
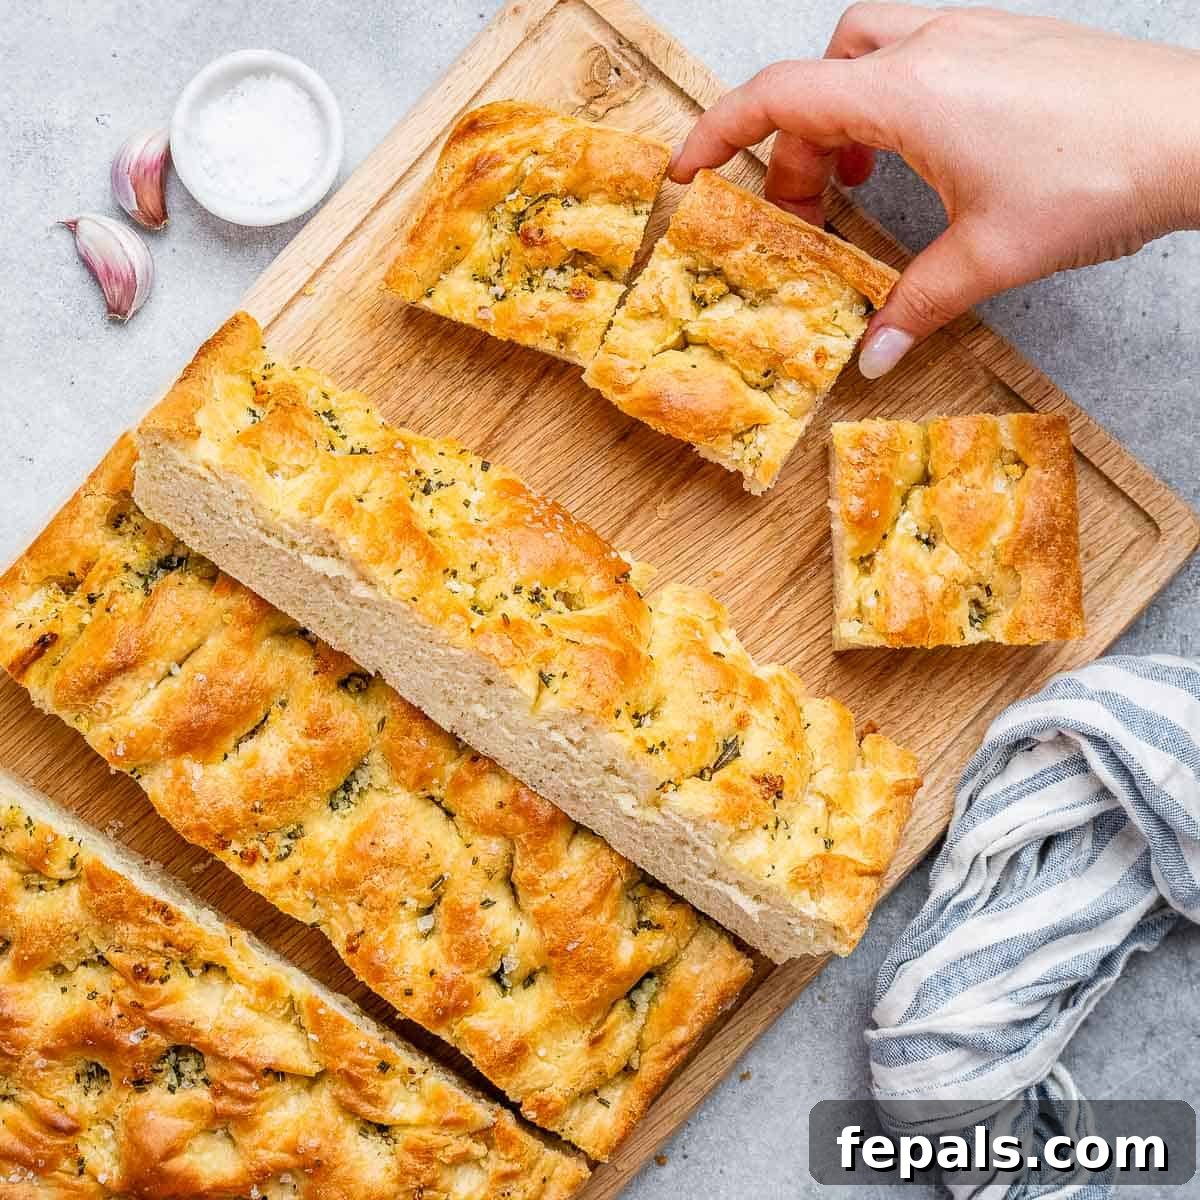
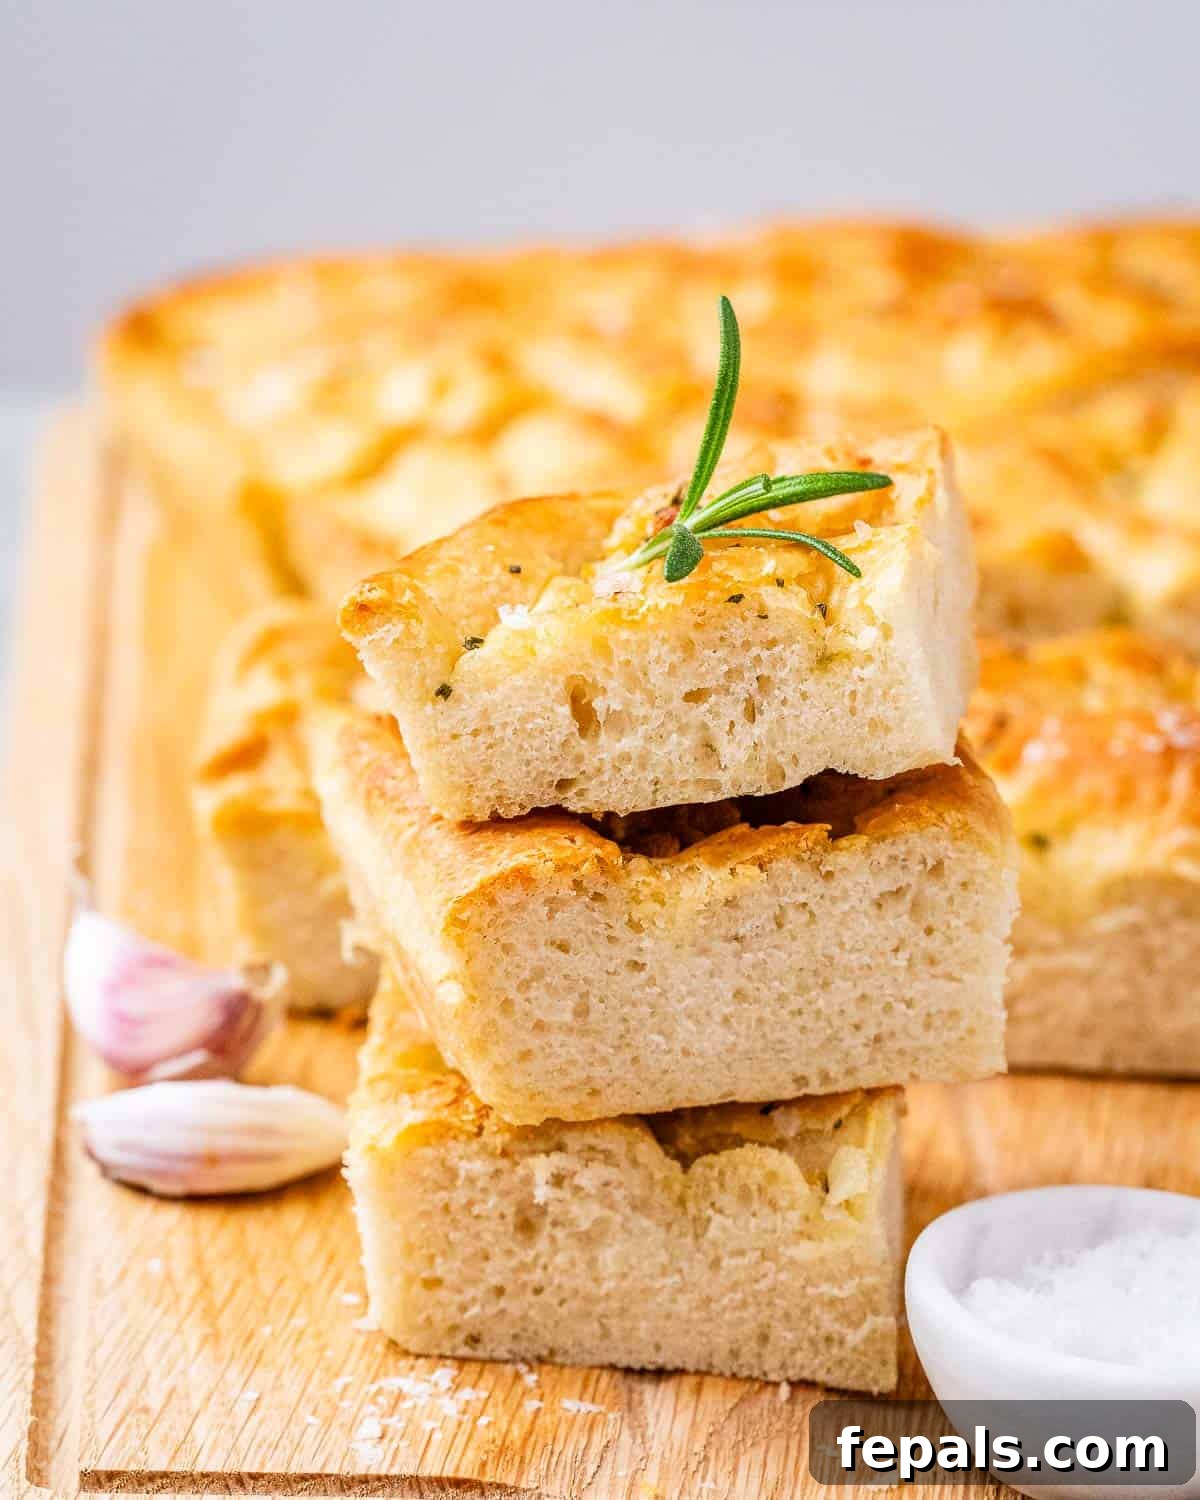
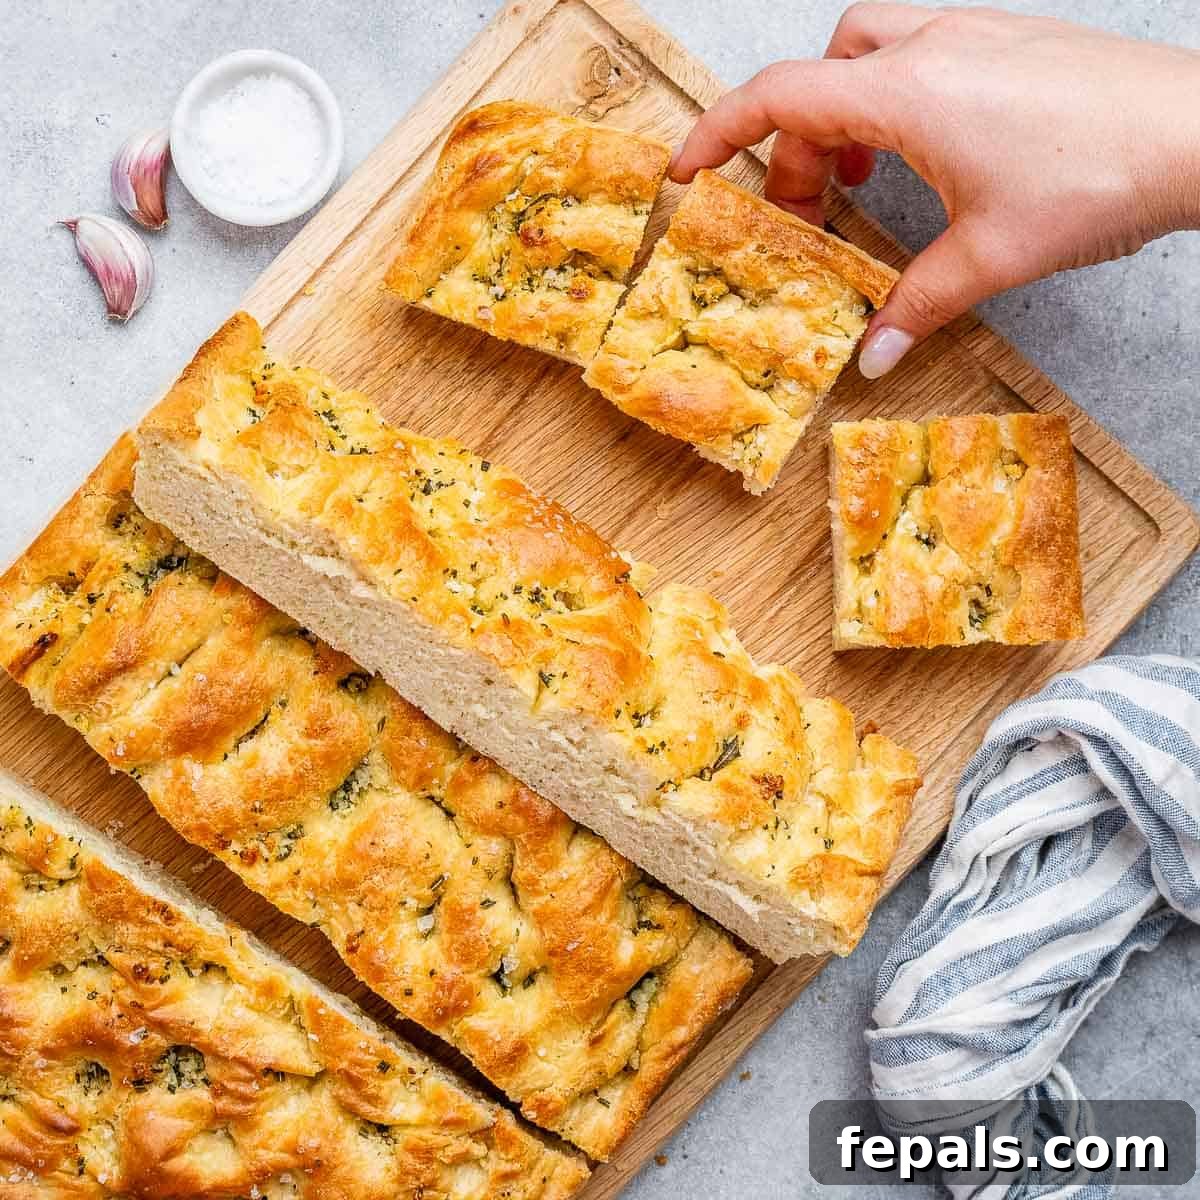
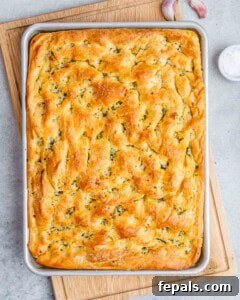
Craving a delightful bread that’s incredibly fluffy, infused with earthy herbal notes, and bursting with savory goodness? This easy Italian Focaccia Bread recipe is truly everything you could ever desire in a homemade savory bread. Perfect for sharing, it brings the authentic flavors of Italy right into your kitchen with minimal effort.
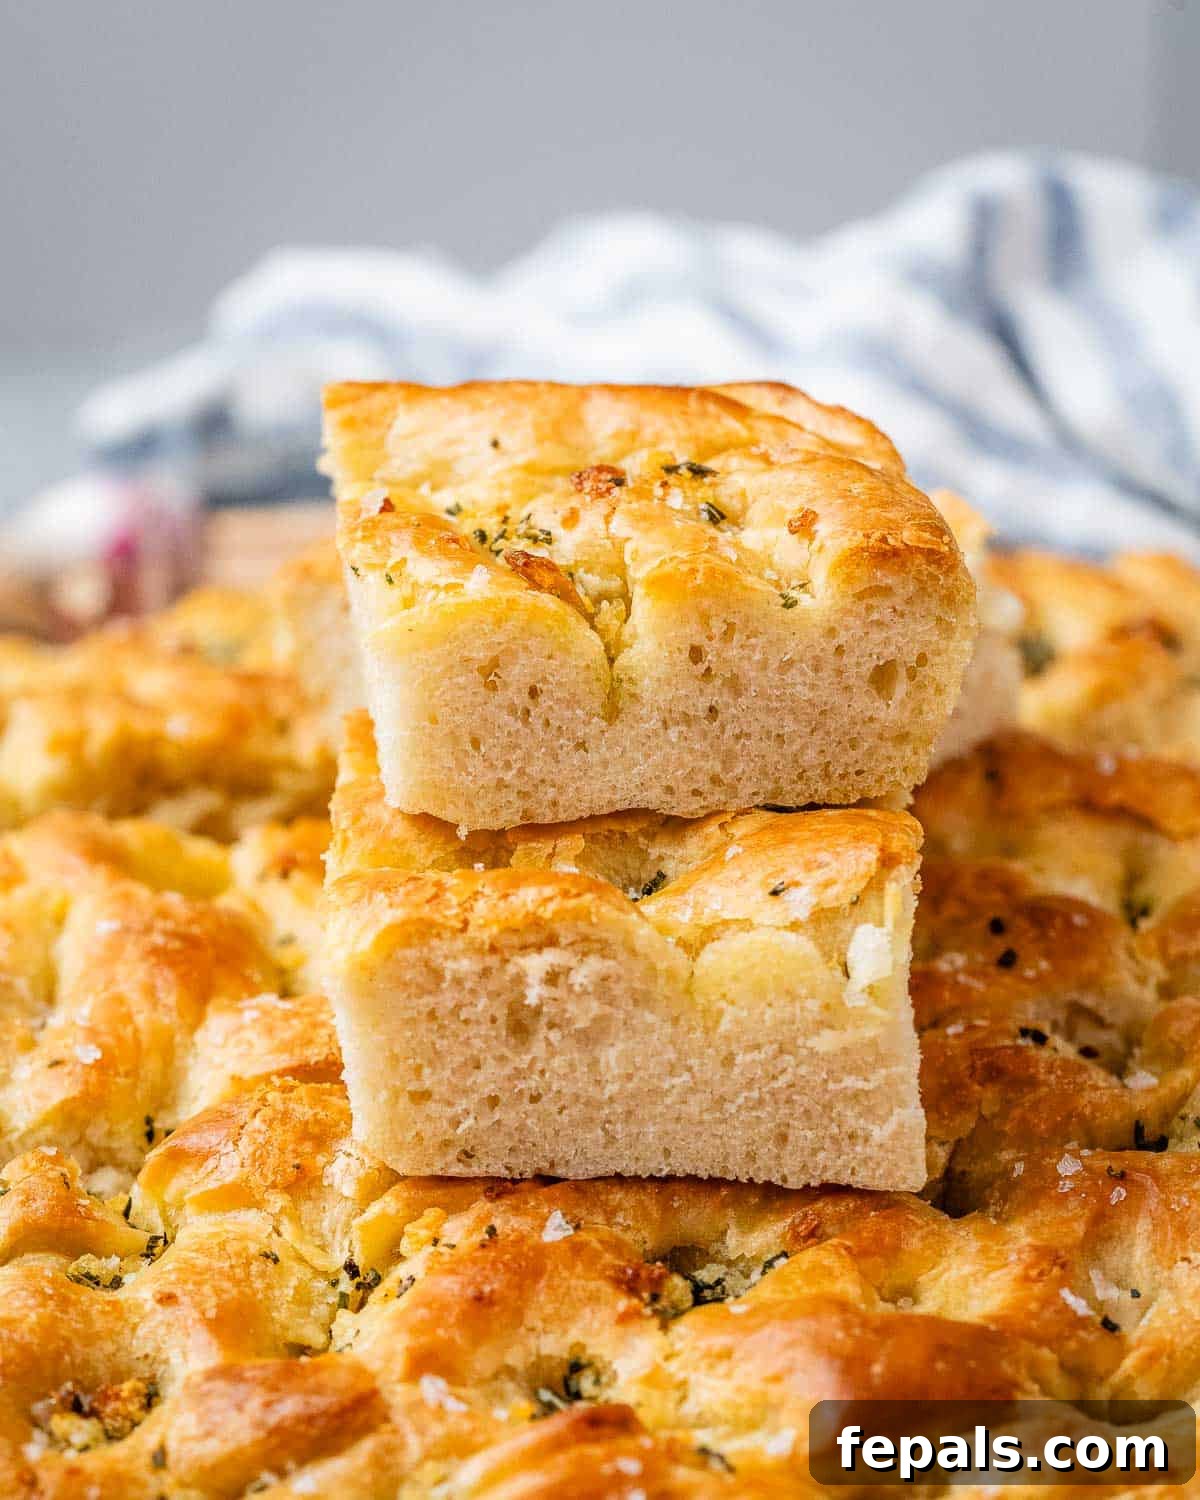
Imagine the cozy aroma filling your home, especially during colder months: freshly baked, warm focaccia bread, lovingly studded with vibrant fresh rosemary and aromatic garlic. The best part? This particular homemade focaccia dough is remarkably simple to prepare, making it an accessible baking project even for beginners. Its incredible versatility means you can enjoy it in countless ways – as a foundation for elegant meal prep sandwiches, a comforting accompaniment to hearty soups, or simply on its own with a drizzle of premium olive oil or a pat of melted butter. It’s so irresistibly delicious that even the pickiest eaters, including children, will fall in love with its soft texture and rich flavor.
Elevate your meal by pairing this exquisite bread with our creamy tomato soup recipe, or use it as a robust base for a fresh, garlic tomato bruschetta. Its robust flavor profile makes it a perfect canvas for many culinary creations.
The Essence of Focaccia: What Makes This Recipe Special
Focaccia, an ancient Italian flatbread, holds a special place in the hearts of bread lovers worldwide. Its history dates back to the Roman Empire, where it was traditionally baked on the hearth (hence its name, derived from “panis focacius,” meaning “hearth bread”). What truly distinguishes an exceptional focaccia, and particularly this recipe, is the thoughtful combination of a few key elements. Firstly, the generous use of high-quality extra virgin olive oil is paramount. It imbues the bread with an incomparable silky texture, a robust, earthy flavor, and keeps it wonderfully moist. Secondly, the characteristic dimples pressed into the dough aren’t just for aesthetics; they serve a vital purpose, allowing the olive oil and savory toppings to pool and truly saturate the bread during baking, enhancing every bite. Lastly, patience is a virtue in focaccia making. A long, slow rise, especially a cold fermentation in the refrigerator, is the secret to developing deep, complex flavors and that coveted airy, soft texture that defines a truly great focaccia.
This recipe focuses on these authentic techniques to ensure your homemade focaccia is not just good, but truly extraordinary. You’ll achieve a rustic bread that boasts a crispy exterior and a tender, open crumb, making it an instant favorite.
Key Ingredients for Authentic Italian Focaccia
Crafting the perfect focaccia starts with selecting the right ingredients. Each component plays a vital role in achieving that desirable texture and rich, savory flavor. Below is a comprehensive list of what you’ll need, along with insights into why each ingredient is crucial. While we encourage sticking to fresh herbs for the best results, feel free to explore minor alterations to suit your taste.
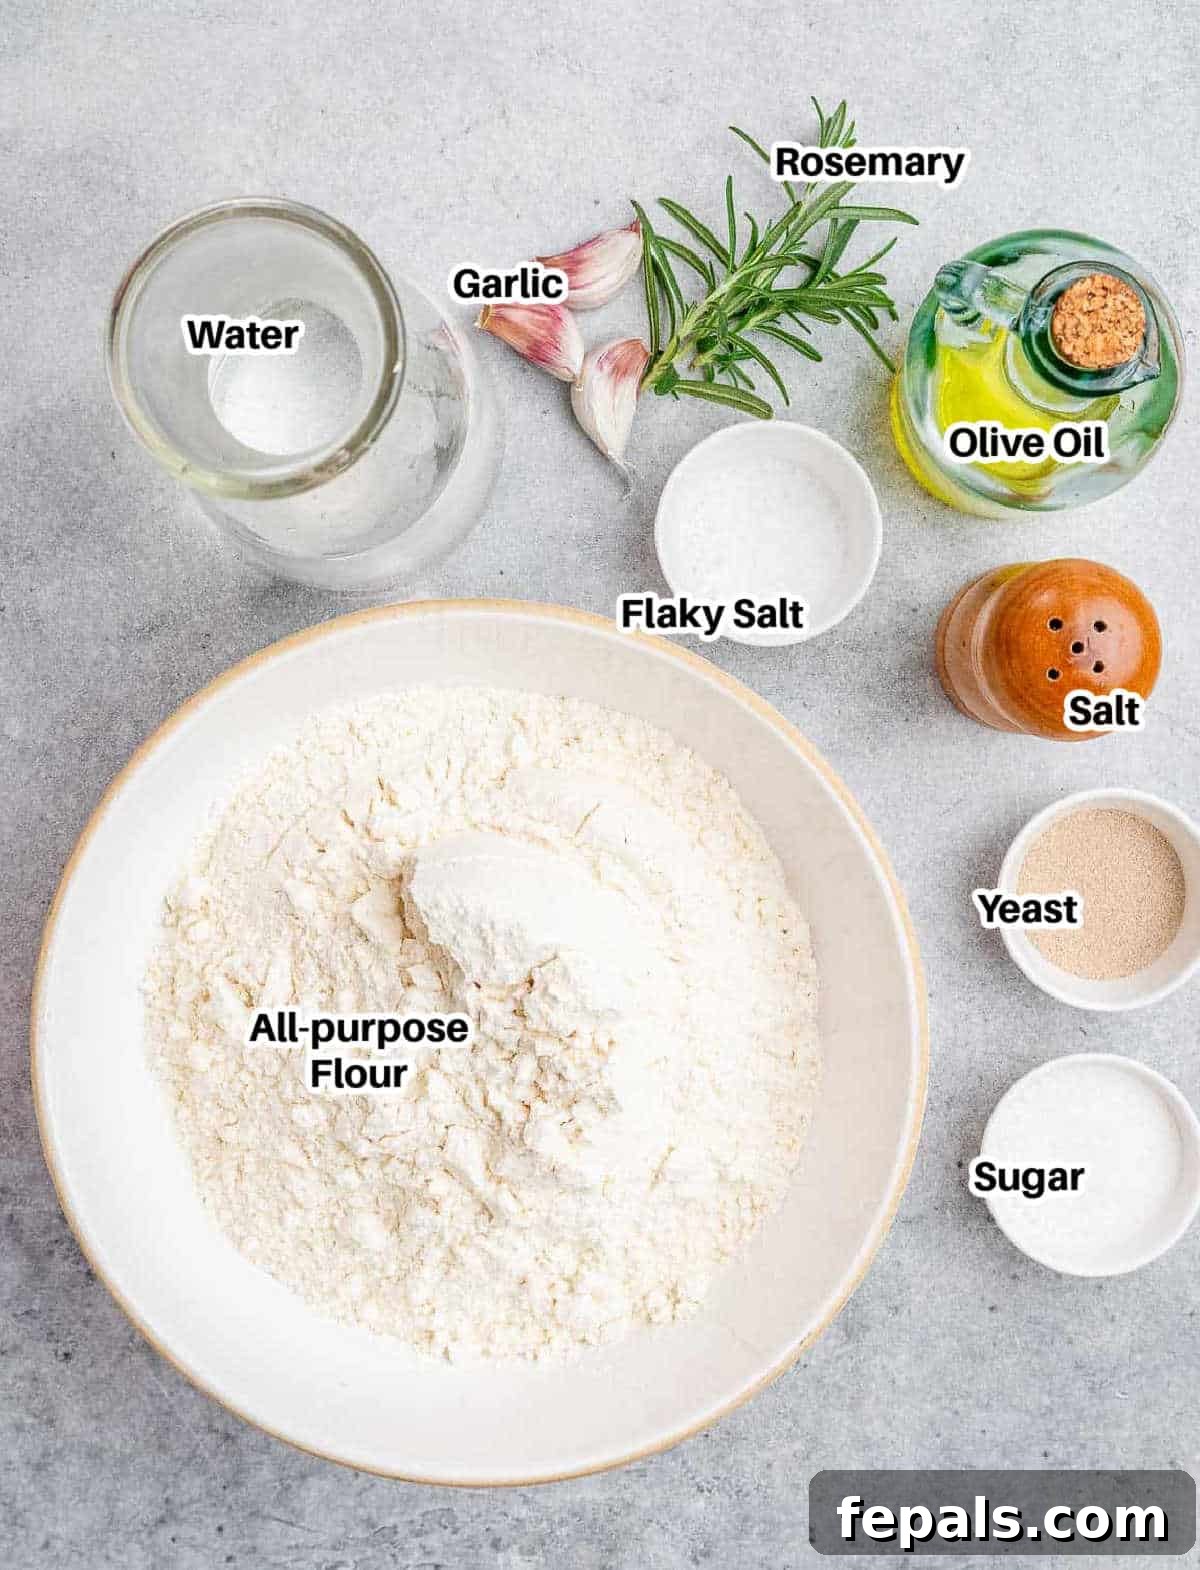
- Instant Yeast: For this light and fluffy bread, you’ll need one packet (approximately 2 ¼ teaspoons) of quick-rise instant yeast. This type of yeast is fantastic because it doesn’t require proofing beforehand and makes the dough rise more rapidly than traditional active dry yeast, saving you time while still yielding excellent results. You can easily find it in the baking aisle of most grocery stores.
- Kosher Salt: Salt is more than just a seasoning; it’s fundamental for balancing the flavors and controlling yeast activity in this Italian bread. For the dough itself, fine Kosher salt works best for even distribution. For that rustic, professional finish and an added burst of flavor on top, flaky sea salt is highly recommended as a garnish.
- Sugar: A small amount of granulated sugar (or light, fine cane sugar) is essential for activating the instant yeast. It acts as “food” for the yeast, helping it to wake up and produce carbon dioxide, which gives the bread its airy texture. Don’t worry, the bread won’t taste sweet!
- Lukewarm Water: The temperature of your water is critical for yeast activation. It should be comfortably warm to the touch, ideally between 105-115°F (40-46°C). Water that is too hot will kill the yeast, while water that is too cold will prevent it from activating properly, leading to a dough that doesn’t rise.
- All-Purpose Flour: This recipe has been thoroughly tested using standard all-purpose flour, which provides an excellent balance of gluten structure and tenderness. While we recommend sticking to it for consistent results, adventurous bakers might experiment with bread flour for a chewier crumb or a blend with a small amount of whole wheat flour for added depth. Please share your experiments in the comments!
- Extra Virgin Olive Oil: This is arguably the most crucial ingredient for authentic Italian focaccia. A high-quality extra virgin olive oil provides the signature rich, fruity flavor and contributes significantly to the bread’s moist, tender crumb and crispy crust. Do not skimp on this ingredient – it truly makes a difference.
- Fresh Rosemary: For the most aromatic and authentic flavor, freshly chopped rosemary is indispensable for topping this bread. Its pungent, piney notes are a classic pairing with olive oil and garlic in focaccia. While dried rosemary can be used in a pinch, fresh is definitely worth the effort for its vibrant taste and aroma.
- Fresh Garlic: Just a few cloves of freshly minced garlic infuse the focaccia with a powerful, savory punch. Like rosemary, fresh garlic provides a much more robust and appealing flavor than dried garlic powder. It becomes beautifully mellow and fragrant when baked.
- Optional Additions: Consider adding other toppings such as halved cherry tomatoes, sliced black olives, thinly sliced red onion, or even a sprinkle of Parmesan cheese for delightful variations.
Step-by-Step Guide: How to Make the Best Italian Focaccia Bread
Making delicious homemade focaccia is a rewarding experience, and this recipe breaks down the process into clear, manageable steps. Follow these instructions carefully to achieve a wonderfully soft, flavorful, and perfectly risen Italian focaccia.
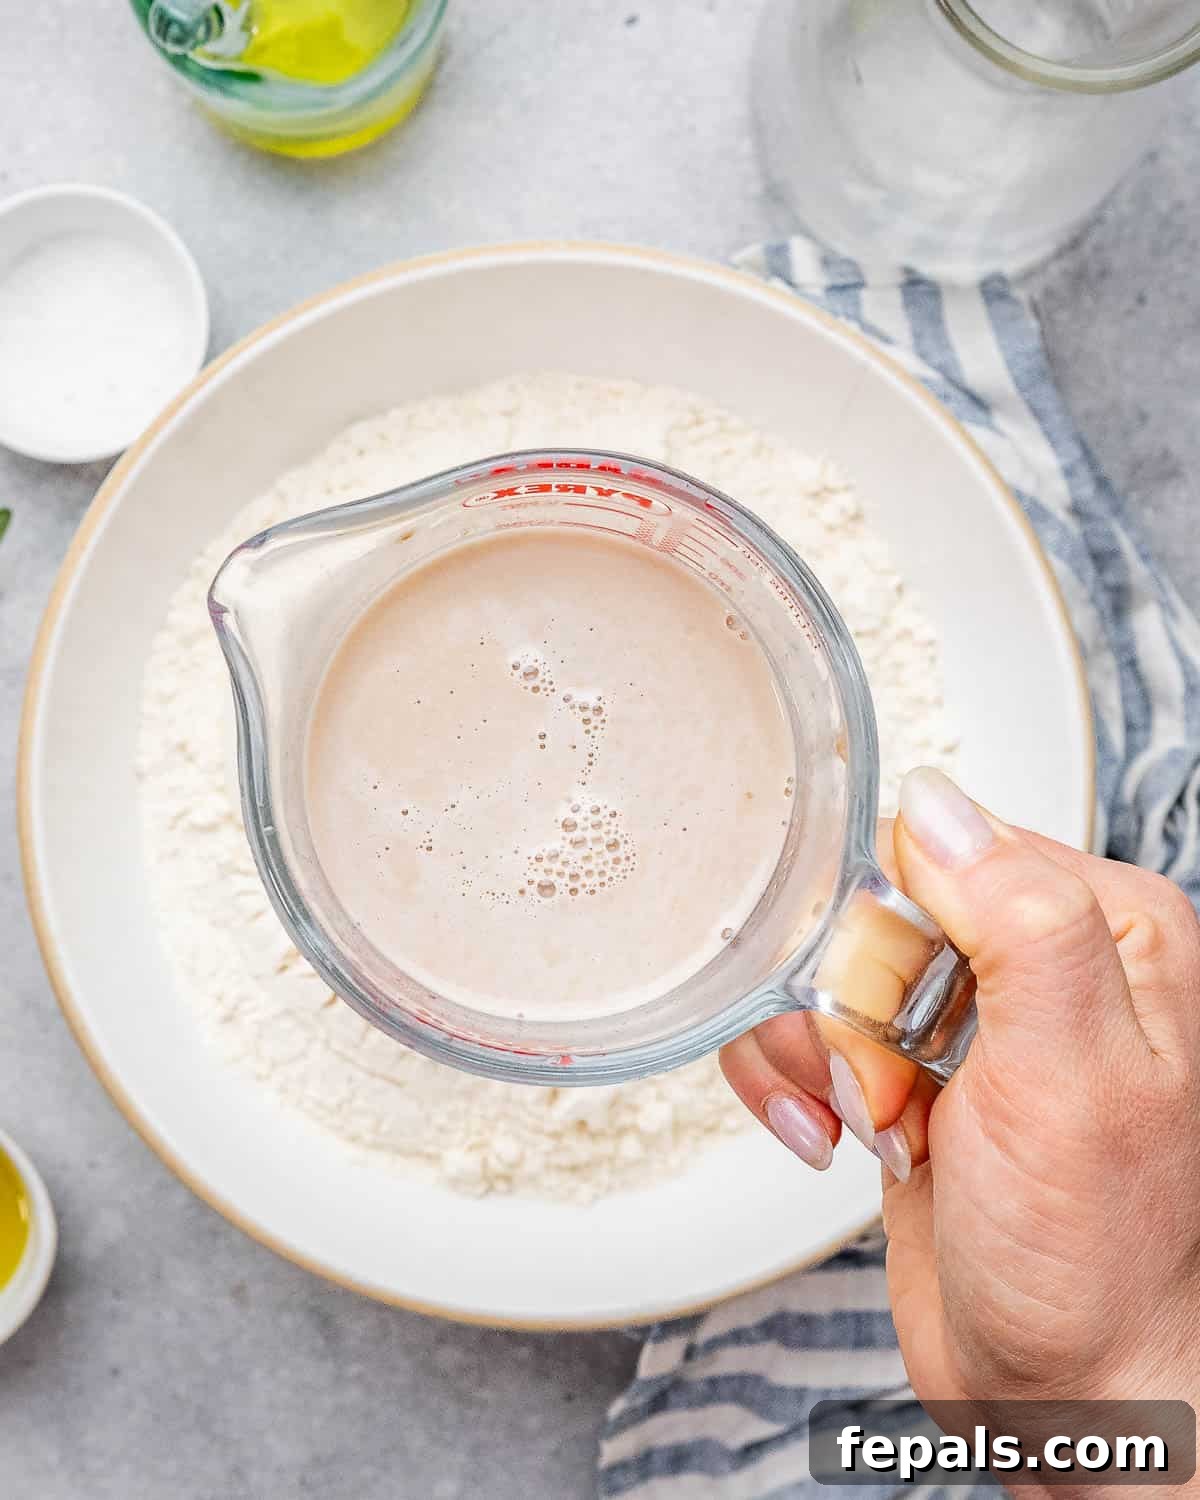
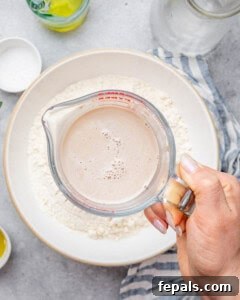
- Activate the Yeast: In a small bowl or jug, combine the instant yeast, fine kosher salt, sugar, and ½ cup of the lukewarm water. Stir everything together gently until dissolved. Let this mixture sit undisturbed for 5-10 minutes. During this time, the yeast should activate, causing a noticeable frothy layer to form on the surface. This froth is a good sign that your yeast is alive and ready to work! If you don’t see any froth, your yeast may be old or the water temperature was incorrect; it’s best to discard it and start over with fresh yeast and properly tempered water.
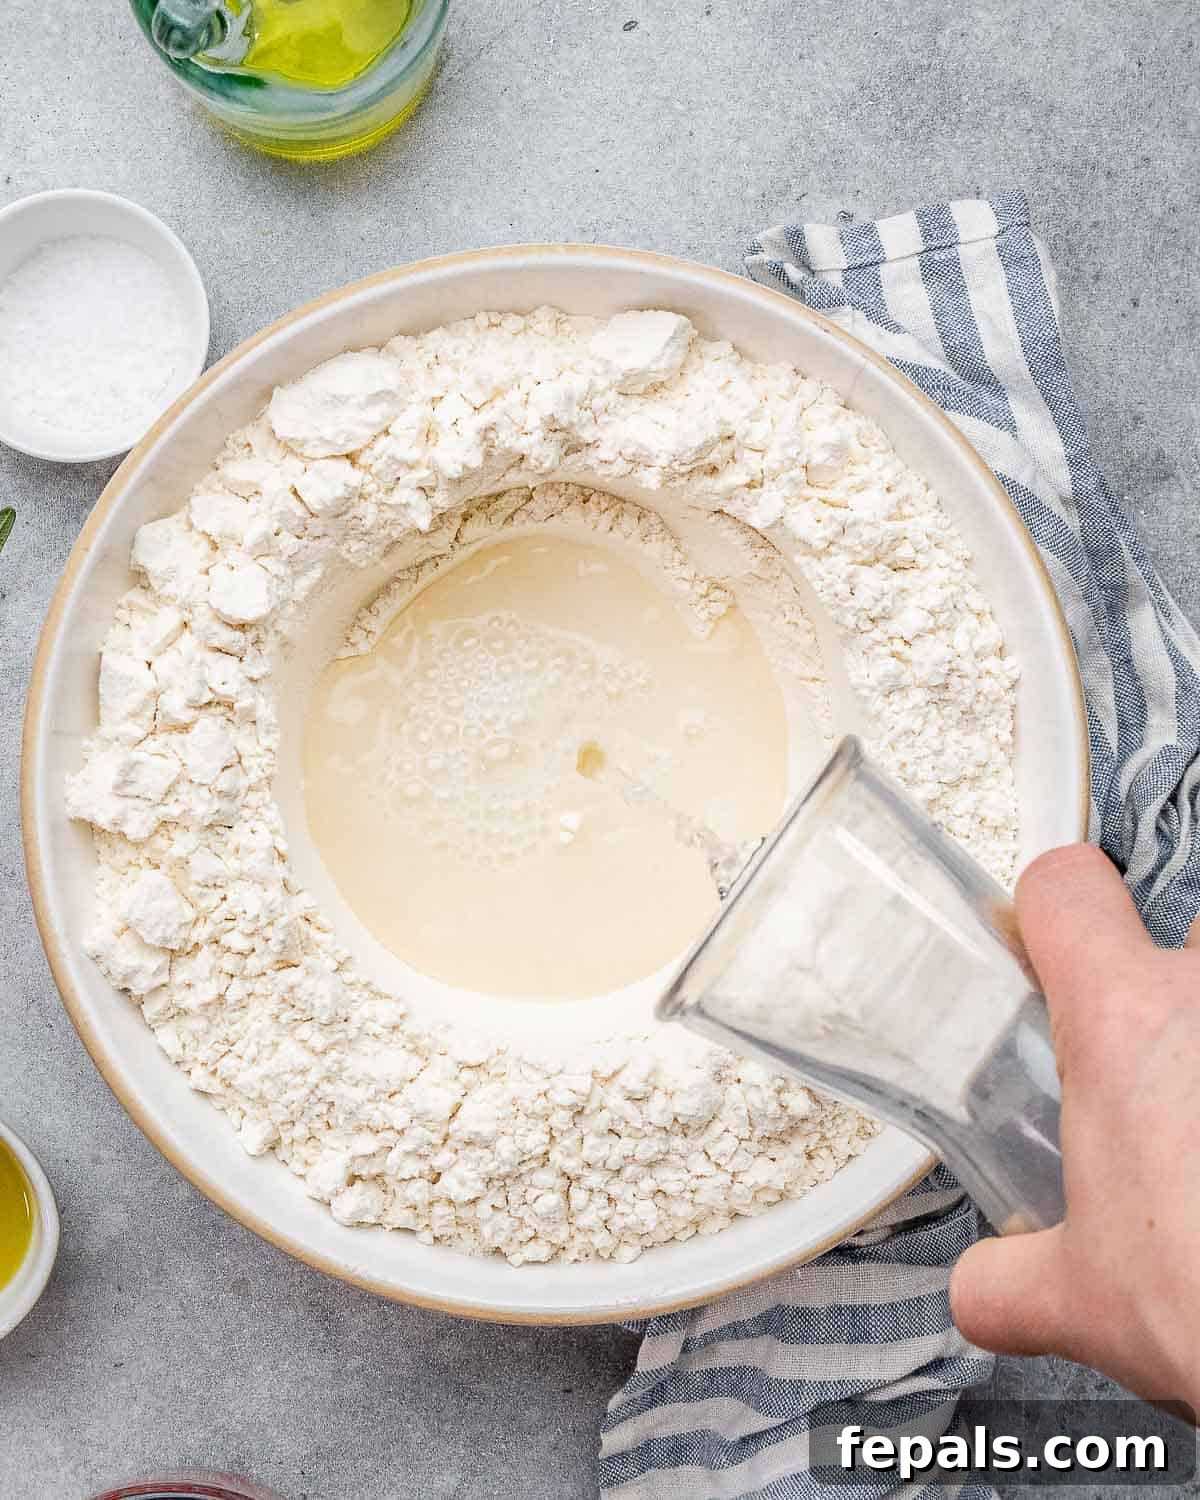
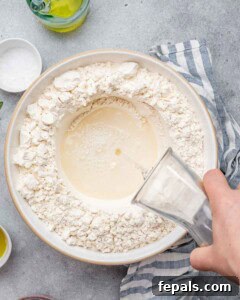
- Combine Dry and Wet Ingredients: In a large mixing bowl, add the all-purpose flour. Using your hand or the back of a spoon, create a small well or hole in the center of the flour. Pour the remaining lukewarm water into this well, followed by the frothy yeast mixture you just prepared.
- Form the Dough: Using a sturdy spatula or a wooden spoon, begin to mix the ingredients from the center outwards. Continue mixing until all the flour is incorporated and the mixture comes together into a shaggy, sticky dough. Avoid vigorous kneading at this stage; gentle mixing is sufficient.
- Oil and Shape: Drizzle 2 tablespoons of the extra virgin olive oil over the surface of the dough. Lightly oil your hands, then gently bring the dough together into a relatively smooth, elastic ball within the bowl. Make sure to grease the inner walls of the bowl with some olive oil as well to prevent the dough from sticking during its long rest.
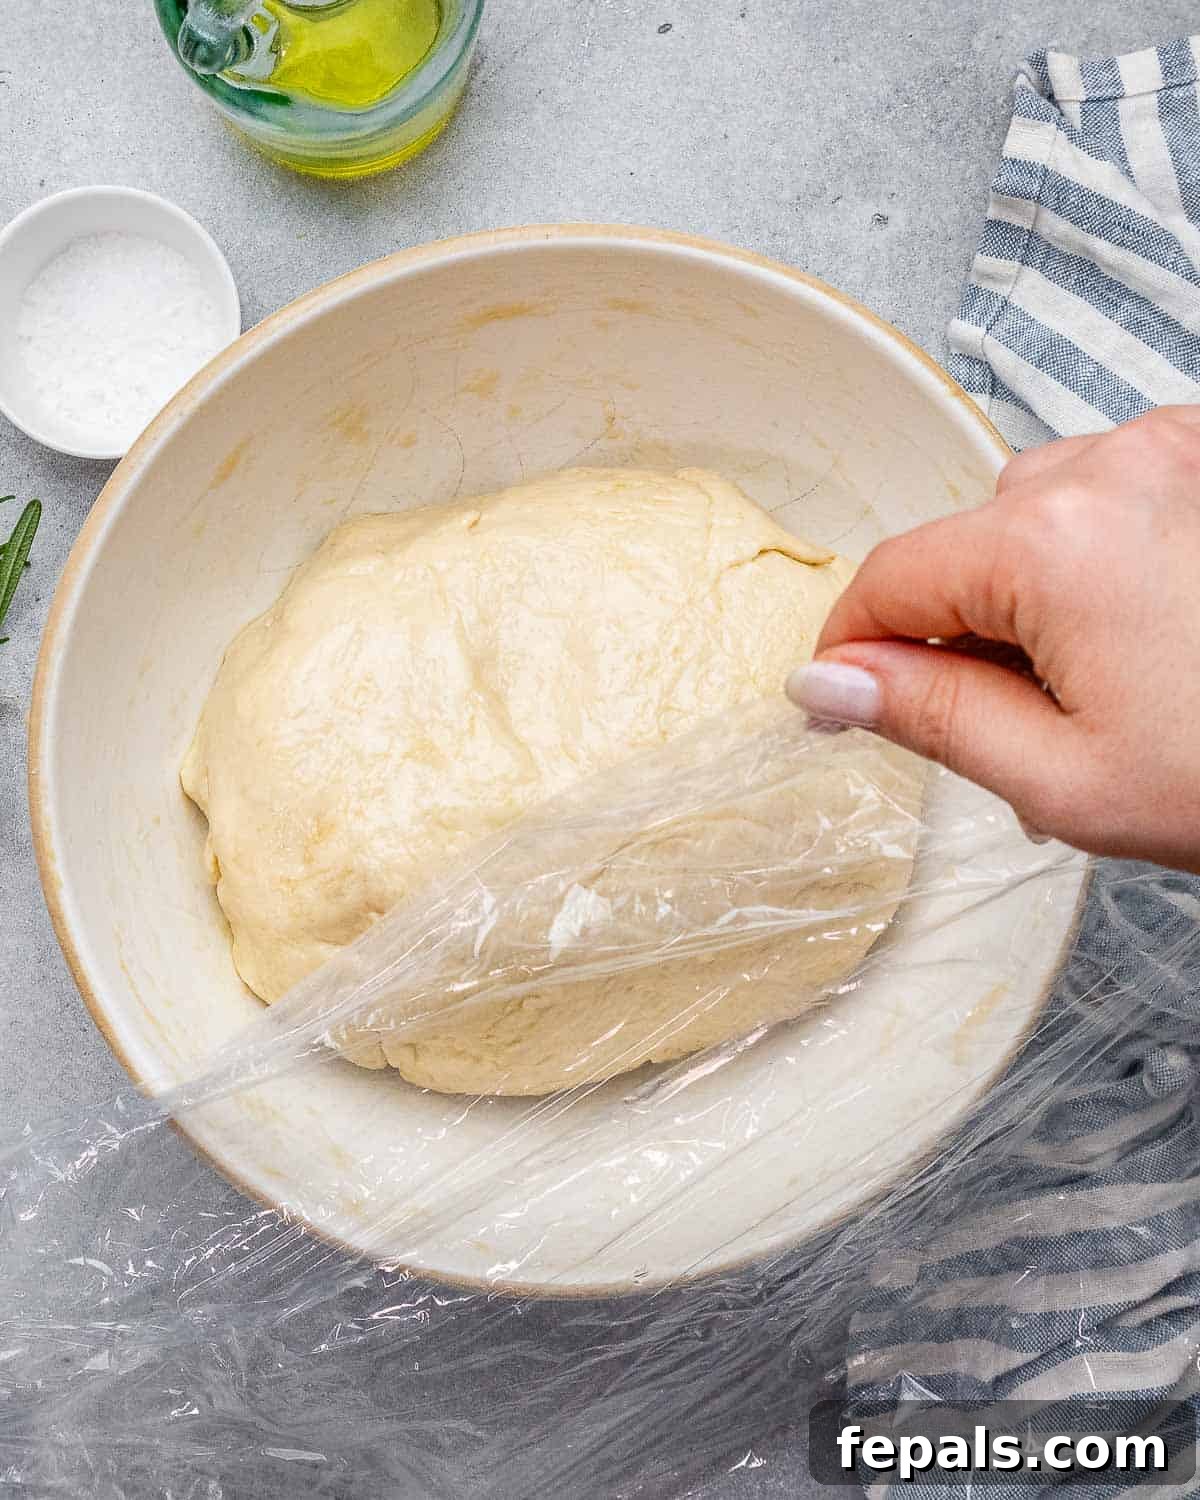
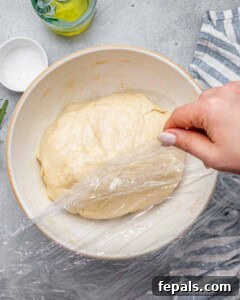
- Cold Fermentation: Cover the bowl tightly with plastic wrap, ensuring it’s airtight. Transfer the covered bowl to the refrigerator and allow the dough to ferment for a minimum of 24 hours. For even deeper flavor and a more developed texture, you can extend this cold fermentation period for up to 3 days. This slow rise is crucial for enhancing the focaccia’s flavor and digestibility.
- Prepare for Baking: Once the cold fermentation is complete and you’re ready to bake, remove the dough from the fridge. It should appear significantly puffed and about double its original size. Generously grease a rectangular baking dish (approximately 9×13 inches) with the remaining 2 tablespoons of extra virgin olive oil, ensuring the bottom and sides are well coated. This prevents sticking and helps create a crispy bottom crust.
- Gentle Folding: With your hands lightly coated in olive oil (this helps prevent sticking and handles the dough gently), carefully take the dough from one side of the bowl and fold it over towards the middle. Rotate the bowl a quarter turn and repeat this gentle folding motion. Continue this process about 6-8 more times. This technique strengthens the gluten structure without deflating the air that has built up during fermentation.
- Second Rise (Proofing): Carefully transfer the gently folded dough into the prepared warm baking pan. Cover the pan again loosely with plastic wrap. Allow the dough to proof in a warm spot in your kitchen for another 1-2 hours. During this final rise, the dough should puff up further and gradually spread to fill the entire baking dish, becoming wonderfully light and airy.
- Preheat Oven: Approximately 20 minutes before the end of the second rise, preheat your oven to 425°F (220°C). This ensures the oven is at the correct temperature for immediate baking once the dough is ready.
- Prepare Toppings: In a small bowl, combine the flaky sea salt, freshly chopped rosemary, and minced garlic for your irresistible topping. Once the dough has completed its second rise, gently remove the plastic wrap from the pan. Drizzle the topping mixture evenly over the surface of the puffed-up dough.
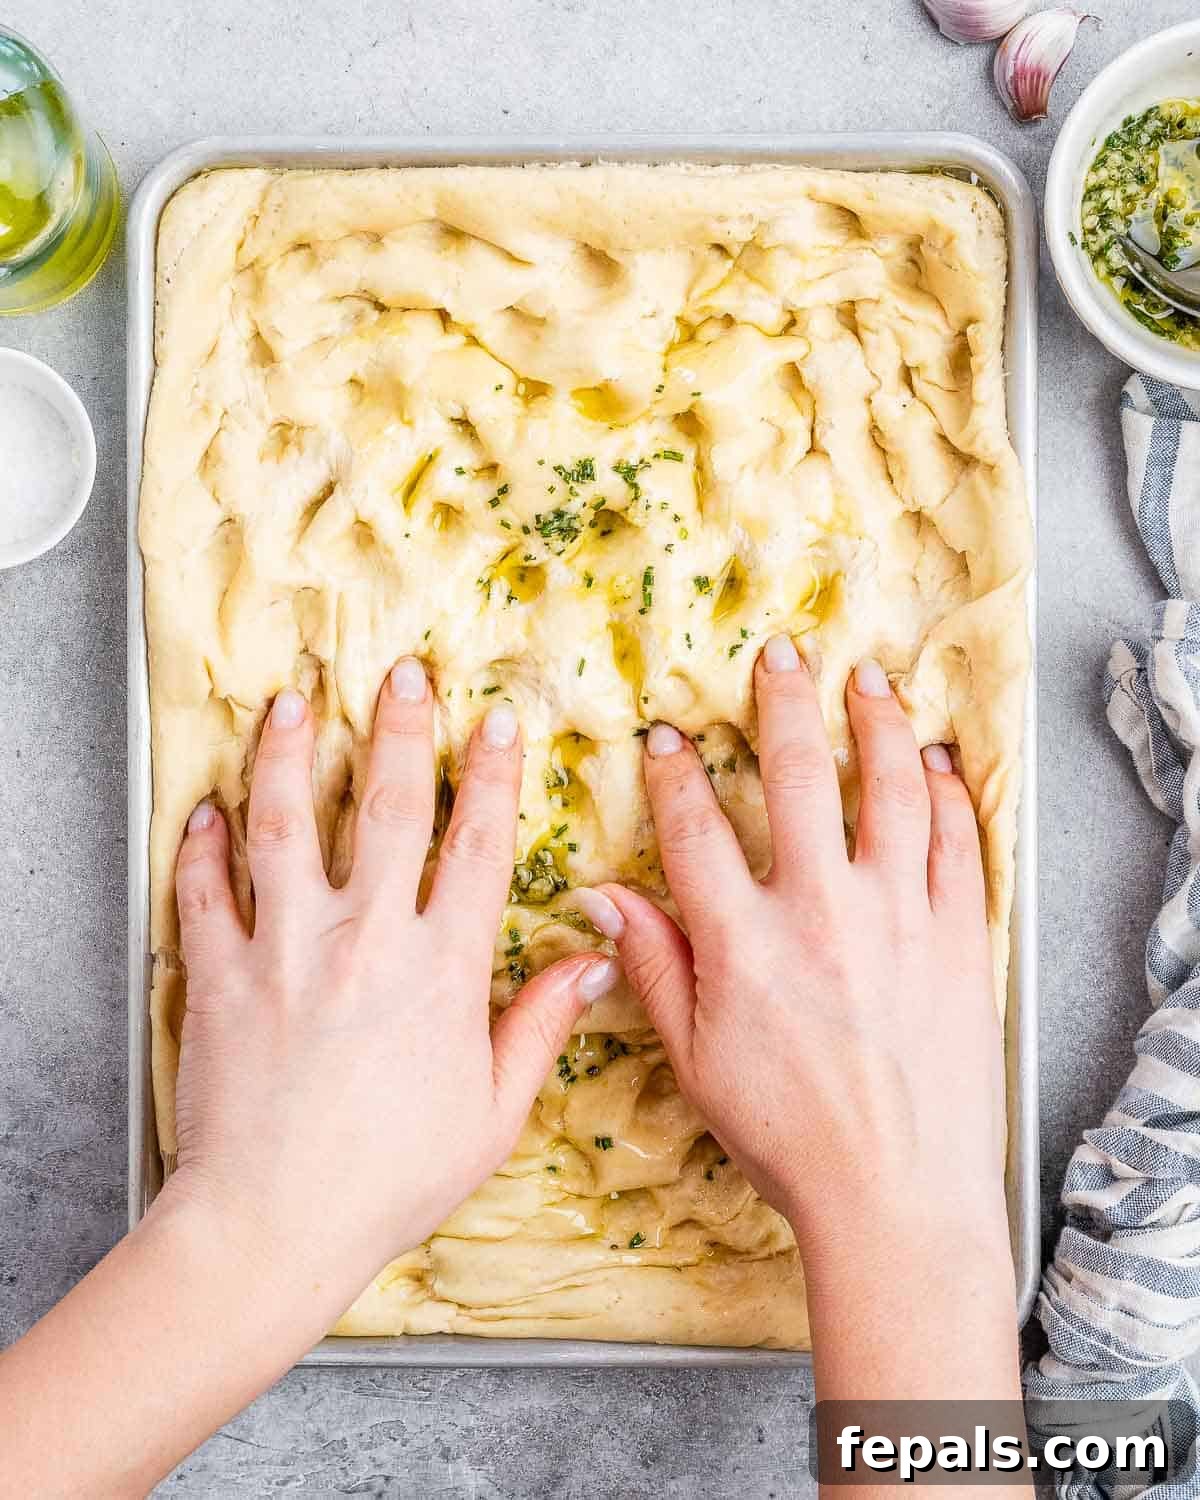
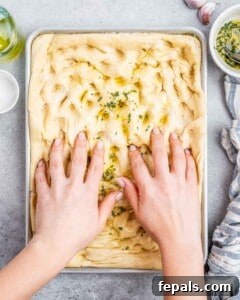
- Create Dimples: Using your fingertips from both hands, gently but firmly press down into the dough to create the signature focaccia dimples. Don’t be afraid to press fairly deeply, but avoid tearing the dough. These dimples are essential for preventing large air pockets from forming during baking and, more importantly, for trapping the olive oil and savory toppings, infusing every part of the bread with flavor.
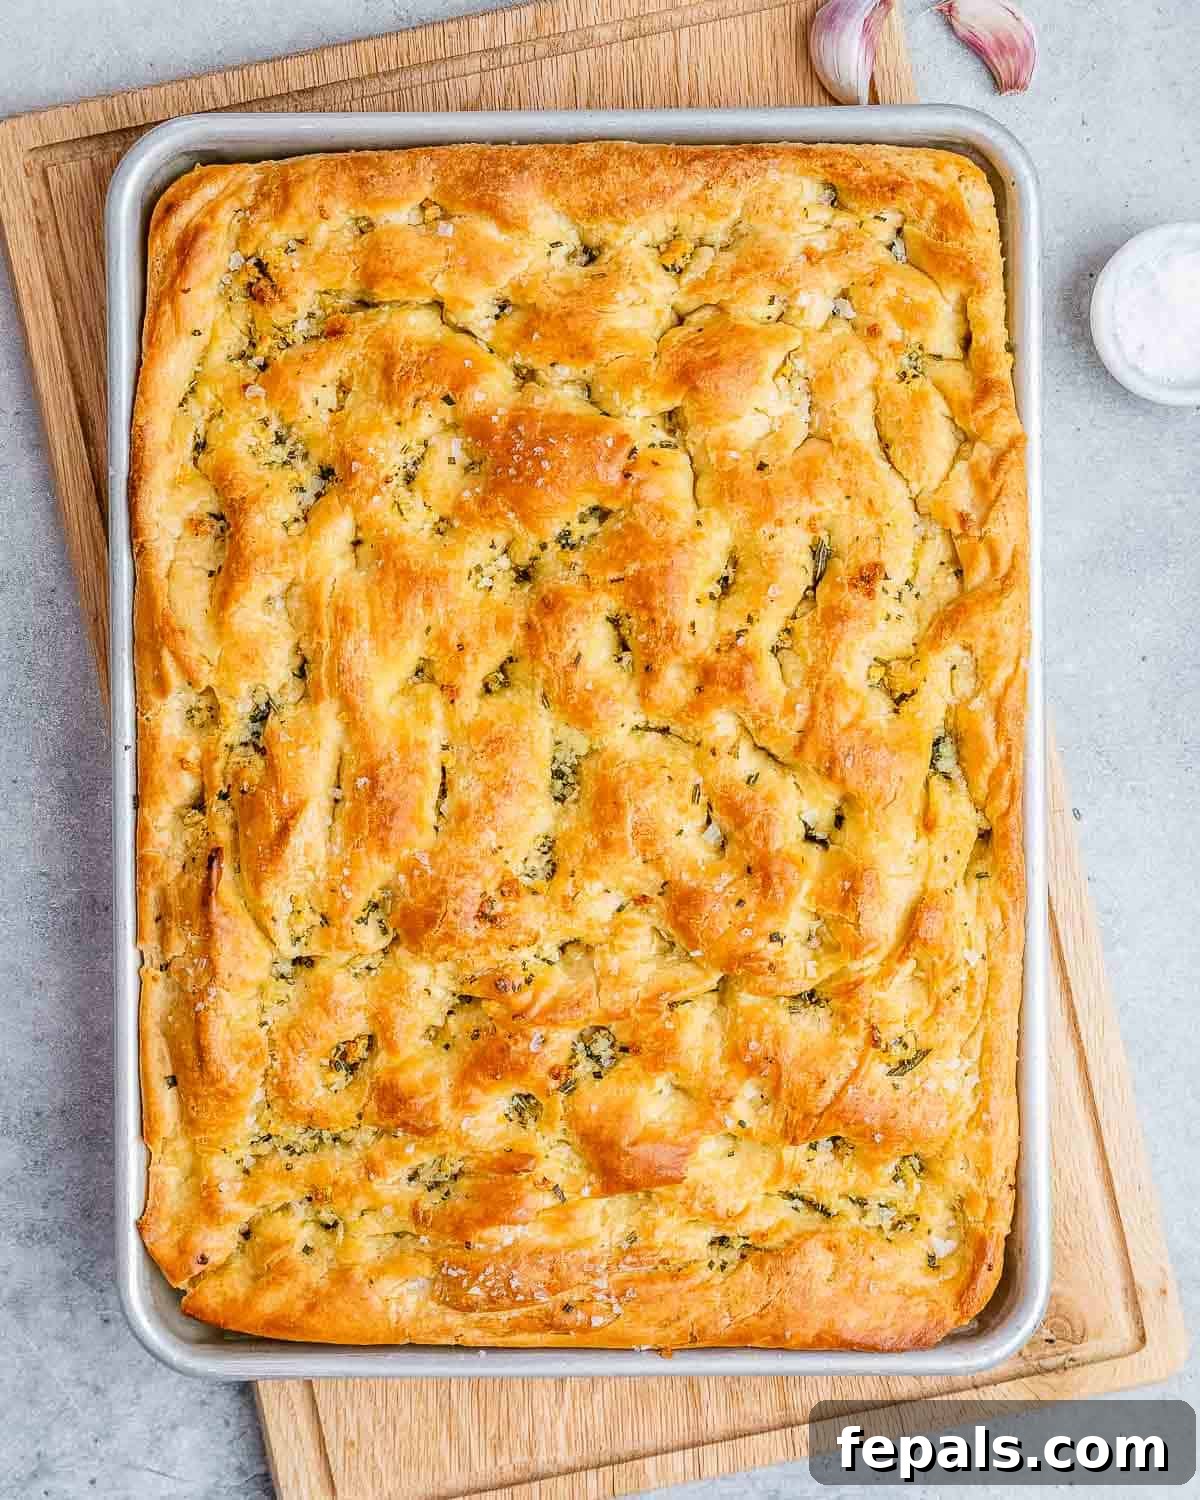
- Bake to Golden Perfection: Place the baking dish into the preheated oven. Bake for 25-35 minutes, or until the focaccia develops a beautiful golden-brown crust and smells incredibly fragrant. The exact baking time may vary based on your oven, so keep an eye on it.
- Cool Before Slicing: Once baked, carefully remove the focaccia from the oven. Allow it to cool in the pan for at least 15-20 minutes before transferring it to a cutting board and slicing. This crucial resting period allows the internal structure of the bread to set, ensuring a perfect texture when cut.
Pro Tips for Perfect Focaccia Every Time
Achieving a truly exceptional focaccia involves a few nuanced techniques and considerations. Keep these expert tips in mind to ensure your homemade bread turns out perfectly soft, flavorful, and with that signature crispy crust every single time:
- Patience with Cooling: Always allow the baked bread to rest in the pan for at least 15-20 minutes before attempting to slice it. This resting period is vital for the internal structure of the bread to set, preventing it from becoming gummy or collapsing when cut.
- Amplify Savory Flavors: For an even deeper and more integrated savory profile, consider mixing some freshly minced garlic and finely chopped rosemary directly into the dough during the initial mixing step (Step 3). This infuses the entire bread, not just the top, with their wonderful aromas.
- Avoid Overmixing: When combining the ingredients for the dough, mix until just combined and shaggy. Overmixing can overdevelop the gluten, resulting in a tough and dense focaccia rather than the desired airy and tender crumb. Gentle handling is key.
- Precise Water Temperature: The temperature of your water is paramount for yeast activation. It should be lukewarm, ideally between 105-115°F (40-46°C). Use a thermometer if unsure. Water that is too hot will kill the yeast, while water that is too cold will inhibit its activity.
- Serve Warm for Best Experience: Focaccia is undeniably best enjoyed warm. Serve it fresh out of the oven, perhaps with an extra drizzle of good olive oil for dipping, or with a generous pat of softened butter.
- Experiment with Herbs: While rosemary and garlic are classic, don’t hesitate to experiment with other fresh herbs. Fresh thyme, oregano, or a combination can offer delightful variations in flavor.
- Invest in Quality Olive Oil: The quality of your extra virgin olive oil significantly impacts the final taste and texture of your focaccia. Choose a good quality, flavorful olive oil – it’s worth the investment for this recipe.
- Listen to Your Dough: Dough behavior can vary based on ambient temperature and humidity. Always use the suggested rising times as a guide, but trust your observations. The dough should double in size and feel light and airy after its final proof.
Serving Suggestions: What to Enjoy with Your Homemade Focaccia
One of the many charms of Italian focaccia is its incredible versatility. It can effortlessly transition from a simple snack to a sophisticated side dish, complementing a wide array of meals. Here are some ideas to inspire you:
- Simply Delicious: Enjoy it on its own, fresh out of the oven, with a light dusting of flaky sea salt and an extra drizzle of high-quality extra virgin olive oil. The simplest way is often the best.
- Dipping Delight: Focaccia is a dream for dipping! Serve it alongside a bowl of balsamic vinegar and olive oil, or use it to soak up the rich flavors of various dips and sauces like hummus, pesto, or a savory marinara.
- Soup & Salad Companion: Its hearty yet airy texture makes it an excellent accompaniment to warm, comforting soups (like our creamy tomato soup!) or fresh, crisp salads. It adds substance and flavor to any light meal.
- Gourmet Sandwiches: Slice the focaccia horizontally to create fantastic homemade sandwich bread. Its sturdy structure and flavorful crumb make it perfect for hot or cold sandwiches, especially with Italian deli meats, cheeses, and roasted vegetables.
- Antipasto Platter: Cut into small squares, focaccia is an ideal component for an Italian antipasto platter. Arrange it with cured meats, cheeses, olives, marinated artichoke hearts, and roasted peppers.
- With Main Courses: Serve it as a side bread with any Italian main course, such as pasta dishes, lasagna, or roasted chicken. Its ability to absorb sauces is unmatched.
- Breakfast Treat: While savory, a warm slice of focaccia with a dollop of fresh ricotta and a drizzle of honey makes for a surprisingly delightful breakfast or brunch item.
Troubleshooting Common Focaccia Issues
Even experienced bakers can encounter hiccups. Here are some common problems and how to solve them for future perfect focaccia:
- My Focaccia is Too Dense: This is often caused by overmixing the dough (developing too much gluten) or insufficient rising time. Ensure you mix only until just combined, and allow the dough to complete its full cold fermentation and second proofing. A dead yeast can also be a culprit; always check for froth during activation.
- My Dough Didn’t Rise: The most common reasons are inactive yeast (check for froth!), water that’s too hot (killed the yeast) or too cold (didn’t activate it), or an environment that’s too cold for proofing. Ensure your yeast is fresh and water temperature is correct.
- The Focaccia is Dry: This could be due to not enough olive oil in the dough or on top, or overbaking. Be generous with the olive oil as instructed and keep an eye on your oven; bake until golden, not dark brown.
- Uneven Texture: Inconsistent dimpling or uneven spreading of the dough in the pan can lead to varying textures. Aim for consistent dimples and ensure the dough spreads evenly during the second proof.
Frequently Asked Questions About Focaccia Bread
Here are answers to some of the most common questions about baking and enjoying focaccia:
- What is special about focaccia bread?
- Focaccia is uniquely characterized by its incredibly airy, soft interior and a deliciously crisp, olive oil-infused crust. The generous application of extra virgin olive oil is central to its identity, giving it a rich, moist crumb and a distinctive aromatic flavor. Furthermore, the dimples pressed into the dough play a crucial role, allowing the olive oil and toppings to truly soak into the bread, enhancing its texture and taste throughout.
- What is the secret to great focaccia?
- The true secret to making a great focaccia lies in giving your dough ample time to rise. This prolonged fermentation, especially a cold one, allows the yeast to slowly develop, enriching the bread with complex flavors and strengthening its gluten structure. This patient process is what ultimately yields focaccia’s signature airy, soft texture and deeply satisfying taste.
- What does focaccia mean in Italy?
- In Italy, the word “focaccia” literally means “hearth bread.” This name is derived from the Latin “panis focacius,” which historically referred to bread baked directly on the hearth or over hot coals during the Roman era. This origin highlights its rustic, ancient roots as a fundamental form of bread.
- What do you eat focaccia with?
- Focaccia is incredibly versatile! It’s absolutely delicious served entirely on its own, allowing its unique flavors to shine. It also makes an excellent base for various sandwiches. Beyond that, you can dip this aromatic bread into a wide range of soups, creamy dips, or rich sauces. For many, the ultimate way to enjoy it is simply dipped in high-quality extra virgin olive oil.
- Why do you poke holes in focaccia?
- Poking dimples (or holes) into the focaccia dough serves several important purposes. Firstly, it helps the dough maintain a relatively flat profile during baking, preventing it from puffing up excessively like a regular loaf of bread. More importantly, these depressions create small wells that capture and hold the olive oil and any added toppings (like rosemary and garlic), ensuring they infuse deep into the bread and contribute to its characteristic earthy and moist flavors.
- Can I make focaccia ahead of time?
- Absolutely! In fact, this recipe encourages making it ahead of time. The long cold fermentation in the refrigerator (for 24 hours up to 3 days) is a key step that significantly develops the flavor and improves the texture of the focaccia. You can prepare the dough, refrigerate it, and then finish the baking process on the day you plan to serve it.
- What kind of olive oil is best for focaccia?
- For the best results and authentic flavor, always use a good quality extra virgin olive oil. Its rich, fruity notes are integral to the taste of focaccia. While any olive oil will work, a higher quality extra virgin variety will elevate your focaccia from good to outstanding, both in flavor and aroma.
Storage and Reheating Tips
While focaccia is undoubtedly best enjoyed fresh, you can certainly store and reheat any leftovers to savor its deliciousness later. Here are some recommendations:
- Countertop Storage: To keep your focaccia fresh for up to three to four days, wrap it tightly in plastic wrap or a clean kitchen tea towel. Store it at room temperature on your kitchen counter.
- Freezing for Longer Storage: If you find yourself with more focaccia than you can eat within a few days, it freezes beautifully. Slice the focaccia into individual servings or smaller pieces, wrap each piece tightly in plastic wrap, and then place them in a freezer-safe bag or airtight container. It can be stored in the freezer for up to one month.
- Reheating Instructions: When you’re ready to enjoy frozen focaccia, allow it to thaw at room temperature first. Once thawed, you can reheat it in a preheated oven at 350°F (175°C) for about 5-10 minutes, or until it’s warmed through and the crust is crisp again. For best results, avoid microwaving, as it can make the focaccia chewy.
Explore More Delicious Bread Recipes
If you loved making this Italian Focaccia, you’re sure to enjoy exploring other bread recipes that are equally comforting and satisfying. Expand your baking repertoire with these delightful options:
- Cottage Cheese Bread
- Pull-Apart Bread
- Apple Cinnamon Bread
- Garlic Naan Bread
- How To Make Breadcrumbs
- Healthy Pumpkin Bread
- Cranberry Orange Bread
Get My Free eBook!
Grab my free ebook featuring 20 of my top 30-minute family-friendly healthy dinner recipes. Simply provide your email below to get instant access and start cooking delicious, healthy meals today!
(In a live web environment, an email signup form would typically be embedded here for direct download.)
Download eBook Now
Ultimate Italian Rosemary Garlic Focaccia Recipe
Italian Focaccia Recipe
Servings: 12
Prep Time: 1 day 2 hours (includes cold fermentation and proofing)
Cook Time: 35 minutes
Total Time: 1 day 2 hours 35 minutes
Made from scratch with an easy dough, this rustic bread is infused with fresh herbal flavors and crafted from ingredients you likely already have in your pantry. A truly delightful bread for any meal or occasion.
Ingredients
For the Dough
- 2 ¼ teaspoon instant yeast (1 standard packet)
- 1 ½ teaspoon fine kosher salt
- 1 tablespoon granulated sugar
- 1 ½ cups lukewarm water (approximately 105-115°F / 40-46°C)
- 4 cups all-purpose flour
- ¼ cup extra virgin olive oil, divided
For the Topping
- 1 tablespoon flaky sea salt
- 1-2 tablespoons fresh chopped rosemary
- 2-3 garlic cloves, minced
- 2 tablespoons extra virgin olive oil
Instructions
-
In a small bowl or jug, combine the 2 ¼ teaspoon instant yeast, 1 ½ teaspoon fine kosher salt, 1 tablespoon sugar, and ½ cup of the 1 ½ cups lukewarm water. Stir gently until dissolved and let it sit for 5-10 minutes. The mixture should become frothy on top, indicating active yeast. If no froth appears, discard and start again with fresh yeast.

-
In a large mixing bowl, add the 4 cups of all-purpose flour. Create a well in the middle and pour in the remaining lukewarm water and the activated yeast mixture.
-
Using a spatula or wooden spoon, mix until all ingredients are just combined and form a shaggy dough. Avoid overmixing.
-
Drizzle the dough with 2 tablespoons of the ¼ cup extra virgin olive oil. With lightly oiled hands, gently bring the dough together into a smooth, elastic ball. Ensure the walls of the bowl are also lightly greased.
-
Cover the bowl tightly with plastic wrap and refrigerate for a minimum of 24 hours, or up to 3 days. This cold fermentation is crucial for flavor development.
-
Once you’re ready to bake, remove the dough from the fridge. It should have nicely puffed up, about double its initial size.
-
Generously oil a rectangular baking dish (approx. 9×13 inches) with the remaining 2 tablespoons of extra virgin olive oil, coating the bottom and sides well.
-
With lightly oiled hands, gently take the dough from one side of the bowl and fold it through the middle. Turn the bowl a quarter and fold again. Repeat this folding and turning process 6-8 more times. This helps to strengthen the dough.
-
Transfer the dough into the prepared warm pan. Cover it loosely with plastic wrap and allow it to sit in a warm place for 1-2 hours, until it puffs further and spreads to fill the entire dish.
-
Preheat your oven to 425°F (220°C).
-
In a small bowl, combine all the topping ingredients: 1 tablespoon flaky sea salt, 1-2 tablespoons fresh chopped rosemary, 2-3 minced garlic cloves, and 2 tablespoons olive oil. Remove the plastic wrap from the risen dough and drizzle this topping mixture evenly over the surface.
-
Using your fingertips from both hands, gently but firmly press into the dough to create the signature dimples. These dimples trap the olive oil and toppings, infusing flavor and preventing large air pockets.
-
Bake for 25-35 minutes, or until the top is beautifully golden brown and the crust is crisp. Baking time may vary.
-
Allow the focaccia to cool in the pan for at least 15-20 minutes before carefully transferring it to a cutting board and slicing. This resting period helps the internal structure set.
Recipe Notes
- Allow the baked bread to rest in the pan for at least 15-20 minutes before slicing to ensure a perfect texture.
- For an even deeper flavor, consider mixing some freshly minced garlic and chopped rosemary directly into the dough during step 3.
- Be mindful not to overmix the dough; mix until just combined to ensure an airy, tender focaccia.
- Ensure your water is lukewarm (105-115°F or 40-46°C) for yeast activation.
- Serve warm with butter or more olive oil for the best experience.
- Feel free to use fresh thyme or oregano with the rosemary for flavor variations.
Nutrition Information (per serving, approximately)
(Please note: Nutrition information is automatically calculated based on standard ingredient values and should only be used as an approximation.)
- Calories: 225 kcal
- Carbohydrates: 34 g
- Protein: 5 g
- Fat: 7 g
- Saturated Fat: 1 g
- Polyunsaturated Fat: 1 g
- Monounsaturated Fat: 5 g
- Sodium: 876 mg
- Potassium: 70 mg
- Fiber: 2 g
- Sugar: 1 g
- Vitamin A: 5 IU
- Vitamin C: 0.3 mg
- Calcium: 11 mg
- Iron: 2 mg
Additional Info
Course: Appetizer, Side Dish
Cuisine: Italian
Tried this recipe?
We absolutely love seeing your culinary creations! If you make this delicious Italian Focaccia, please share your photos and mention @healthyfitnessmeals or tag #healthyfitnessmeals on Instagram! Your feedback inspires us.
Thank you for stopping by and taking the time to read this blog post and try our authentic Italian Focaccia Bread recipe. We sincerely hope you and your family enjoy this wonderful bread as much as ours does. Please don’t hesitate to leave a comment below with your feedback, questions, or any creative variations you try. We always love to hear from you!
FOLLOW me on FACEBOOK | INSTAGRAM | PINTEREST | TWITTER for all of my latest blog posts, delicious recipes, and healthy living tips!