
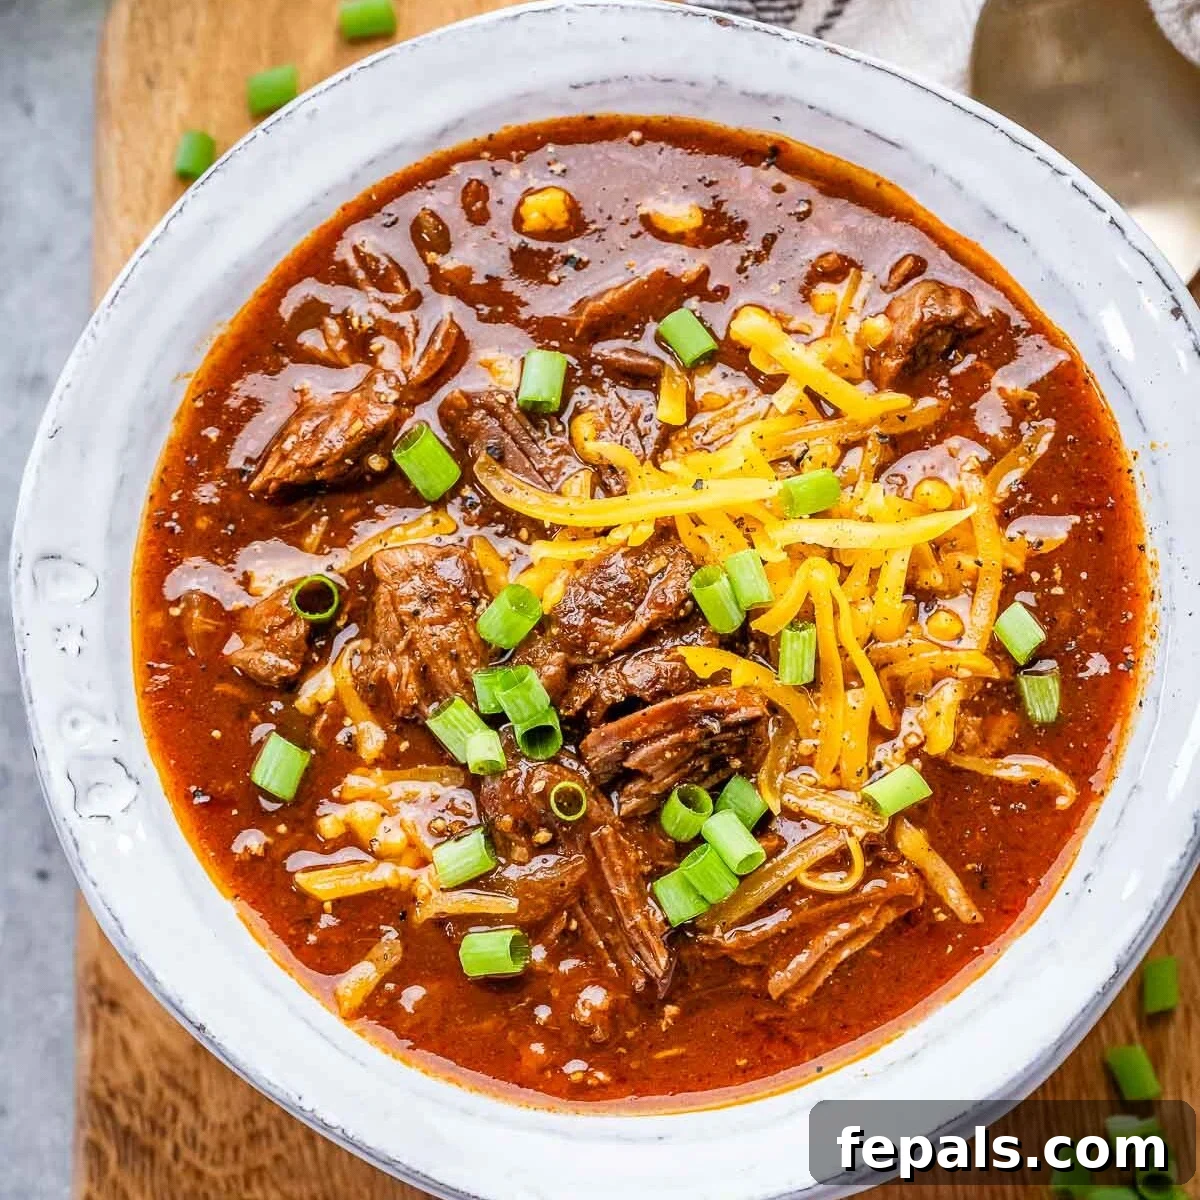
The Ultimate Texas Chili Recipe (No Beans!)
Prepare to discover your new go-to comfort food: an authentic Texas Chili, or “Bowl of Red,” that redefines hearty and flavorful. This recipe features succulent, slow-cooked chunks of beef swimming in a richly spiced, intensely savory sauce. And for all the purists out there, rest assured – this recipe proudly adheres to tradition with absolutely no beans! It’s the perfect robust meal for a chilly evening or any day you crave deep, satisfying flavor.
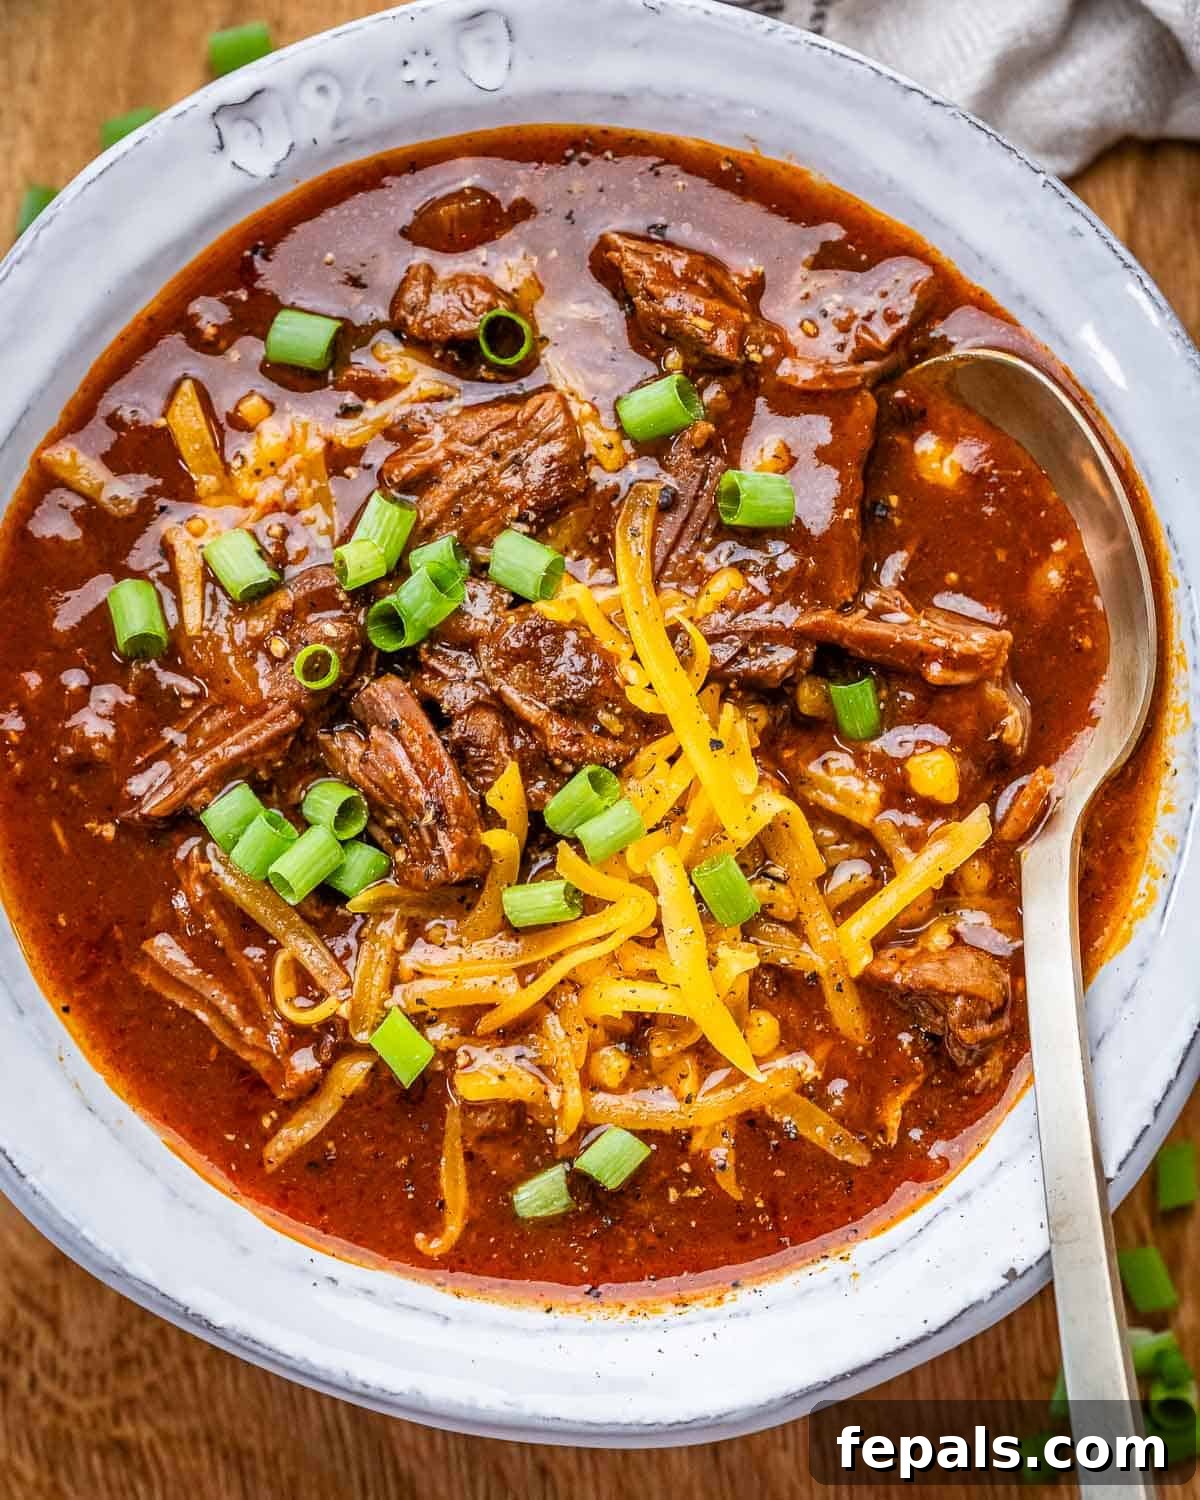
While I appreciate the convenience of a quick chili made with ground beef and beans, this traditional Texas Chili demands a little more time and patience – but the reward is immeasurable. By braising generous chunks of beef chuck in a vibrant, spicy sauce for several hours, the meat slowly transforms, becoming incredibly tender and fall-apart perfection. This long, gentle cooking process allows the beef to infuse the entire chili with an unparalleled depth of flavor, far surpassing what you’d achieve with ground meat.
Traditionally, Texas chili often omits tomatoes, but I’ve opted to include a touch of tomato puree in this recipe. This addition helps to round out the flavors, adding a subtle tang and enhancing the overall richness without overshadowing the beef and chiles. The result is a profoundly flavorful, deeply satisfying stew that’s truly a standout, especially as the weather cools.
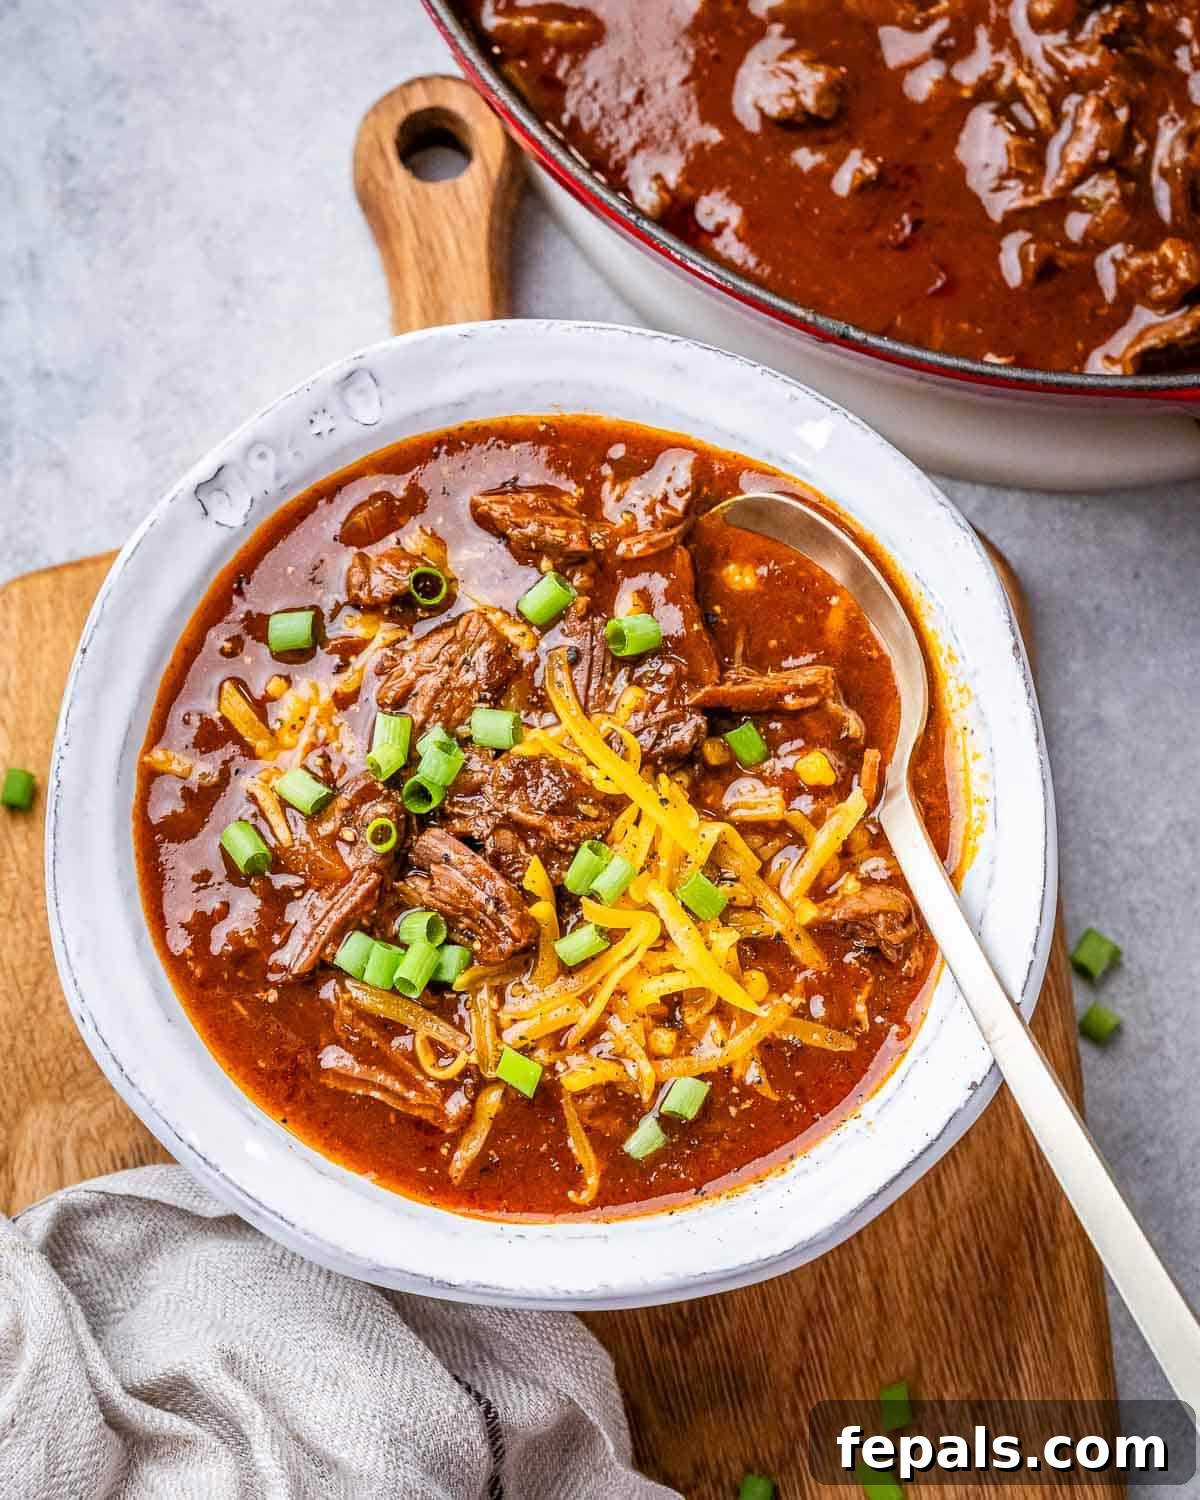
One of the most delightful aspects of serving chili is the opportunity for customization! Everyone at the table can personalize their bowl with their favorite toppings. My personal choices include a generous sprinkle of freshly shredded sharp cheddar cheese and a scattering of vibrant sliced green onions for a fresh bite.
Craving more chili inspiration? Explore my other delicious recipes for Easy Chicken Chili and Classic Beef Chili.
Recipe Overview
Essential Tips Before You Start Cooking
To ensure your Texas Chili turns out perfectly rich and tender, consider these valuable tips before you begin your culinary adventure:
- Plan Ahead for Slow Simmering: This recipe relies on several hours of simmering to achieve that irresistible fall-apart beef texture and deep flavor. Make sure you allocate sufficient time on the day you plan to cook, or even better, prepare it the day before. Like many slow-cooked dishes, chili often tastes even more incredible after its flavors have had a chance to meld and deepen overnight in the refrigerator. This makes it an ideal candidate for meal prepping!
- Sear Beef in Batches for Maximum Flavor: The secret to a deeply flavorful chili begins with a proper sear on your beef chunks. It’s crucial not to overcrowd your pan during this step. If too much meat is added at once, the temperature of the pan drops, and the beef will steam rather than brown. Searing in smaller batches ensures each piece develops a beautiful, golden-brown crust, which translates into a rich, complex flavor foundation for your chili.
- Monitor Liquid Levels During Simmering: While the chili simmers, the liquid will naturally reduce and thicken. Keep an eye on it throughout the cooking process. If you notice it’s becoming too dry or thick, simply add a splash more water or beef broth. Maintaining adequate liquid is essential to prevent the chili from sticking to the bottom of the pot and to ensure the beef cooks evenly and remains tender.
- Select the Right Cookware: For a dish that simmers for hours, a large, heavy-bottomed pot or Dutch oven is indispensable. The heavy construction helps to distribute heat evenly across the base and sides, which prevents hot spots that can cause the stew to catch and burn. This ensures a consistent, gentle simmer for perfectly tender results.
Frequently Asked Questions About Texas Chili
What is Texas Chili traditionally?
Texas Chili, famously known as “Bowl of Red,” is a legendary dish steeped in Lone Star State tradition. At its core, it’s a robust, slow-cooked beef stew made with a rich, aromatic sauce crafted primarily from dried chiles. The defining characteristics are clear: it’s all about the beef and the chiles. You absolutely will not find any beans in authentic Texas Chili, and historically, tomatoes were also omitted. The focus is on a pure, intense, smoky, and deeply meaty flavor profile that truly showcases the quality of the beef and the complexity of the chile blend.
What cut of meat is best for Texas Chili?
For an unparalleled Texas Chili experience, beef chuck roast is the gold standard. This cut is perfectly suited for stewing and long, slow cooking methods. While initially tough, beef chuck is incredibly flavorful, with ample marbling and connective tissue. Over several hours of simmering, these tough tissues break down, rendering the meat unbelievably tender, juicy, and fall-apart delicious, just as it should be in this hearty dish. Other cuts like brisket can also work, but chuck roast offers the ideal balance of flavor and texture when slow-cooked.
What do you serve with Texas Chili?
Texas Chili is a canvas for delicious toppings and complementary sides. Classic toppings include shredded sharp cheddar cheese, a sprinkle of fresh chopped cilantro, or vibrant sliced green onions for a burst of freshness. Diced avocado adds a creamy texture and coolness, while a dollop of sour cream or Greek yogurt provides a tangy counterpoint. For crunch, serve with crispy tortilla chips or warm cornbread. I particularly enjoy offering lemon or lime wedges on the side; a squeeze of citrus adds a bright, fresh kick that elevates the chili’s rich flavors beautifully.
Can you Freeze Texas Chili?
Absolutely! Texas Chili is an excellent candidate for freezing, making it perfect for meal prep or enjoying later. To freeze, allow the chili to cool completely to room temperature. Then, transfer it to an airtight, freezer-safe container or heavy-duty freezer bags. It will maintain its quality in the freezer for up to 3 months. When you’re ready to enjoy, simply thaw it in the refrigerator overnight and reheat gently on the stovetop or in the microwave until thoroughly hot.
Ingredients You’ll Need for This Robust Chili
Crafting this unforgettable Texas Chili requires a selection of quality ingredients that build layers of deep, savory flavor. Below is a comprehensive list of what you’ll need. Full quantities and detailed measurements can be found in the recipe card further down the page.
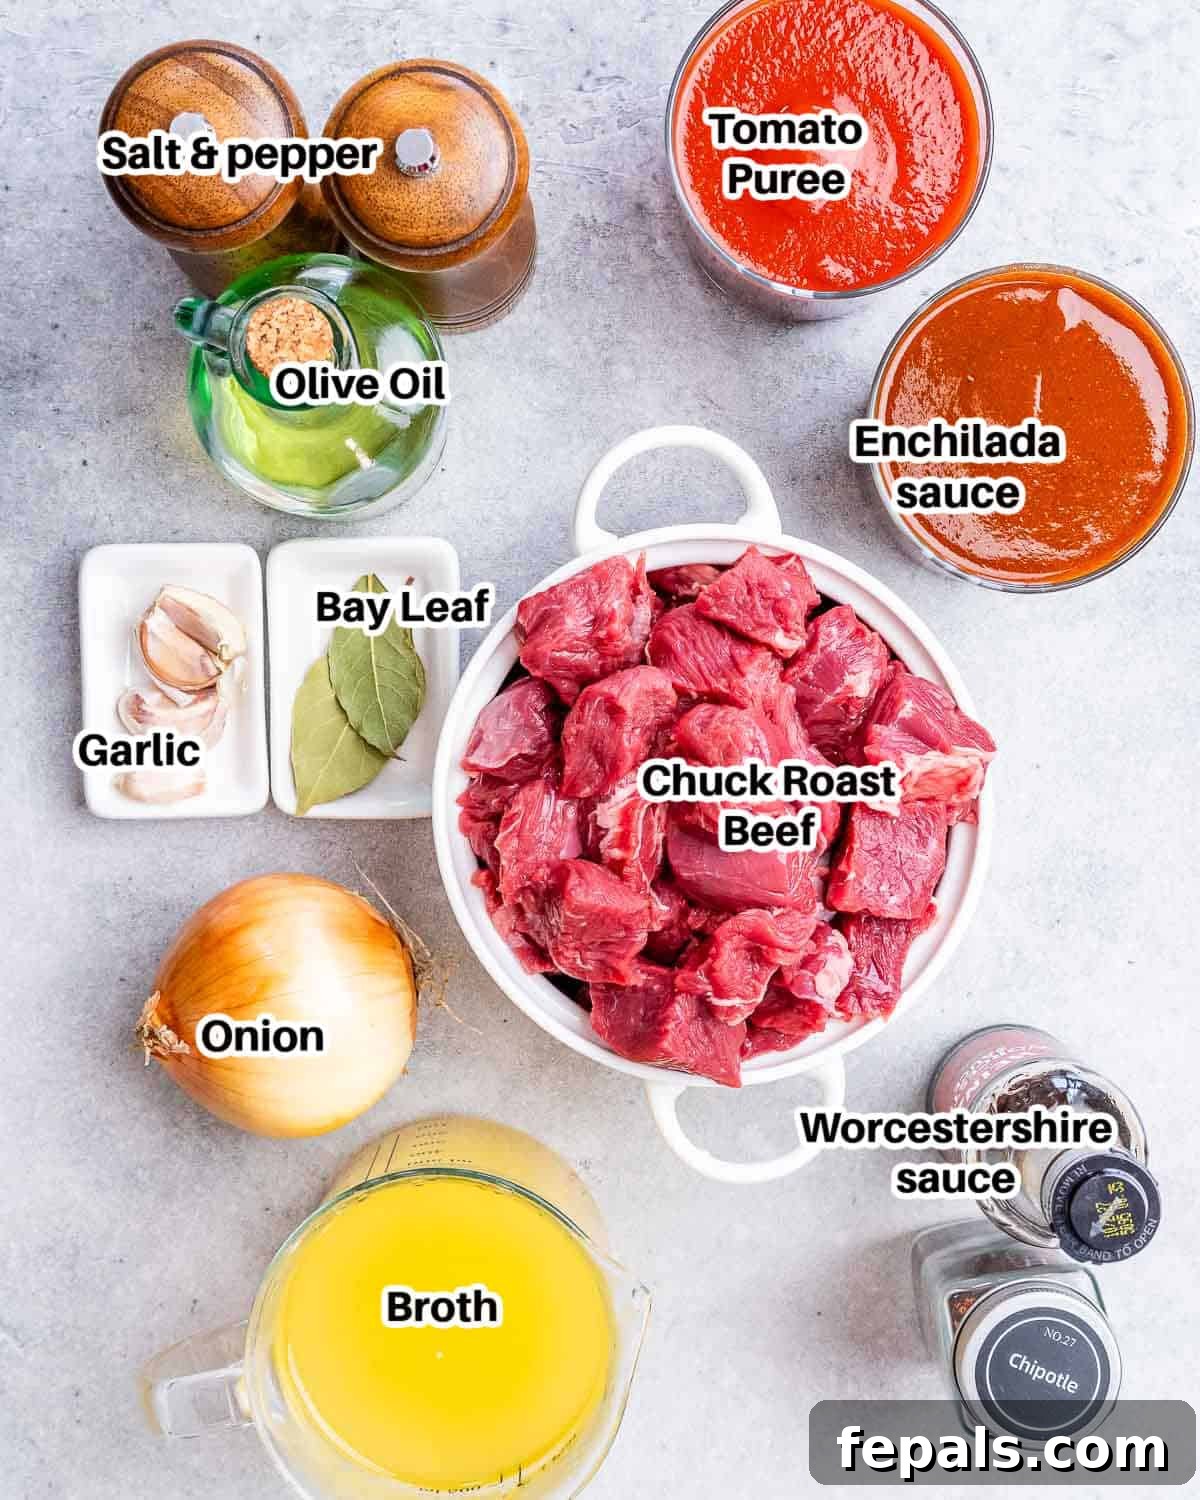
- Beef Chuck Roast: This is the star of our chili. Beef chuck is highly prized for slow-cooked dishes because its generous marbling and connective tissues break down over time, yielding incredibly tender, juicy, and flavorful results. Its rich beefy taste is fundamental to an authentic Texas chili.
- Kosher Salt and Black Pepper: Simple seasonings are essential for enhancing the natural flavors of the beef and integrating them into the sauce. Adjust to your personal preference.
- Olive Oil: Used for searing the beef and sautéing the aromatics. Extra virgin olive oil adds a lovely baseline flavor. Avocado oil is a great alternative if you prefer a higher smoke point.
- Yellow Onion: A diced yellow onion provides a foundational sweetness and aromatic depth to the chili base. In a pinch, a red onion can be used, though it might impart a slightly stronger, sharper flavor.
- Garlic: Freshly minced garlic is highly recommended for its pungent, aromatic qualities that are crucial to the chili’s flavor profile. If fresh garlic is unavailable, 1 teaspoon of garlic powder can be substituted; add it alongside the chipotle powder to allow its flavors to bloom.
- Chipotle Powder: This ingredient brings a fantastic smoky depth and a moderate level of heat to the chili. Chipotle powder is made from smoked, dried jalapeño peppers, offering a complex flavor that isn’t just about spice. You can adjust the quantity from 1 teaspoon for a milder chili to 2 teaspoons for more noticeable heat.
- Enchilada Sauce: We recommend a mild, Tex-Mex style enchilada sauce to contribute a rich, savory background and a hint of traditional Southwestern flavor. Feel free to opt for a spicier version if you enjoy extra heat.
- Tomato Puree: While not always present in every traditional Texas chili recipe, the addition of tomato puree here helps to balance and round out the deep, savory beef flavors. It adds a subtle acidity and body to the sauce. If you prefer using fresh tomatoes, simply puree them first to achieve a similar consistency.
- Worcestershire Sauce: This fermented condiment is a powerhouse of umami. Just a tablespoon can significantly deepen the savory, meaty taste of your chili. If you don’t have Worcestershire sauce, you can omit it, or try a dash of soy sauce for a similar umami boost, adjusting for saltiness.
- Beef Stock or Broth: The quality of your beef stock will significantly impact the richness of your chili’s sauce. Opt for a high-quality, flavorful beef broth for the best results. Chicken broth can be used as a substitute, but be aware that it will result in a slightly lighter, less intensely beefy chili.
- Bay Leaves: These fragrant leaves impart a subtle, slightly sweet, and herbaceous note that brightens the overall flavor of the chili. Fresh bay leaves offer a more potent aroma, but dried bay leaves work wonderfully as well. Remember to remove them before serving.
- Toppings: This is where you make the chili your own! While optional, toppings add texture and customize the flavor. Classic choices include freshly shredded cheese (cheddar is popular), and thinly sliced green onions for a fresh, mild bite.
Step-by-Step Guide: How to Make the Best Texas Chili
Follow these detailed steps to create a truly unforgettable Texas Chili. I’ve included helpful tips along the way to ensure your success on the first try!
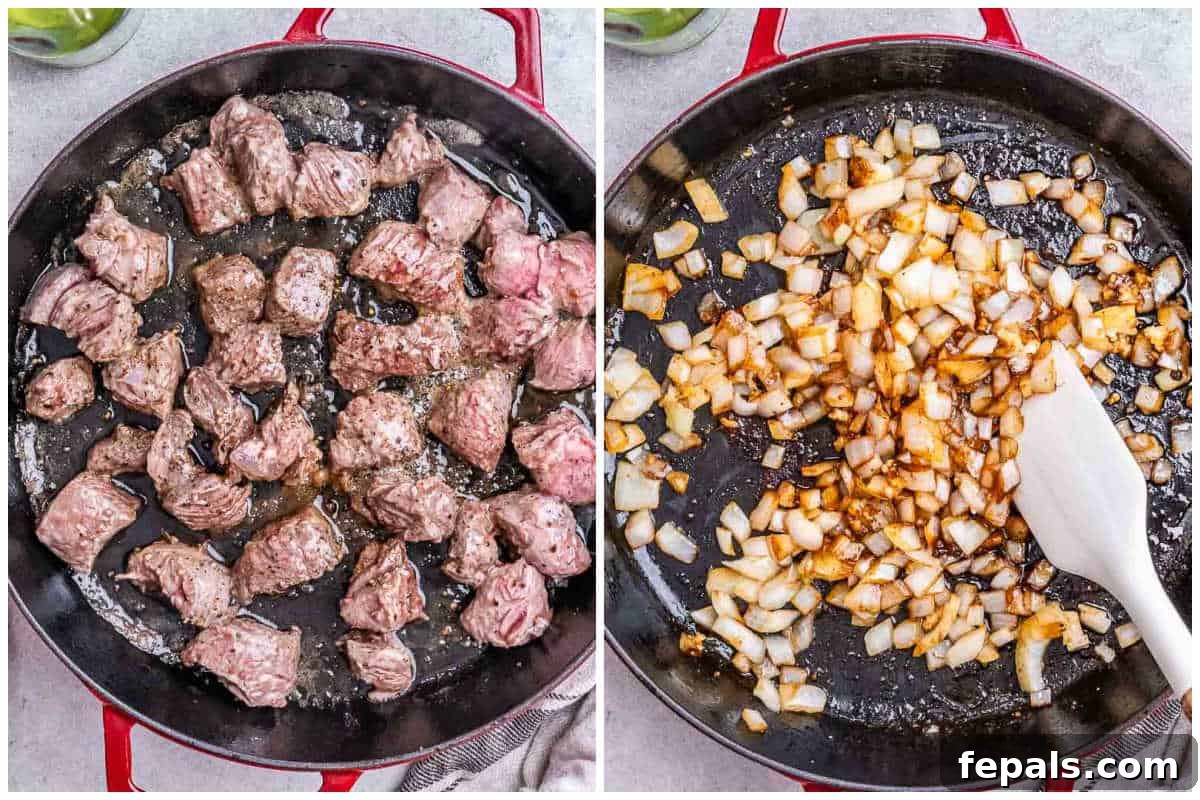
1️⃣ Prepare and Sear the Beef
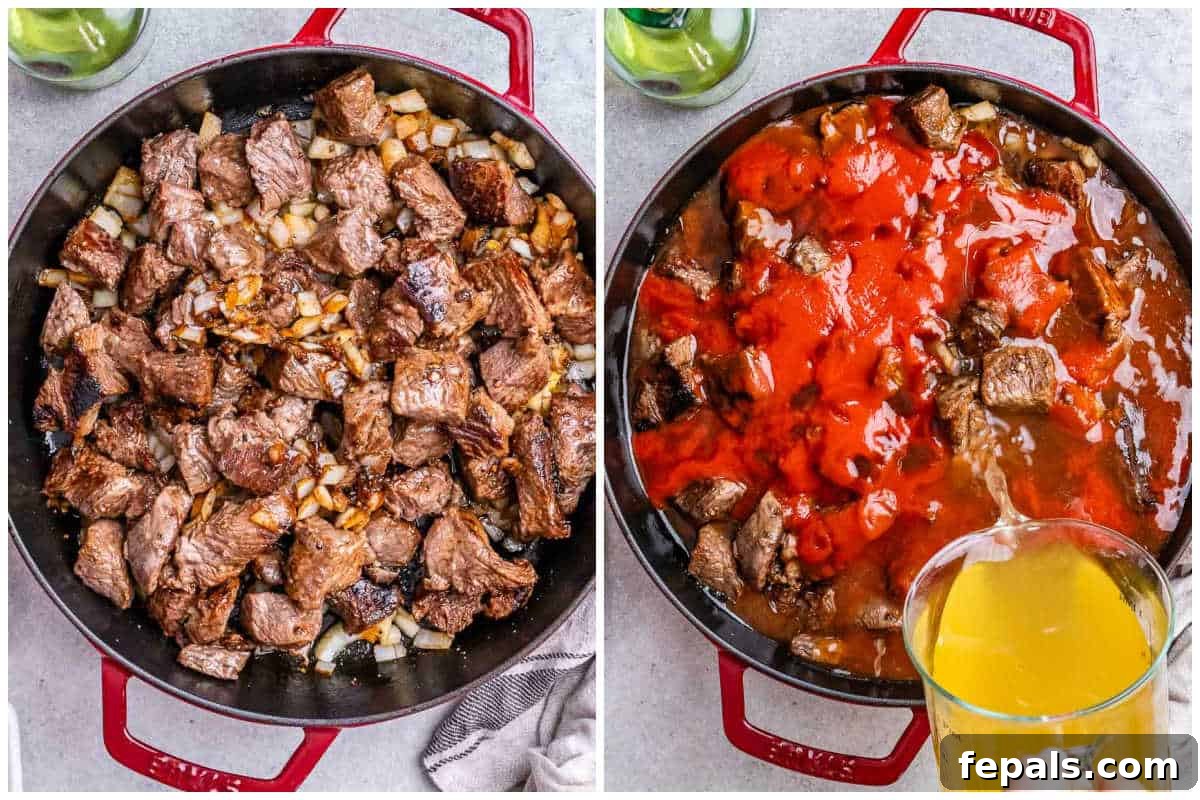
Begin by trimming any excess fat from your beef chuck roast, then cut the meat into uniform 1/2-inch chunks. Season these beef pieces generously with Kosher salt and freshly ground black pepper on all sides. Heat 2 tablespoons of olive oil in a large, heavy-bottomed pot or Dutch oven over medium-high heat until shimmering. Add about half of the beef chunks to the hot pan, ensuring not to overcrowd it. Sear the beef until beautifully browned and caramelized on all sides, about 3-5 minutes per batch. Remove the browned beef from the pan and set it aside in a bowl. Add the remaining 2 tablespoons of olive oil and repeat the searing process with the second batch of beef.
Tip: Searing the beef in smaller batches is crucial. Overcrowding the pan will lower the temperature, causing the beef to steam rather than develop that desirable golden-brown crust. This crust adds immense depth and umami to your chili!
2️⃣ Sauté Aromatics
Once all the beef has been seared and removed, reduce the heat to medium. Add the diced large yellow onion to the same pot, scraping up any browned bits from the bottom of the pan as you stir. Sauté the onion for 5-7 minutes until it softens and becomes translucent. Then, add the minced garlic cloves and cook for another 1-2 minutes until fragrant. Be careful not to burn the garlic.
Tip: If you notice the onions or garlic starting to stick or catch on the bottom of the pan, add a small splash (about 1-2 tablespoons) of water or beef stock. This will help deglaze the pan and prevent burning, incorporating all those flavorful browned bits into your chili base.
3️⃣ Combine All Chili Ingredients
Return all of the seared beef chunks, along with any accumulated juices, back into the pot with the sautéed onions and garlic. Sprinkle the chipotle powder over the beef and stir well to coat, allowing the spices to toast slightly for about 30 seconds until fragrant. Pour in the entire can of mild enchilada sauce and the can of tomato puree. Add the Worcestershire sauce, beef stock, and bay leaves. Stir everything together thoroughly, ensuring all the ingredients are well combined and any remaining browned bits from the bottom of the pan are scraped up and incorporated into the liquid. These bits are packed with flavor!
Tip: Make sure to scrape the bottom of the pan vigorously with your cooking spoon when adding the liquids. Those caramelized bits, known as “fond,” are packed with intense flavor and will dissolve into the sauce, enriching the chili’s taste.
4️⃣ Slow Simmer to Perfection
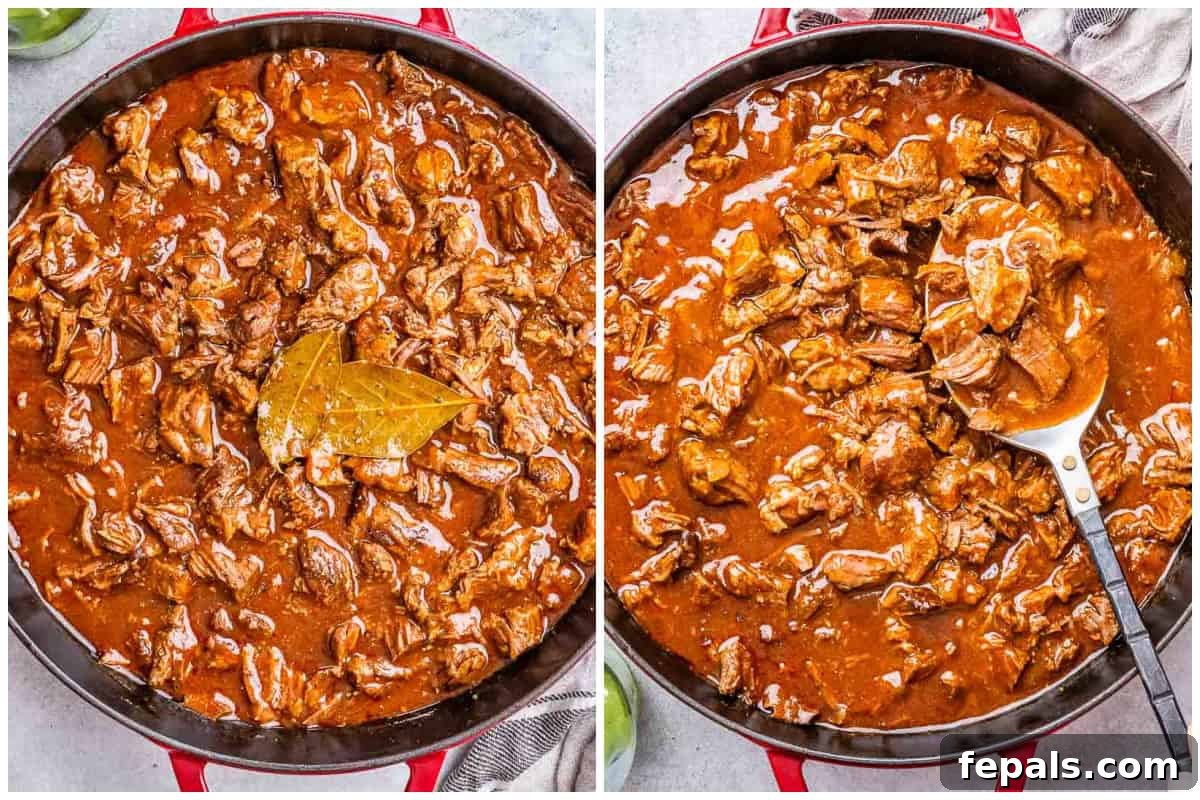
Bring the chili mixture to a gentle simmer over medium-high heat. Once simmering, reduce the heat to low, partially cover the pot with a lid (leaving a small gap for steam to escape), and let it simmer for approximately 3 1/2 hours. The goal is for the beef to become incredibly tender and easily fall apart. Throughout the simmering process, check on the chili every 30-45 minutes, giving it a good stir to prevent it from sticking to the bottom of the pot.
Tip: Partially covering the pot allows some of the liquid to slowly evaporate, which helps to thicken and concentrate the sauce without letting it dry out completely. If you notice the chili becoming too thick during simmering, feel free to add an extra splash of beef broth or water to achieve your desired consistency.
5️⃣ Shred the Tender Beef
Once the beef has finished simmering and is incredibly tender, remove the bay leaves. Using two forks, gently pull apart the beef chunks directly in the pot. The meat should shred easily, integrating beautifully into the rich, thickened chili sauce. This step adds a wonderful texture and ensures every spoonful is packed with meaty goodness.
Tip: If you find the beef isn’t shredding easily, it simply needs a bit more cooking time. Return the pot to the stove, cover, and let it simmer for another 10-15 minutes, or until the meat is fork-tender. Patience is key for truly melt-in-your-mouth beef!
6️⃣ Serve and Enjoy
Ladle the piping hot Texas Chili into bowls. Now comes the best part: customizing it with your favorite toppings! A sprinkle of shredded cheddar cheese, fresh green onions, a dollop of sour cream, or even a side of warm cornbread are all fantastic choices. Serve immediately and savor the rich, complex flavors of this homemade, no-bean Texas Chili.
Texas Chili

Ingredients
- 4 pounds beef chuck roast, trimmed of excess fat, cut into 1/2 inch chunks
- Kosher salt and black pepper, to taste
- 4 tablespoons olive oil, divided
- 1 large yellow onion, diced
- 4 cloves garlic, minced
- 1-2 teaspoons chipotle powder, to taste
- 14.5 ounces mild enchilada sauce (one can, Tex-Mex style)
- 14.5 ounces tomato puree (one can)
- 1 tablespoon Worcestershire sauce
- 2 cups beef stock or broth
- 2 bay leaves
- Optional: Shredded cheddar cheese, sliced green onions, lemon wedges (for serving)
Instructions
- Season the 4 pounds beef chuck roast (cut into 1/2-inch chunks) with Kosher salt and black pepper.
- Heat 2 tbsp of olive oil in a rimmed heavy-bottom pan over medium-high heat. Add half the meat to prevent overcrowding the pan, and cook until browned on both sides. Set aside. Repeat with the remaining 2 tbsp olive oil and the second batch of meat.

- Once all the meat is done searing, reduce the heat to medium. Sauté the 1 large yellow onion (diced) and 4 cloves garlic (minced) for 3-4 minutes until softened. If it starts to catch on the bottom of the skillet, add a couple of tablespoons of water.
- Return the browned beef to the skillet and stir in the 1-2 teaspoons chipotle powder. Add the 14.5 ounces mild enchilada sauce, 14.5 ounces tomato puree, 1 tablespoon Worcestershire sauce, 2 cups beef stock or broth, and 2 bay leaves. Stir to combine, making sure to scrape all the way through the bottom of the pan to incorporate flavorful bits.
- Partially cover the skillet and reduce the heat to low. Simmer for around 3 and a half hours, or until the meat is super tender and easily falls apart. Check every half an hour and stir through the pan. If the chili becomes too thick, you can add some more stock as needed.
- When done, remove the bay leaves. Use 2 forks to gently pull apart the beef pieces directly in the pot. This helps to better integrate the meat into the chili and contributes to a thicker, more satisfying texture.
- Serve hot with shredded cheddar cheese, sliced green onions, or lemon wedges, if desired. Enjoy your authentic Texas Chili!






Notes
Tips:
- As this recipe takes a few hours to simmer, ensure you give yourself enough time to make it that day so that you can ensure the beef is falling apart by the time you come to shred it. Better yet, make it ahead of time – the chili tastes even better after it has sat in the fridge overnight!
- Searing the beef chunks in batches is key to getting a nice golden crust on the meat. If you overcrowd the pan when doing this, the beef will steam and won’t get such a deep flavor into the chili.
- While the chili is simmering, you can add a bit more liquid (water or broth) if you notice it’s looking a bit too dry. It’s important for there to be enough liquid in the pot so that the meat can cook properly.
- Choose a large, heavy-bottomed pot for this recipe so that it evens out the heat and stops the stew from catching and burning as it simmers.
Substitutions:
- No beef stock? You can use chicken stock or broth instead for a lighter flavor.
- No beef chuck? You could use an equal quantity of brisket instead, which also benefits from slow cooking.
Storage Tips:
- Fridge: Allow the chili to cool completely, then transfer to an airtight container. Chill in the fridge for up to 3 days.
- Freezer: Allow the chili to cool completely, then transfer to an airtight container. Freeze for up to 3 months.
- Reheat: You can microwave the chili in an uncovered, microwave-safe container in bursts until piping hot throughout. Otherwise, heat gently in a pot on the stove, stirring often, until piping hot.
Nutrition Information
Nutrition information is automatically calculated, so should only be used as an approximation.
| Nutrient | Amount Per Serving |
|---|---|
| Calories | 707 kcal |
| Carbohydrates | 17 g |
| Protein | 62 g |
| Fat | 44 g |
| Saturated Fat | 17 g |
| Polyunsaturated Fat | 4 g |
| Monounsaturated Fat | 25 g |
| Trans Fat | 2 g |
| Cholesterol | 209 mg |
| Sodium | 1067 mg |
| Potassium | 1527 mg |
| Fiber | 3 g |
| Sugar | 10 g |
| Vitamin A | 950 IU |
| Vitamin C | 11 mg |
| Calcium | 84 mg |
| Iron | 8 mg |
Additional Info
Creative Variations & Simple Substitutions for Your Chili
While this Texas Chili recipe is a classic, don’t hesitate to personalize it or adapt it based on what you have on hand. Here are a few ideas to get you started:
- Spice Level Adjustments: For a milder chili, start with 1 teaspoon of chipotle powder and omit any additional spicy enchilada sauce. If you crave more heat, increase the chipotle powder to 2 teaspoons, or even add a pinch of cayenne pepper or a diced jalapeño alongside the onions for an extra kick. For extreme heat, consider a dash of your favorite hot sauce at the end.
- Different Beef Cuts: If beef chuck isn’t available, brisket makes an excellent substitute. Like chuck, brisket benefits immensely from long, slow cooking, resulting in similarly tender and flavorful shredded beef. Other stewing cuts, such as oxtail or short ribs, could also be used for an even richer, more luxurious chili, though they may require longer cooking times.
- Broth Alternatives: While beef stock provides the most robust flavor, chicken broth can be used for a slightly lighter chili. For an even deeper flavor profile, consider using half beef stock and half dark beer (like a stout or porter), which adds complexity and richness that perfectly complements the beef. Ensure the beer is fully cooked off during the simmering process.
- Adding Subtle Vegetables (Beyond Beans!): While strictly no beans, you can introduce other non-bean vegetables for added nutrition and flavor. Diced bell peppers (red, green, or yellow) or diced carrots can be sautéed with the onions to add sweetness and texture without compromising the “no-bean” tradition. Just ensure they are finely diced to meld seamlessly into the sauce.
Make-Ahead and Storage Solutions
This Texas Chili is a fantastic meal to prepare in advance, as its flavors often deepen and improve with time. It’s also incredibly freezer-friendly, making it perfect for busy weeknights.
Fridge Storage: Once your chili has finished cooking, allow it to cool completely to room temperature. Transfer the cooled chili to an airtight container. It can be safely stored in the refrigerator for up to 3 days. Reheating often brings out even more nuanced flavors.
Freezer Storage: For longer storage, ensure the chili is thoroughly cooled. Divide it into individual portions or family-sized servings and transfer to freezer-safe airtight containers or heavy-duty freezer bags. Label with the date. Frozen Texas Chili will maintain its best quality for up to 3 months. Thaw overnight in the refrigerator before reheating.
Reheating Instructions:
Microwave: For quick reheating, place a portion of chili in an uncovered, microwave-safe bowl. Heat in 1-2 minute bursts, stirring well in between, until it is piping hot throughout.
Stovetop: For larger quantities or a more gentle reheat, transfer the chili to a pot on the stove. Heat over medium-low heat, stirring frequently, until it reaches a gentle simmer and is thoroughly heated through. Add a splash of broth or water if it seems too thick.
More Hearty & Comforting Recipes You’ll Love
If you enjoyed this rich and flavorful Texas Chili, you’ll surely appreciate these other warming and satisfying dishes from my kitchen:
- Creamy White Bean Chicken Chili
- Quick & Easy Instant Pot Chili
- Wholesome Sweet Potato Chili
- Flavorful Chicken Chili Recipe
- Hearty White Bean Pumpkin Chili
Beyond Chili: More Robust Beef Dishes
For more beef-centric comfort food inspiration, explore these favorites:
- Creamy Crockpot Mac and Cheese
- Ultimate Chili Mac and Cheese
- Classic Slow Cooker Beef Stew
- Quick & Easy Ground Beef Bowl
- Comforting Cottage Pie (Shepherd’s Pie)
- Tender Slow Cooker Beef Pot Roast
Pin this now to find it later!
Pin It
Thank you for stopping by and exploring this fantastic Texas Chili recipe! I hope it brings warmth and delicious flavors to your table. Don’t forget to subscribe to my newsletter to receive more free recipes like this, delivered straight to your inbox.
FOLLOW me on FACEBOOK | INSTAGRAM | PINTEREST | TWITTER for all of my latest blog posts and delicious recipes.