
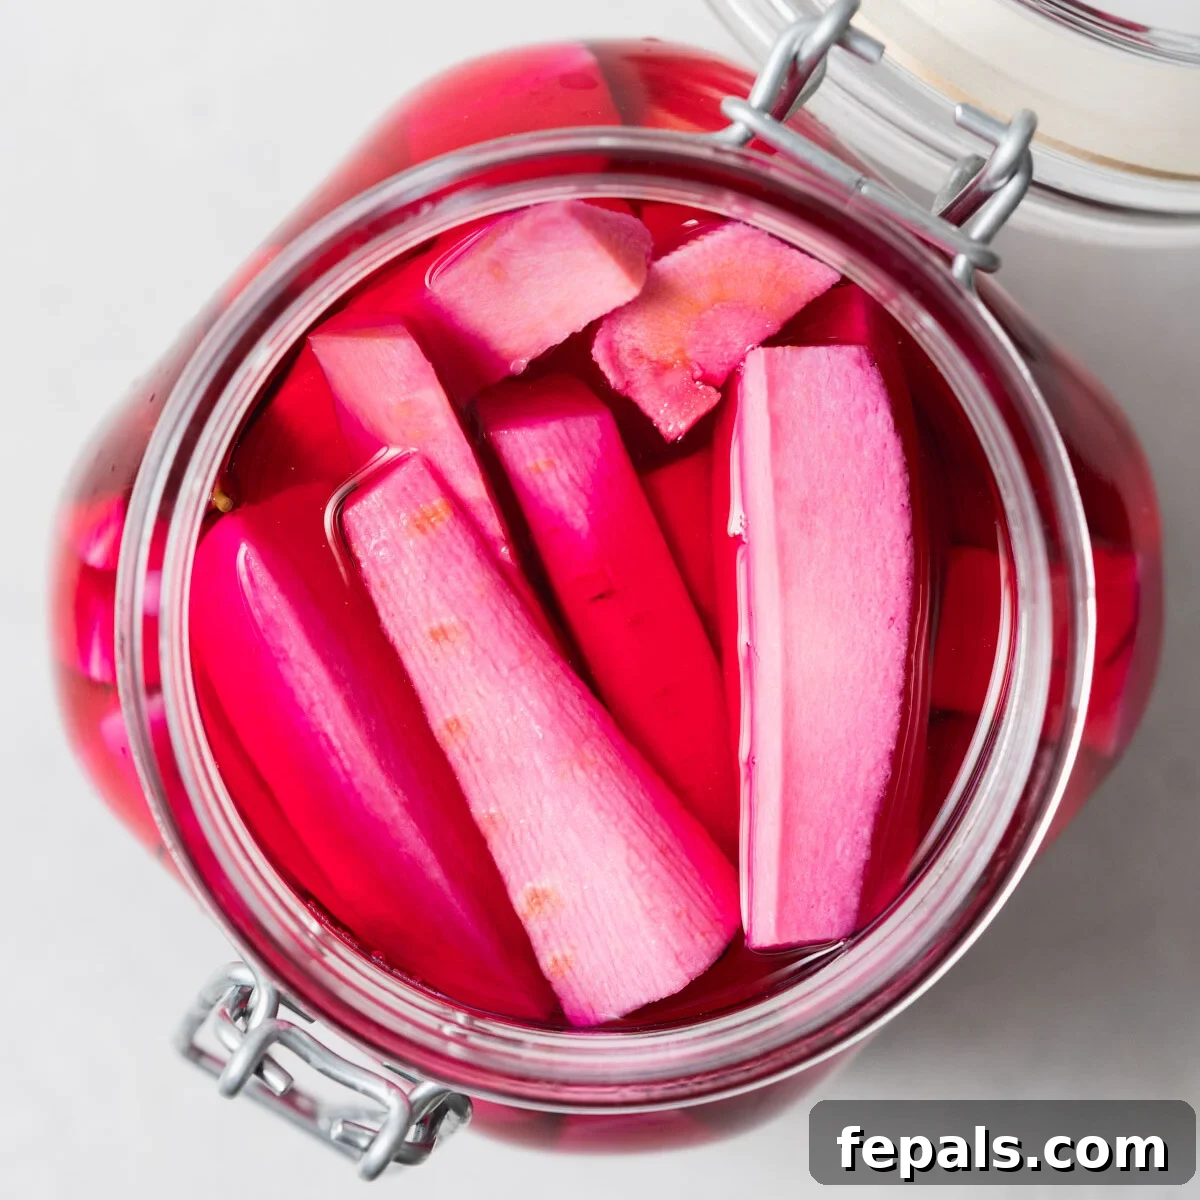
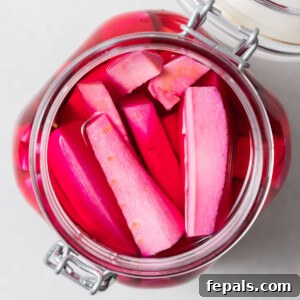
Pickled turnips, a quintessential element of Middle Eastern cuisine, are celebrated for their vibrant flavor, satisfying crunch, and signature pink hue. These tangy, crunchy delights are more than just a condiment; they are a cultural staple, often gracing mezze platters, sandwiches, and a variety of traditional dishes. Crafting your own batch of these beautiful pink turnip pickles at home is surprisingly simple, requiring just a handful of fresh ingredients and a straightforward pickling process. In a matter of days, you can enjoy crisp, flavorful pickled turnips straight from the jar, ready to elevate any meal.
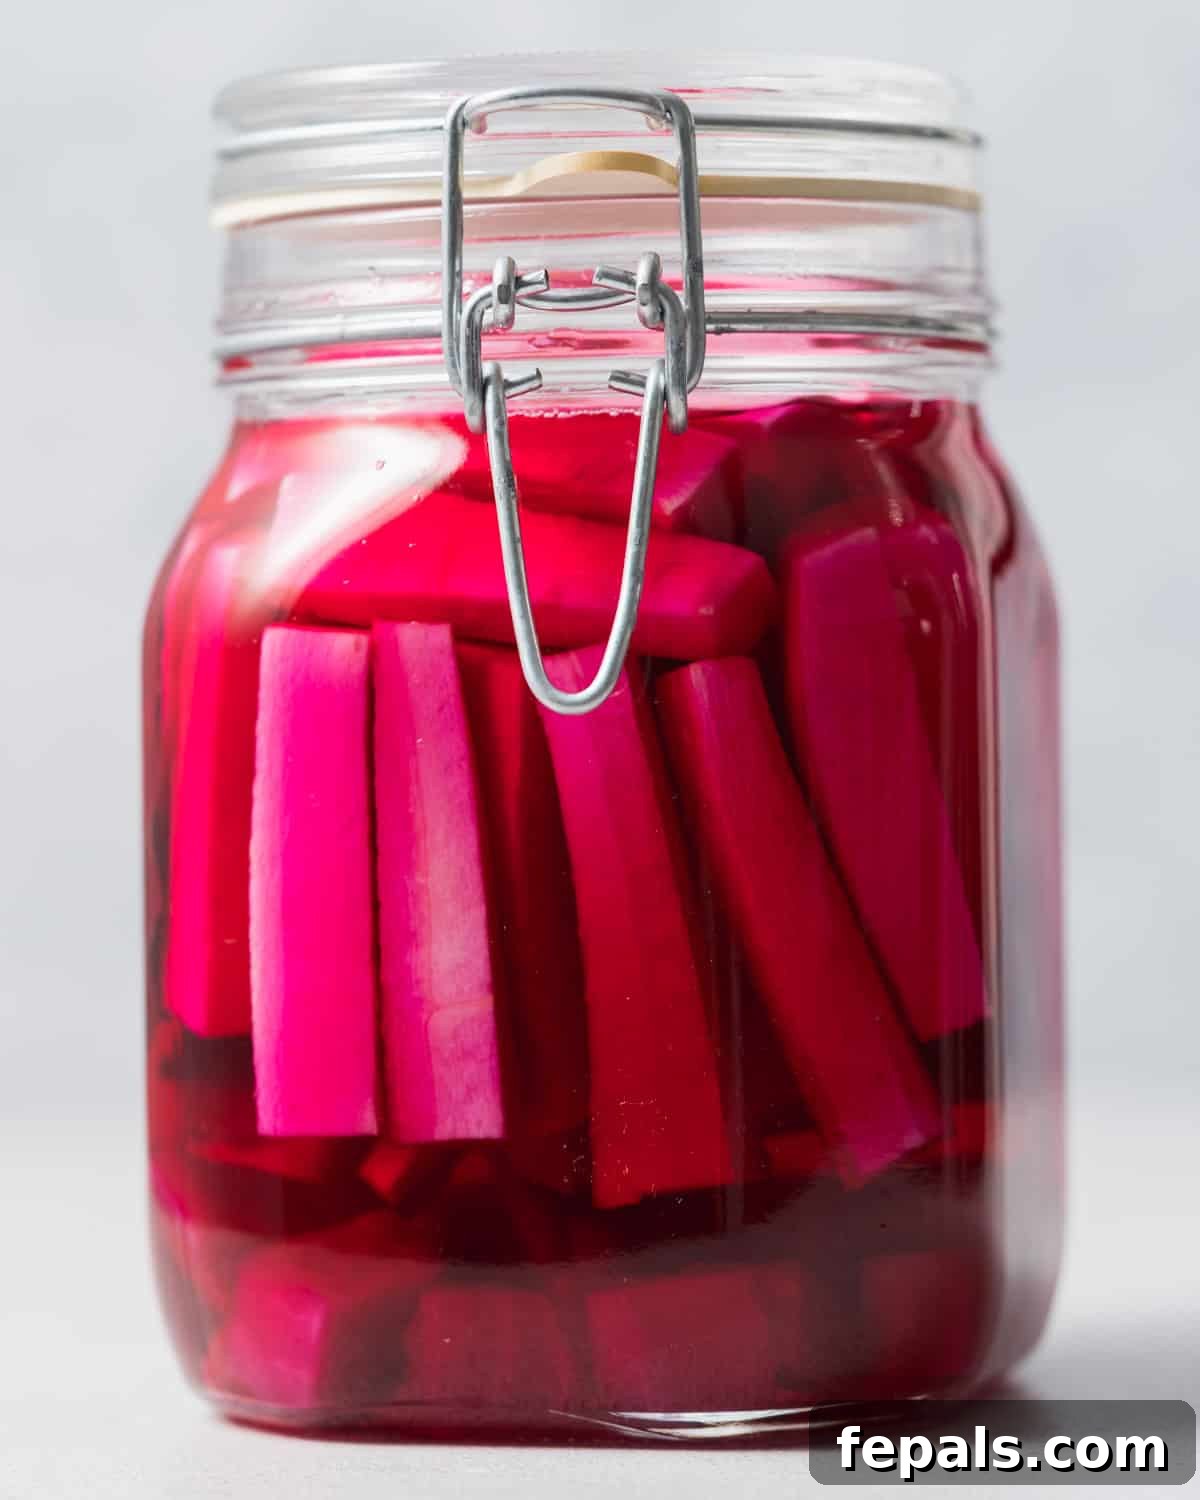
Discover the Magic of Homemade Pickled Turnips
This homemade pickled turnips recipe is an absolute must-try for any food enthusiast, whether you’re new to pickling or a seasoned pro. Its simplicity belies the incredible depth of flavor and satisfying texture it delivers. With just a few minutes of active preparation, you’ll set in motion a delightful transformation that results in jars of crisp, tangy, and beautifully colored turnip pickles. Forget store-bought versions; the fresh taste and vibrant crunch of homemade pickled turnips are unparalleled.
As someone with Lebanese heritage, I can attest that these pickled turnips are a constant presence in our refrigerators. They are truly a versatile staple, accompanying almost every meal imaginable. Their bright, piquant flavor cuts through rich dishes, adding a refreshing counterpoint. They are an indispensable addition to classic Middle Eastern favorites such as chicken shawarma bowls, grilled beef shawarma bowls, and any form of pita wrap. Beyond their traditional uses, I often enjoy them as a lively, crunchy topping for fresh salads or simply as a guilt-free, flavorful snack throughout the day. Their unique tang makes them an addictive treat that you’ll want to keep on hand at all times.
Why You’ll Fall in Love with Pickled Turnips!

Growing up, pickled turnips were a non-negotiable part of almost every meal and a frequent snack. Whether our family dinner featured succulent chicken shish tawook, savory beef kafta, or we were assembling delicious beef shawarma bowls and sandwiches, these pink pickles were always on the table, ready to be enjoyed. They are a true hallmark of Middle Eastern dining, something you can reliably expect at any authentic restaurant or tucked into your takeout bag.
Beyond their nostalgic charm, there are compelling reasons why these pickled turnips stand out:
- A Tangy, Unforgettable Flavor: The carefully balanced pickling brine, infused with white distilled vinegar, a touch of sugar, and hints of bay leaf, creates an irresistible tangy and subtly sweet flavor profile. This zesty kick awakens the palate and complements a wide array of dishes, making them truly versatile.
- Pretty Pink Color: The addition of just one small beet is the secret behind the turnips’ stunning, natural pink hue. This vibrant color not only makes them visually appealing on any plate or platter but also adds an element of culinary artistry to your mezze spread or sandwich.
- Remarkably Easy to Make: Don’t be intimidated by the idea of pickling. This recipe is designed for ease and accessibility. With minimal hands-on time and readily available basic ingredients, you can effortlessly create impressive homemade pickles, even if you’re a beginner in the kitchen.
- Customizable to Your Taste: The beauty of homemade pickles lies in their adaptability. Feel free to personalize your batch by experimenting with various fresh herbs like fragrant dill, earthy thyme, or aromatic rosemary. For those who crave a fiery kick, adding a few slices of jalapeño or other chili peppers to the jars can introduce a wonderful layer of heat.
- Healthy and Nutritious: Turnips themselves are low in calories and rich in vitamins and fiber. While pickling adds salt, these homemade versions allow you to control sugar and sodium levels, making them a healthier alternative to many store-bought options.
- Cost-Effective: Making your own pickled turnips is significantly more economical than purchasing specialty pickles from the store. You can produce a large batch for a fraction of the cost, ensuring you always have this delicious condiment on hand.
The combination of these qualities makes homemade pickled turnips an essential and highly rewarding addition to your culinary repertoire. Once you try them, you’ll understand why they are so beloved.
Essential Ingredients for Perfect Pickled Turnips
Crafting delicious pickled turnips begins with selecting high-quality ingredients. Here’s a detailed look at what you’ll need to create your own batch of these flavorful pink pickles:
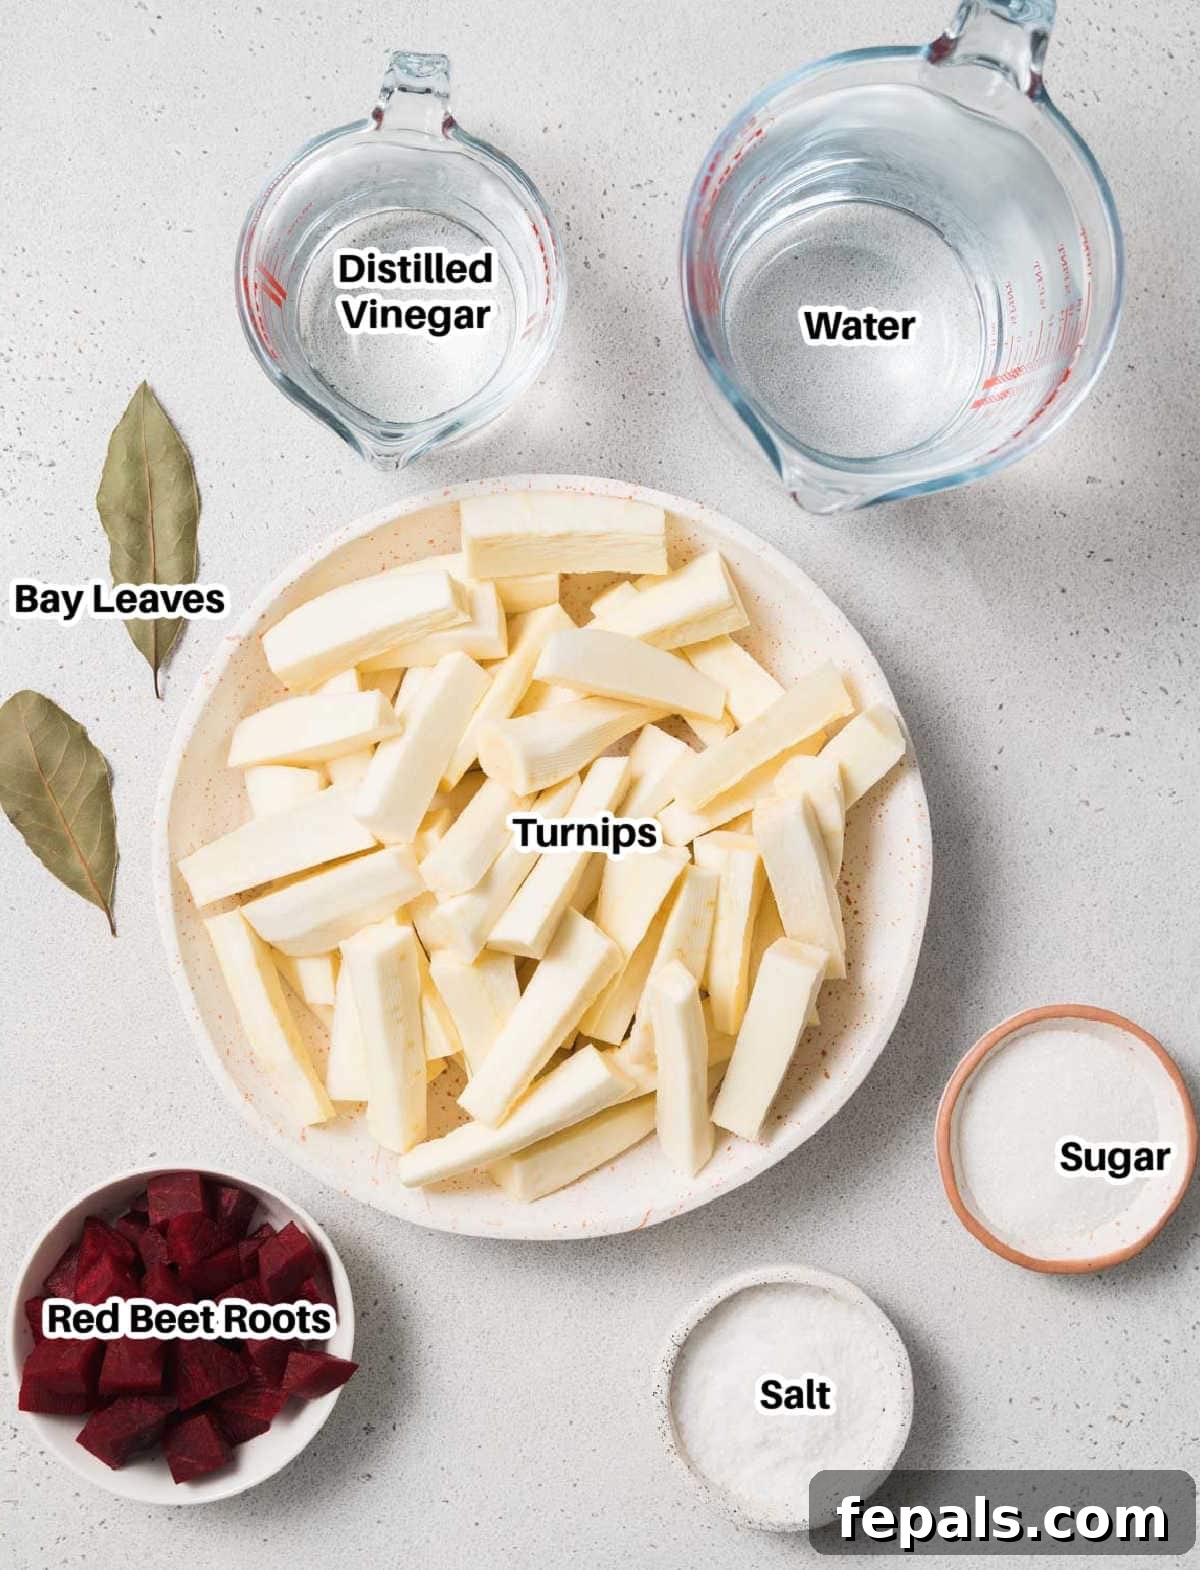
- Turnips: The star of our recipe! Look for fresh, firm turnips that feel heavy for their size and have smooth, unblemished skin. Avoid any that appear soft, shriveled, or have dark spots. You’ll need approximately 2 pounds, which, after peeling, should be cut into uniform ½-inch thick sticks or batons. Uniformity is key for even pickling and a consistent crunch.
- Red Beets: Just one small, peeled, and diced red beet is all it takes to impart that characteristic, stunning pink color to your turnips. While optional for flavor, it’s essential for achieving the traditional visual appeal. Choose a firm, vibrant beet for the best results.
- White Distilled Vinegar: This is the primary acidic component for our pickling brine. White distilled vinegar is preferred for its clean, sharp flavor that doesn’t overpower the turnips, and it typically contains 5% acidity, which is ideal for safe pickling. Avoid flavored or stronger vinegars unless specifically noted for variations.
- Water and Kosher Salt: Filtered water is recommended for the clearest brine. It’s crucial to use kosher salt (or pickling salt) as it lacks anti-caking agents and iodine found in regular table salt, which can make your brine cloudy and affect the final taste.
- Sugar: A small amount of white granulated or cane sugar is added to balance the intense tartness of the vinegar, creating a more mellow and palatable flavor profile for the pickled turnips. It enhances the overall taste without making the pickles sweet.
- Bay Leaves: Adding a single bay leaf to each jar introduces a subtle, aromatic layer of flavor to the pickling brine. Their slightly floral and herbaceous notes complement the turnips beautifully without being too dominant.
Recipe Overview
Step-by-Step Guide: How to Make Pickled Turnips
Making your own pickled turnips is a rewarding process that yields incredible flavor and a satisfying crunch. Follow these simple steps to create your perfect batch:
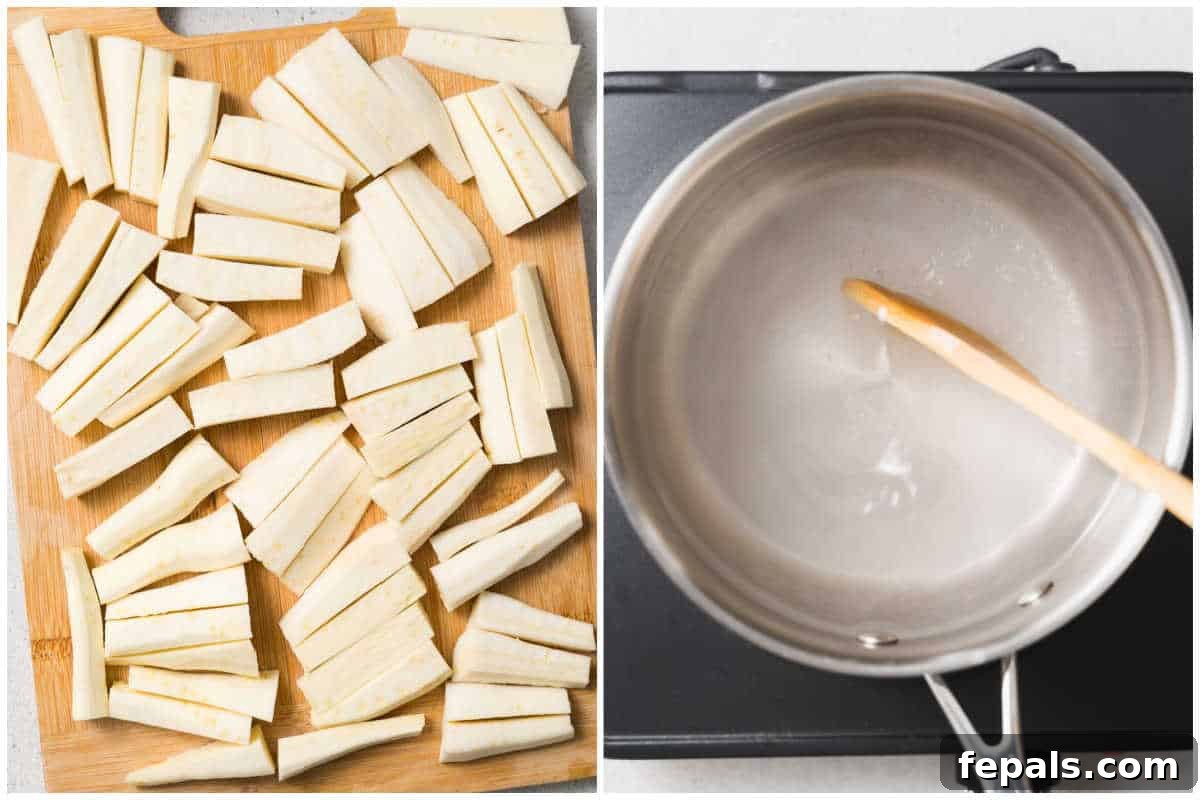
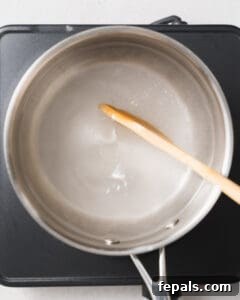
- Prepare the Pickling Brine: In a medium-sized saucepan, combine the white distilled vinegar, water, kosher salt, and sugar. Place the saucepan over medium-high heat. Stir the mixture frequently to ensure that the salt and sugar completely dissolve. This should take approximately 2-3 minutes, just until the mixture comes to a gentle boil. Once dissolved and boiling, remove the saucepan from the heat and set the brine aside to cool slightly while you prepare your vegetables and jars. A slightly cooler brine will help maintain the crunchiness of the turnips.
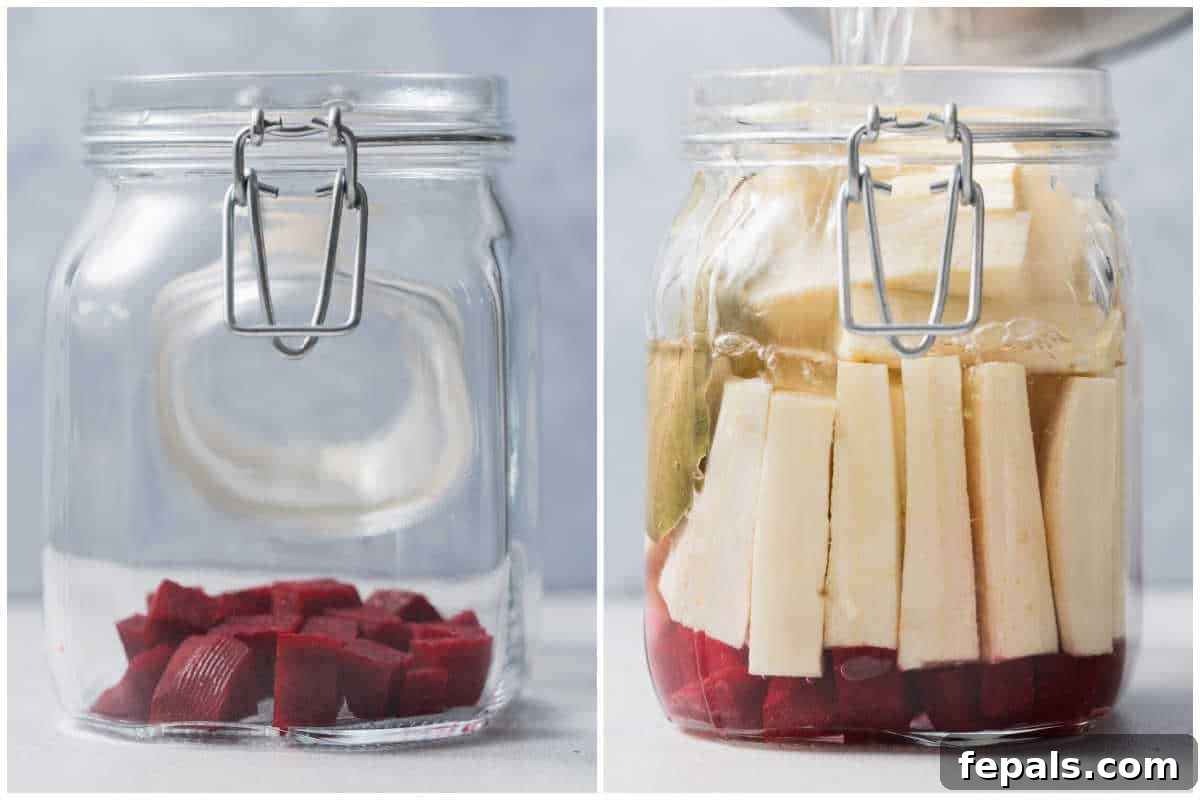
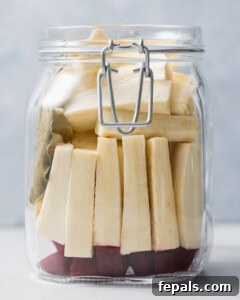
- Prepare and Pack the Jars: Begin by washing and sterilizing two 32-ounce mason jars and their lids. This is crucial for food safety. Evenly divide the prepared turnip batons and diced beet pieces between the two clean jars. Pack them relatively tightly but without crushing the turnips, ensuring there’s enough room for the brine to circulate. Place one bay leaf into each jar, nestled among the vegetables, to infuse the pickles with its subtle aroma.
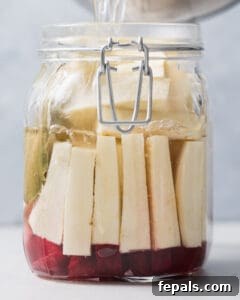
- Pour Brine Over Turnips: Carefully and slowly pour the warm (or slightly cooled) vinegar brine over the turnips and beets in the jars. Ensure that all the vegetables are completely submerged in the liquid. This is vital to prevent spoilage and ensure proper pickling. Leave about ½ inch of headspace at the very top of each jar to allow for expansion and to create a good seal.
- Cool and Seal: Once the brine has been added, allow the jars to cool down to room temperature without their lids. This usually takes about 1 hour. Cooling them uncovered first helps prevent excessive condensation. Once completely cooled, firmly secure the lids onto the jars. Ensure they are airtight to facilitate the pickling process effectively.
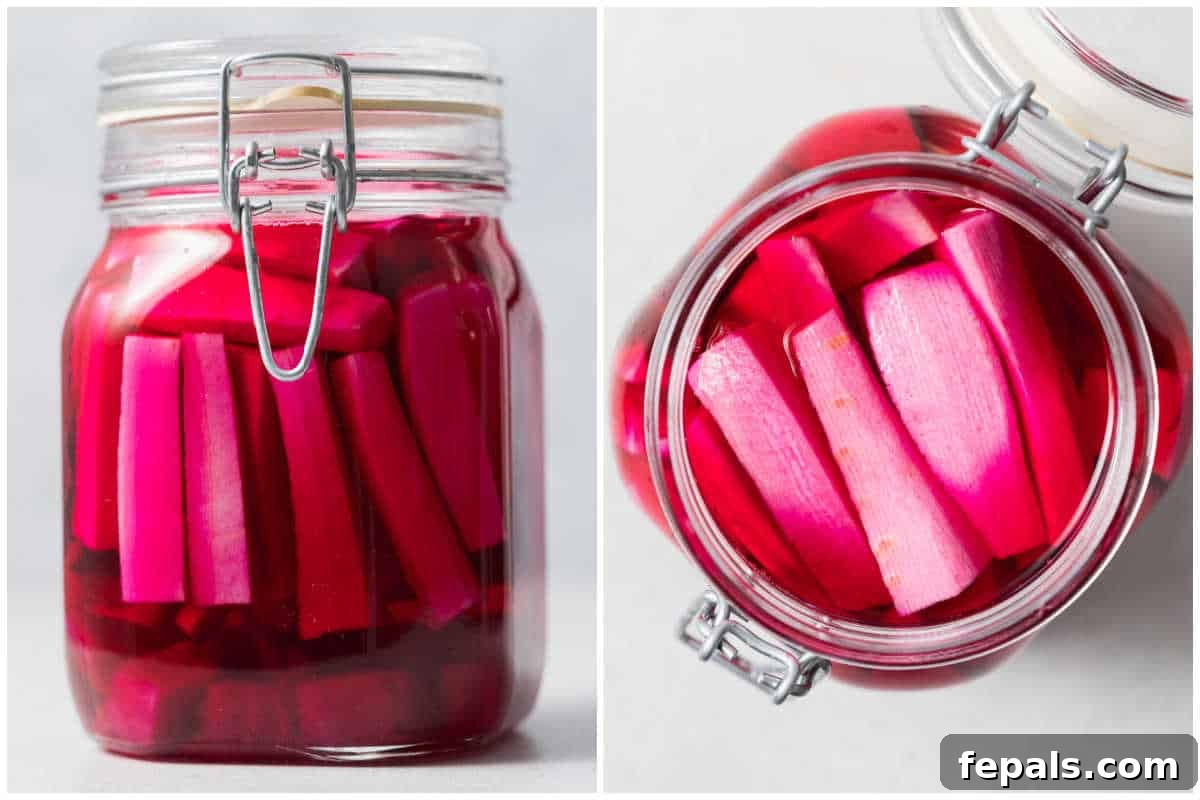
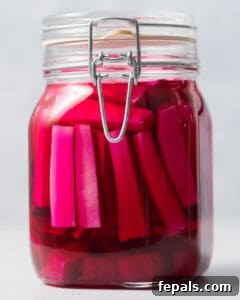
- Pickle the Turnips: This is where the magic happens! Let the sealed jars of turnip pickles sit at room temperature in a cool, dark place for 5 full days. During this time, the turnips will absorb the flavors of the brine, develop their characteristic tang, and take on that beautiful pink color from the beets. Resist the urge to open the jars during this initial pickling period.
- Refrigerate and Enjoy: After the 5-day room temperature pickling period, transfer the jars to your refrigerator. Chilling helps to halt further fermentation and preserves the crisp texture of the turnips. For optimal flavor development, allow them to refrigerate for at least 24 hours before you start enjoying them. These delightful homemade pickled turnips will keep well in the refrigerator for up to 4 weeks, providing you with a fresh, tangy condiment whenever you need it.
Recipe Notes and Expert Tips for the Best Pickled Turnips
To ensure your homemade pickled turnips turn out perfectly every time, keep these valuable tips in mind:
- Choose the Right Salt: Always use pickling salt or kosher salt, not regular iodized table salt. Table salt contains anti-caking agents and iodine that can react with the vegetables and brine, leading to a cloudy liquid and an off-flavor in your pickles. Kosher salt or pickling salt dissolves cleanly and maintains clarity.
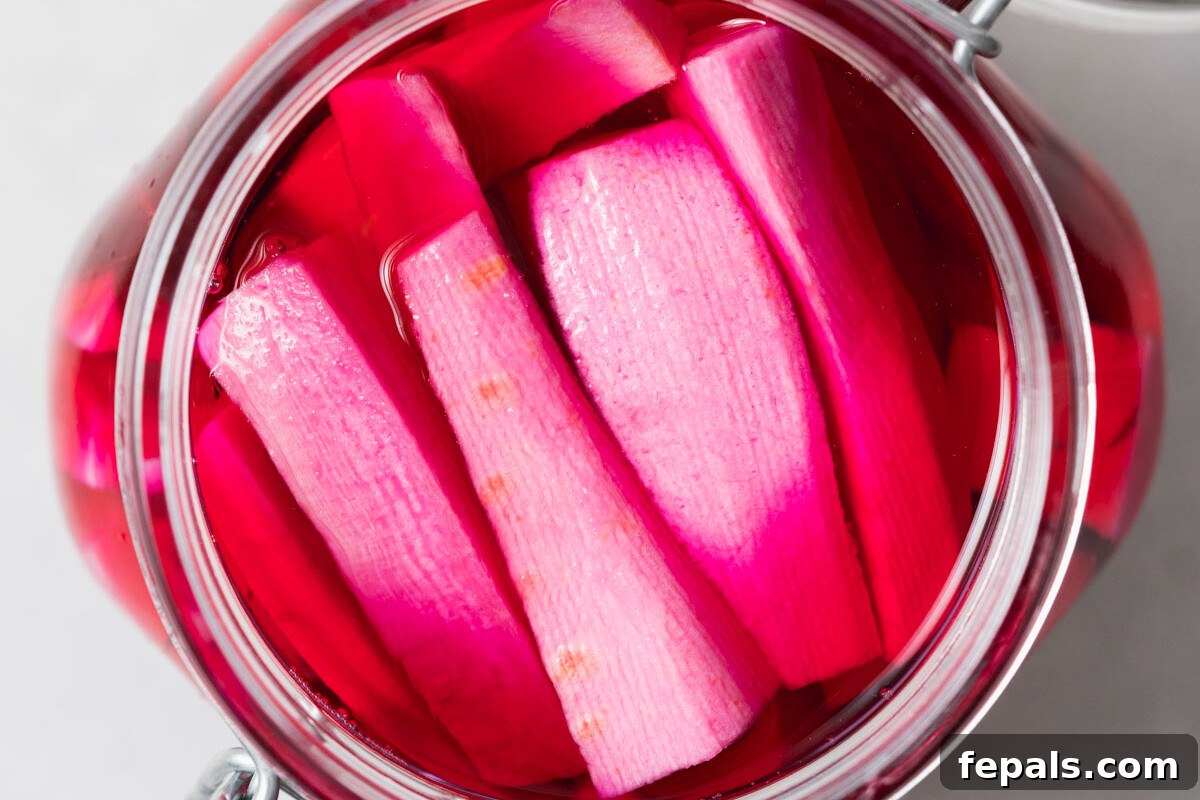
- Don’t Skip the Beets for Color: For that signature, beautiful pop of pink color, it’s essential to include the beet pieces. The beets naturally release their pigment into the brine, which is then absorbed by the turnips, giving them their lovely rosy hue. If you omit the beet, your turnips will remain white, which is fine for flavor but less traditional visually.
- Experiment with Fresh Herbs: While bay leaves provide a classic touch, feel free to get creative with other fresh herbs. Sprigs of fresh dill, a few thyme branches, or even a rosemary sprig can add an extra layer of complexity and aroma to your pickling brine, making your pickles truly unique.
- Add a Kick of Heat: If you enjoy a bit of spice, enhance your pickled turnips with some chili peppers. Add a slice or two of jalapeño, serrano, or even a small dried chili pepper to each jar along with the turnips. The heat will gradually infuse into the pickles, offering a delightful fiery note.
- For Maximum Crunch: To achieve extra crunchy pickled turnips, let the pickling brine cool down completely to room temperature before pouring it over the turnips in the jars. Pouring overly hot brine directly onto the vegetables can slightly cook them, leading to a softer texture. A cool brine helps maintain their crispness.
- Storage Duration: These are refrigerator pickles, designed for short-term storage. When properly stored in the refrigerator, your homemade pickled turnips will retain their best flavor and crunch for up to 4 weeks. After this period, while still safe to eat, their texture and vibrant flavor may begin to diminish.
- Sterilize Your Jars: Always start with clean, sterilized jars and lids. This helps prevent unwanted bacterial growth and ensures your pickles are safe for consumption and last longer. You can sterilize jars by boiling them for 10 minutes or running them through a hot dishwasher cycle.
- Pack Tightly but Gently: When filling the jars, pack the turnip batons tightly but avoid crushing them. A snug fit helps keep the turnips submerged in the brine, which is crucial for even pickling and prevents them from floating to the top and being exposed to air.
How to Store Your Pickled Turnips for Longevity
Proper storage is key to enjoying your delicious homemade pickled turnips for as long as possible. Here are comprehensive tips for storing them:
- Refrigerate for Short-Term Storage: After the initial 5-day pickling period at room temperature, it is crucial to transfer your sealed jars of pickled turnips to the refrigerator. Once chilled, they will keep exceptionally well for up to 4 weeks. Refrigeration slows down the fermentation process, preserving their crisp texture and vibrant flavor. Always ensure the turnips remain submerged in the brine, as exposure to air can lead to spoilage.
- Freezing is Not Recommended: While freezing is a common preservation method, it is generally not recommended for pickled turnips. The freezing and thawing process significantly alters the cellular structure of the turnips, resulting in a mushy and unappealing texture. The satisfying crunch that makes pickled turnips so enjoyable would be lost.
- Canning for Long-Term Storage (Optional Method): If you wish to store your pickled turnips for a period longer than 4 weeks, the traditional canning method is your best option. This method ensures shelf-stability for up to a year, though for the best flavor and crunch, aim to consume them within 6 months. Here’s how to do it:
- Sterilize Jars and Lids: Thoroughly wash and sterilize your canning jars and lids in boiling water or a hot dishwasher cycle. Keep them hot until ready to fill.
- Pack Jars with Turnips and Beets: Tightly pack the turnip batons and beet pieces into the hot, sterilized jars, leaving about ½ inch of headspace at the top. Add a bay leaf to each jar if desired.
- Prepare Hot Brine: Make your pickling brine as instructed in the recipe, ensuring it comes to a full boil.
- Fill Jars with Hot Brine: Carefully pour the boiling hot brine over the vegetables in the jars, making sure they are completely covered by the liquid and maintaining the ½-inch headspace. Remove any air bubbles with a clean utensil.
- Seal and Process: Wipe the rims of the jars clean, place the hot lids on top, and secure with screw bands until fingertip tight. Place the filled jars into a boiling water canner, ensuring they are covered by at least 1-2 inches of water. Bring the water to a rolling boil and process pint jars for 10 minutes (adjust for altitude if necessary).
- Cool and Store: After processing, carefully remove the jars from the canner and place them on a clean towel on your counter, allowing them to cool undisturbed for 24 hours. You should hear the lids “ping” as they seal. Check seals by pressing on the center of the lid; if it doesn’t flex, it’s sealed. Store properly sealed jars in a cool, dark place (like a pantry) for up to 1 year. Once a jar is opened, refrigerate it and consume within 2-3 weeks.
Common Questions About Pickled Turnips
Can I add other root vegetables to the jars?
Absolutely! Pickling is a fantastic way to preserve a variety of vegetables. Feel free to experiment by adding thinly sliced radishes, carrot sticks, or even small florets of cauliflower to the jars alongside your turnips and beets. Just be mindful not to pack the jars too tightly, as the brine needs space to circulate and thoroughly pickle all the vegetables. Ensure all added vegetables are fully submerged in the brine.
What if I don’t have white distilled vinegar?
While white distilled vinegar is recommended for its clean flavor and consistent acidity, you can substitute it with apple cider vinegar in a pinch. Apple cider vinegar will impart a slightly fruitier and milder flavor profile. However, it’s best to avoid very strong or flavored vinegars, such as malt vinegar or balsamic vinegar, as their robust flavors can easily overpower the delicate taste of the turnips.
Do I need to can or process the jars?
For this specific refrigerator pickled turnips recipe, there is no need to fully can or process the jars in a boiling water bath, unless you intend for long-term, shelf-stable storage (as described in the “How to Store” section). These are designed as refrigerator pickles, meaning they are stored in the fridge from day five onward. The acidity of the brine, combined with refrigeration, is sufficient to preserve them safely for up to 4 weeks.
Do I have to add beet root?
No, adding beet root is entirely optional. The primary purpose of the beet is to give the turnips their signature, attractive pink color. If you don’t mind that your pickled turnips remain white, or if you simply don’t have a beet on hand, you can certainly omit it from the recipe without affecting the flavor or pickling process. The turnips will still be delicious and crunchy.
Explore More Culinary Guides and How-To Recipes
If you enjoyed learning how to make these delightful pickled turnips, you might be interested in expanding your culinary skills with some of our other helpful guides:
- How to Caramelize Onions to Perfection
- How to Make Irresistible Homemade BBQ Sauce
- How to Cook Fluffy and Flavorful Couscous Every Time
Your feedback is incredibly valuable to us! If you try this pickled turnips recipe and love it, please leave us a comment below and don’t forget to rate it. Sharing your culinary creations with friends and family on social media also helps us reach more food lovers!
FOLLOW me on FACEBOOK | INSTAGRAM | PINTEREST | TWITTER for all of my latest blog posts, delicious recipes, and healthy living tips.
Homemade Pickled Turnips
Rena Awada
Beginner
16
10 mins
5 mins
15 mins (plus 5 days pickling)
Pin Recipe
Print Recipe
This simple recipe for homemade pickled turnips delivers crunchy, vibrant pink pickles perfect for pairing with shawarma, falafel, or enjoying as a refreshing snack. Easy to make and bursting with tangy flavor, they’re a Middle Eastern staple you’ll love.
Ingredients
- 1 cup white distilled vinegar
- 3 cups water
- 3 tablespoons kosher salt (not table salt)
- 2 tablespoons sugar (white or cane sugar)
- 2 bay leaves
- 2 pounds turnips (about 2 large turnips, peeled and cut into ½-inch thick batons)
- 1 small beet (peeled and diced for color)
Instructions
-
Prepare the Brine: Place a medium saucepan over medium-high heat. Add the 3 cups water, 1 cup white distilled vinegar, 3 tablespoons kosher salt, and 2 tablespoons sugar. Stir well until all the salt and sugar are fully dissolved, and the mixture just begins to boil (about 2-3 minutes).

-
Cool the Brine: Remove the saucepan from the heat and allow the brine to cool for a few minutes. For crispier pickles, let it cool completely to room temperature.
-
Fill the Jars: Wash and sterilize two 32-ounce mason jars. Evenly divide the 2 pounds turnips (cut into thick batons) and 1 small diced beet into the mason jars. Add one bay leaf to each jar.
-
Pour the Brine: Carefully pour the warm or cooled vinegar brine into the mason jars until the turnips and beets are completely covered by the liquid. Leave about ½ inch of headspace at the top of each jar.
-
Initial Pickling (Room Temperature): Allow the jars to cool completely to room temperature (about 1 hour) before securing the lids tightly. Let the sealed jars sit in a cool, dry area at room temperature for 5 full days to allow the pickling process to develop the flavors and characteristic pink color.
-
Refrigerate and Enjoy: After the 5-day room temperature pickling period, transfer the jars to the refrigerator. For the best flavor, allow them to refrigerate for at least 24 hours before serving. Your delicious homemade pickled turnips are now ready to enjoy!
Notes
- Jars: This recipe yields enough pickled turnips to fill two 32-oz mason jars with tight-fitting lids. Ensure they are clean and sterilized.
- Storage: After the initial 5-7 days of pickling at room temperature, always store your sealed pickled turnips in the fridge. They will keep for up to 4 weeks.
- Beets for Color: The beet root is essential for achieving the beautiful pink color. If you omit it, the turnips will remain white, which is perfectly fine for flavor.
- Brine Preparation Shortcut: You can skip the stovetop boiling in step one if you use very hot tap water. Simply add salt, sugar, and vinegar into 3 cups of hot water and stir vigorously until everything is dissolved, then proceed to step 2.
- Salt Type: Always use kosher salt or pickling salt. Regular table salt contains anti-caking agents and iodine that can make your brine cloudy and alter the taste.
- Shelf Life: Once refrigerated, the pickled turnips in their brine will last up to 4 weeks for optimal freshness and crunch.
Nutrition
Carbohydrates: 6g
Protein: 1g
Fat: 0.1g
Saturated Fat: 0.01g
Polyunsaturated Fat: 0.03g
Monounsaturated Fat: 0.004g
Sodium: 1352mg
Potassium: 124mg
Fiber: 1g
Sugar: 4g
Vitamin A: 2IU
Vitamin C: 12mg
Calcium: 21mg
Iron: 0.2mg
Nutrition information is automatically calculated and should only be used as an approximation.
Additional Info
Condiment, Appetizer, Side Dish
Middle Eastern, Lebanese, Mediterranean
Tried this recipe?
Mention @healthyfitnessmeals or tag #healthyfitnessmeals!