
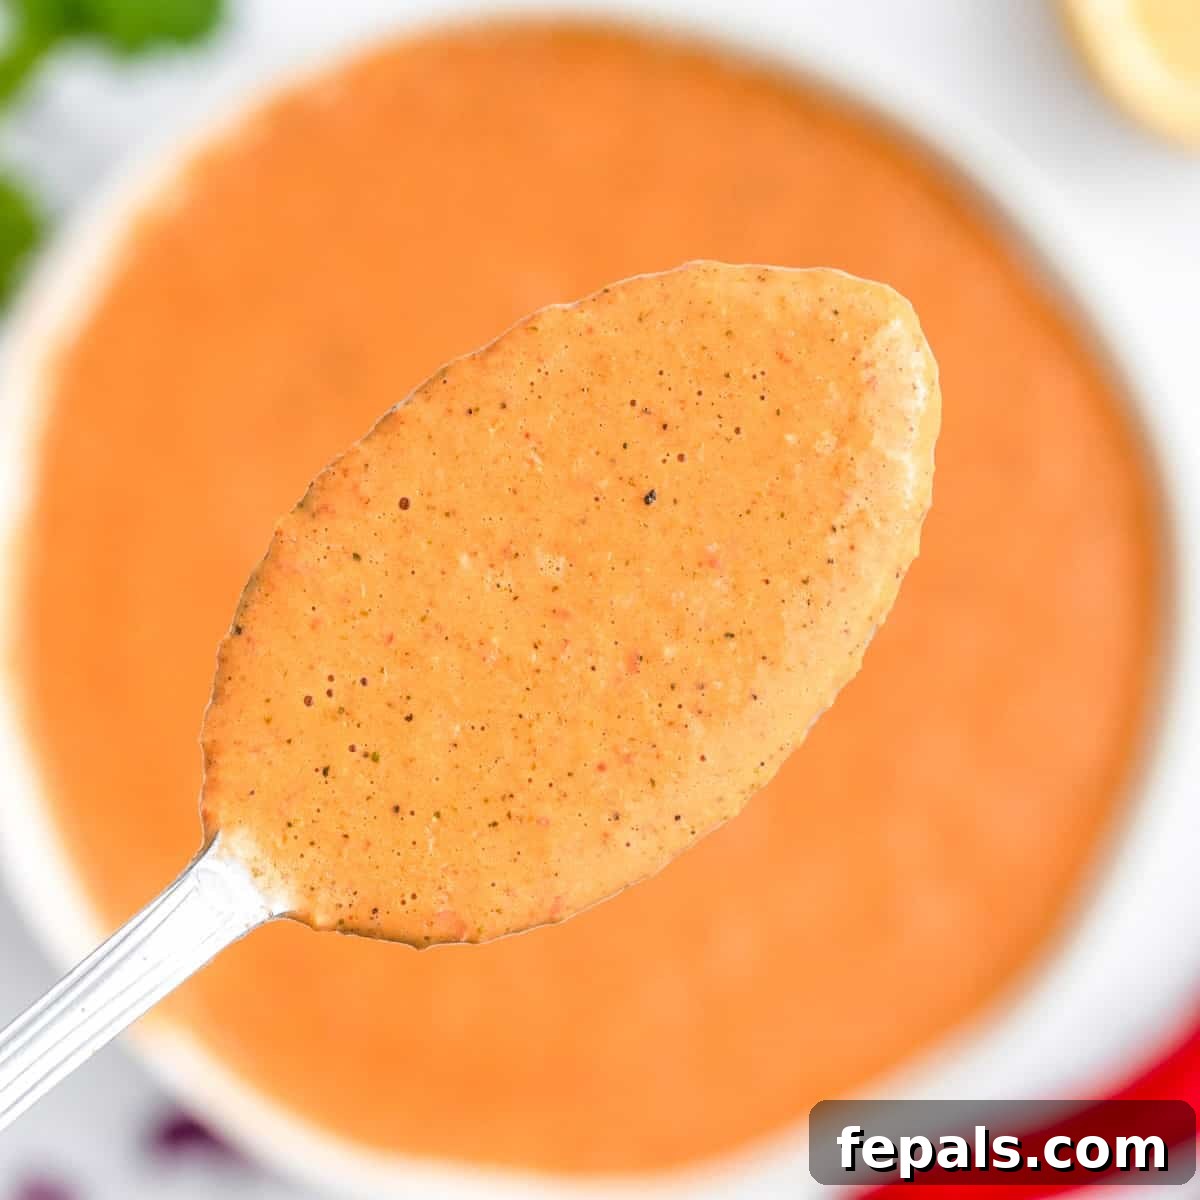
Unleash a vibrant burst of flavor with this incredible homemade Peri Peri Sauce. Forget bland meals; this fiery, tangy, and aromatic condiment is designed to elevate everything it touches. Crafted with a blend of fresh roasted peppers, pungent garlic, zesty lemon juice, and an exquisite mix of warm, earthy spices, this sauce transforms into a silky-smooth elixir perfect for grilling, marinating, dipping, or drizzling over your favorite dishes. Whether you’re a fan of succulent chicken, tender seafood, crisp roasted vegetables, or simply seeking a bold new marinade, this Peri Peri Sauce is your secret weapon for unforgettable taste.
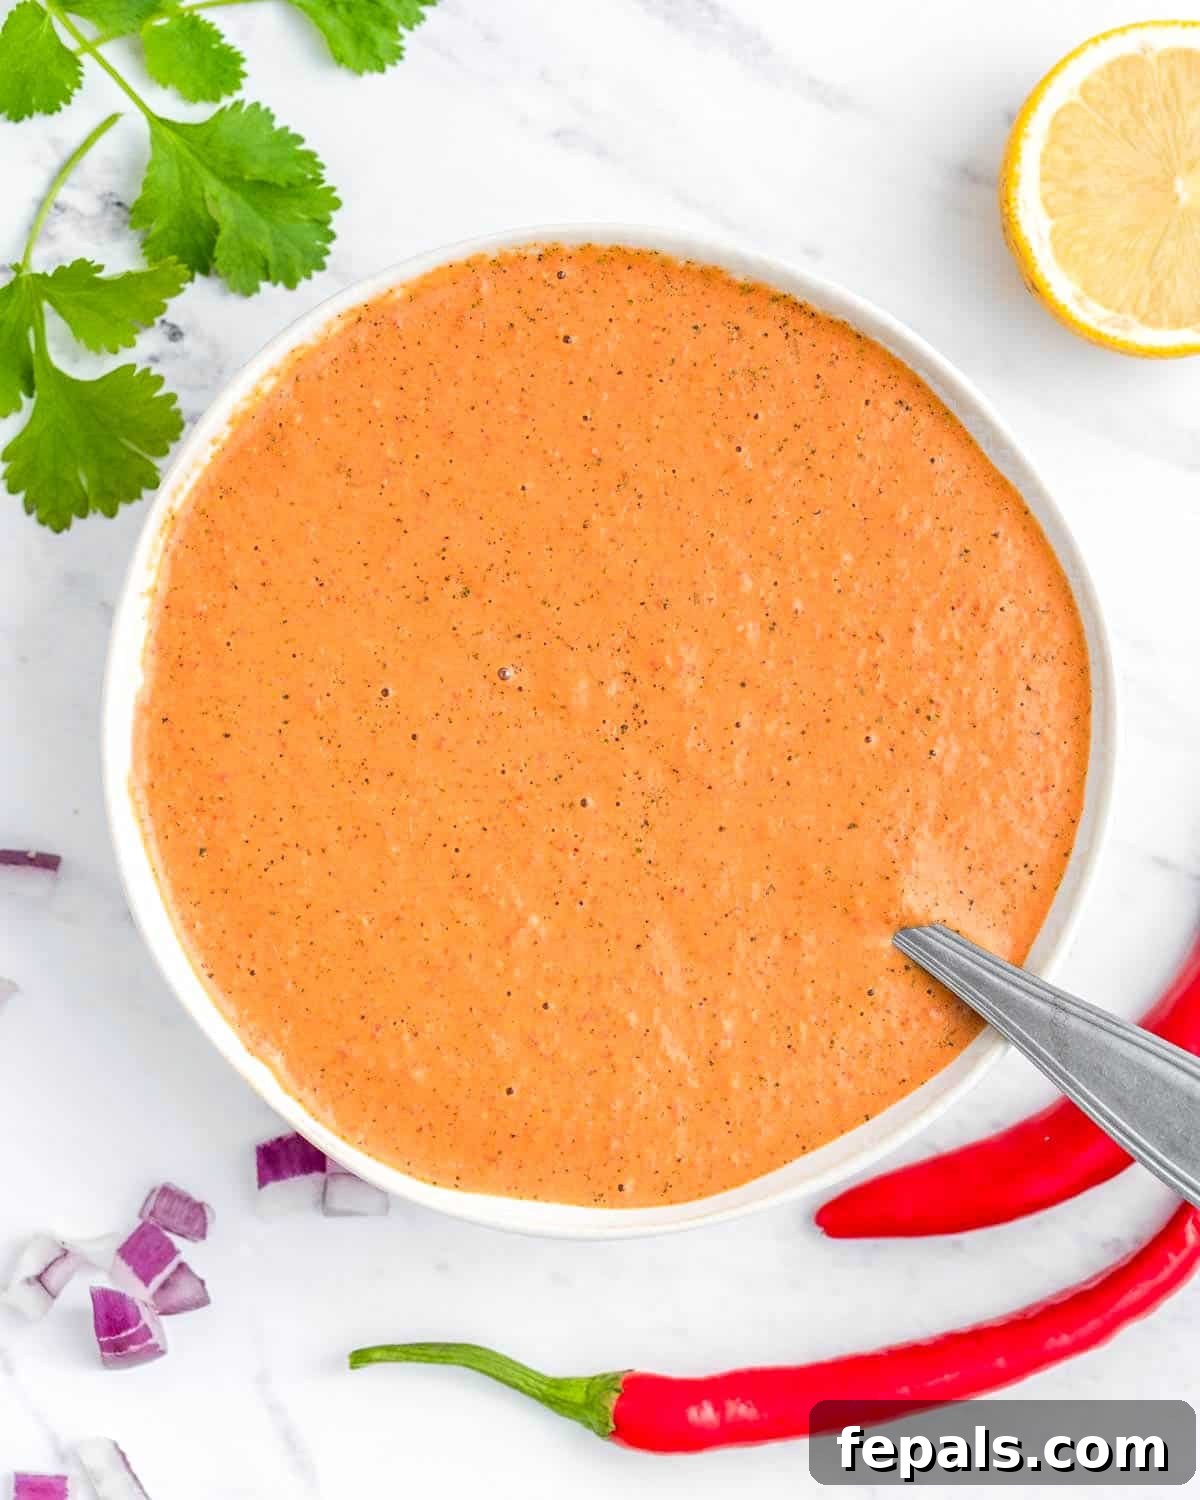
There’s an undeniable magic in preparing sauces from scratch, and this Peri Peri recipe exemplifies it. When you make your own, you gain complete command over the ingredients, ensuring freshness, quality, and the perfect balance of heat to suit your palate. Peri Peri sauce, derived from the Swahili word for “pepper-pepper,” is more than just a condiment; it’s a flavor powerhouse capable of instantly infusing any meal with an exciting depth. I always keep a batch chilled in the fridge, ready to transform ordinary grilled chicken into a gourmet delight, add a fiery kick to roasted vegetables, or serve as an impromptu, irresistible dipping sauce for anything from crispy fries to crunchy crudités. Once you experience the effortless preparation and superior taste of this homemade version, you’ll likely bid farewell to store-bought alternatives forever.
For more delicious sauce inspiration, you might also enjoy my Creamy Peri Peri Chicken Skillet for a complete meal, or explore the fresh, herbaceous notes of my Easy Homemade Chimichurri Sauce.
Why You’ll Love This Homemade Peri Peri Sauce Recipe
This homemade Peri Peri Sauce isn’t just another condiment; it’s a culinary game-changer that promises exceptional flavor and convenience. Here are just a few reasons why this recipe will become a staple in your kitchen:
- Effortless Preparation: In just about 10 minutes, you can whip up a batch of this flavorful sauce. Its simplicity means less time in the kitchen and more time enjoying delicious food. No complicated cooking steps, just blend and enjoy!
- Superior Flavor & Freshness: Unlike many store-bought options that rely on preservatives and artificial flavors, this recipe uses only fresh, wholesome ingredients. This ensures a sauce that bursts with natural taste and aroma, truly enhancing your meals.
- Customizable Heat Level: You’re the chef here! Whether you prefer a gentle warmth or a blazing inferno, you have full control over the spice. Easily adjust the amount and type of chilies to match your personal preference, making it perfect for everyone at your table.
- Incredibly Versatile: This isn’t a one-trick pony. Our Peri Peri Sauce is wonderfully adaptable, serving beautifully as a vibrant marinade for meats and vegetables, a zesty dipping sauce, a flavorful dressing, or a vibrant finishing drizzle over countless dishes.
- Excellent for Meal Prep: This sauce stores beautifully in the refrigerator for up to a week, or even longer in the freezer. Prepare a larger batch and always have this bold flavor ready to go, making weeknight meals a breeze.
- Made with Simple, Wholesome Ingredients: You won’t find any obscure items on this ingredient list. All components are readily available at your local grocery store, making this a practical and accessible recipe for any home cook.
Recipe Overview
Key Ingredients for Authentic Peri Peri Flavor
Crafting the perfect homemade Peri Peri Sauce hinges on selecting fresh, high-quality ingredients. Each component plays a crucial role in building the sauce’s distinctive bold, spicy, and tangy profile. Below, you’ll find a detailed breakdown of what you’ll need, along with tips for selection and potential substitutes. For precise measurements, please refer to the comprehensive recipe card further down this page.
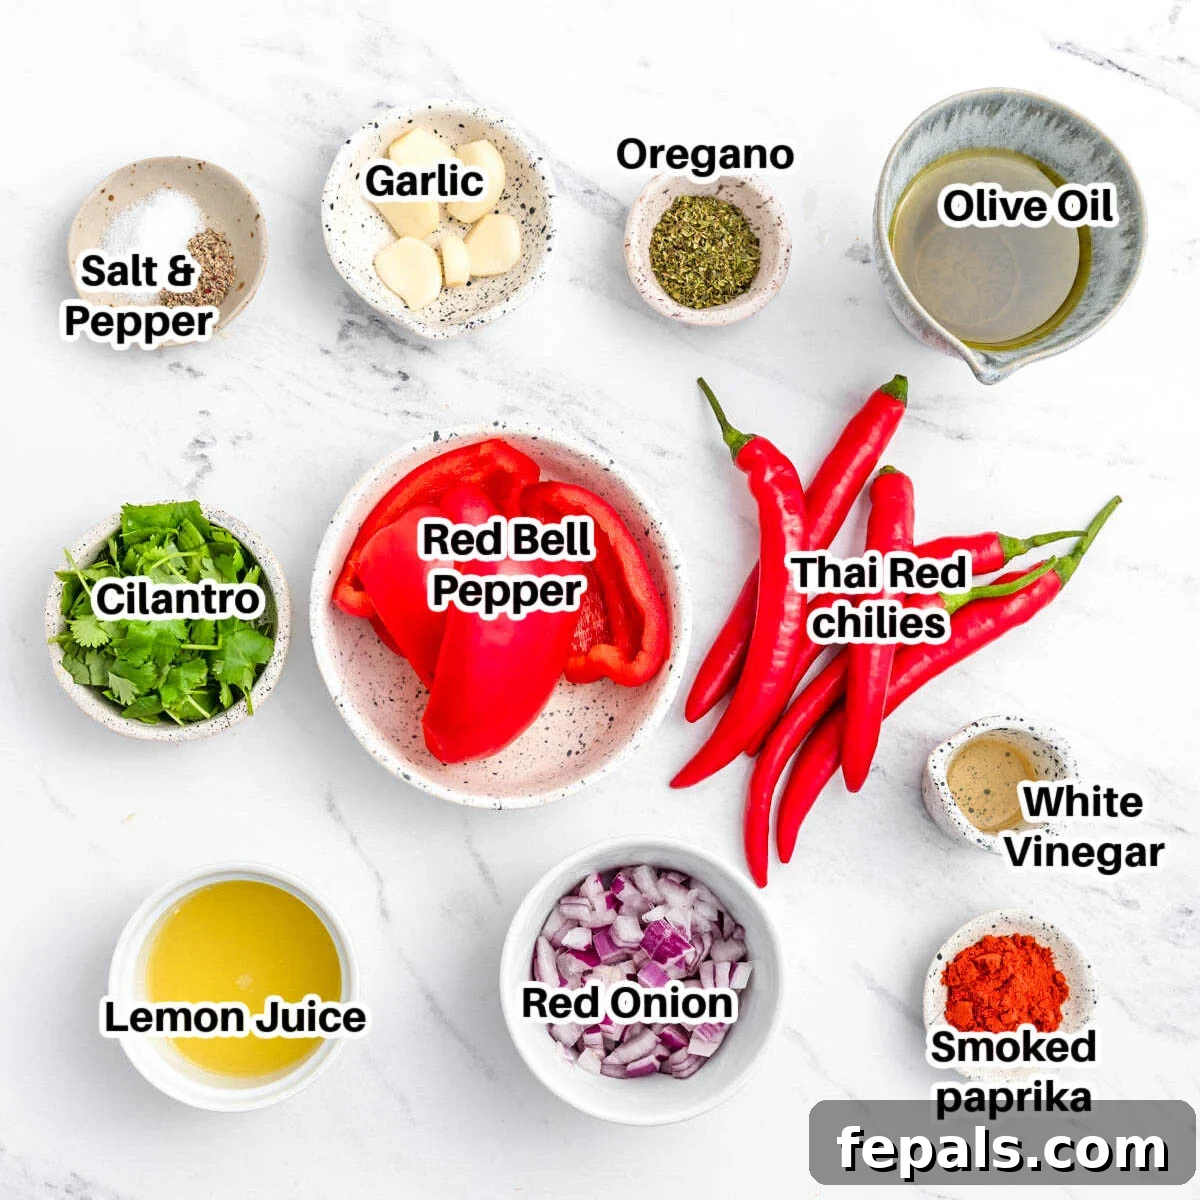
- Red Bell Pepper: Choose a small, firm bell pepper with a vibrant, unblemished red color. This ingredient is essential for providing a natural sweetness that beautifully balances the fiery kick from the chilies without overpowering the sauce. It also contributes to the sauce’s rich color and smooth texture.
- Thai Red Chilies (African Bird’s Eye Peppers): These are the stars of true Peri Peri Sauce, delivering its signature fiery heat and complex flavor. If authentic African Bird’s Eye peppers are challenging to locate, fresh cayenne peppers or serrano chilies make excellent and readily available substitutes, offering a very similar heat profile. For a milder sauce, you can remove some of the seeds and membranes, or use fewer chilies. For an even bolder experience, consider adding a habanero or scotch bonnet pepper, but be warned – they pack a serious punch!
- Garlic Cloves: Fresh, whole garlic cloves are absolutely non-negotiable for this recipe. They provide an intense, sharp, and aromatic depth that simply cannot be replicated by pre-minced garlic from a jar. The fresh cloves blend seamlessly into the sauce, infusing it with their pungent, savory essence.
- Red Onion: One small, roughly chopped red onion adds a crucial bite, a subtle sweetness, and a bright, slightly piquant note to the sauce. Its vibrant color also contributes to the overall appeal. If red onion isn’t available, a yellow onion can be used in a pinch, though the flavor will be slightly less sharp.
- Seasonings:
- Smoked Paprika: This spice is vital for imparting a deep, smoky undertone that elevates the sauce beyond just heat. It adds a layer of rich complexity. Do not substitute with regular paprika if you want that smoky depth.
- Dried Oregano: Provides an herbaceous, slightly earthy flavor that complements the other ingredients beautifully. You can use fresh oregano if you have it; approximately 3 tablespoons of fresh would be equivalent to 1 tablespoon dried.
- Salt and Black Pepper: Essential for seasoning and enhancing all the other flavors, making them pop. Adjust these to your personal taste preference.
- Fresh Cilantro: Chopped, including the tender stems, fresh cilantro cuts through the richness and heat of the sauce with its bright, citrusy, and slightly peppery notes. It adds an incredible layer of freshness. If you’re not a fan of cilantro, flat-leaf parsley is an excellent alternative, offering a clean, herbaceous flavor.
- Olive Oil: Extra-virgin olive oil is preferred for its robust, fruity richness and ability to create a wonderfully smooth texture when blended. It also helps to emulsify the sauce. If you prefer a lighter, more neutral-tasting oil, avocado oil or even a good quality sunflower oil can be used.
- White Wine Vinegar: This ingredient is key to providing that bright, clean acidity that defines authentic Peri Peri Sauce, adding a necessary tang and cutting through the richness. Apple cider vinegar or red wine vinegar can also step in with a similar, though slightly different, acidic profile if white wine vinegar is unavailable.
- Lemon: Freshly juiced from one whole lemon, this adds a lively zing and a burst of citrus brightness that truly awakens all the flavors in the sauce. Always opt for fresh lemon juice over bottled for the best taste.
How to Make This Bold & Fiery Peri Peri Sauce
Making this homemade Peri Peri Sauce is surprisingly simple and incredibly rewarding. Follow these straightforward steps to achieve perfect results every time, ensuring a smooth, flavorful, and perfectly balanced sauce.
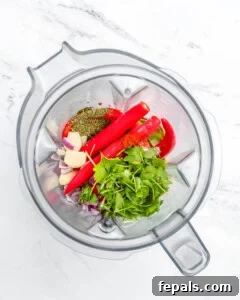
Step 1: Prepare and Combine All Ingredients in Your Blender or Food Processor: Begin by gathering all your fresh ingredients. Roughly chop the small red bell pepper and red onion to help them blend more easily. Peel the garlic cloves. Then, carefully add all the Peri Peri sauce ingredients into the pitcher of a high-speed blender or the bowl of a food processor. This includes: 1 small red bell pepper, 4-8 Thai red chilies (adjust according to your desired heat level), 6 whole garlic cloves, 1 small red onion, 2 teaspoons of rich smoked paprika, ⅓ cup of fresh cilantro (stems and all), 1 tablespoon of dried oregano (or 3 tablespoons fresh), ½ cup of good quality olive oil, 1 tablespoon of white wine vinegar, the freshly squeezed juice of 1 whole lemon, and finally, salt and black pepper to taste (start with about 1 teaspoon of each). Ensure all ingredients are nestled in, ready for blending.
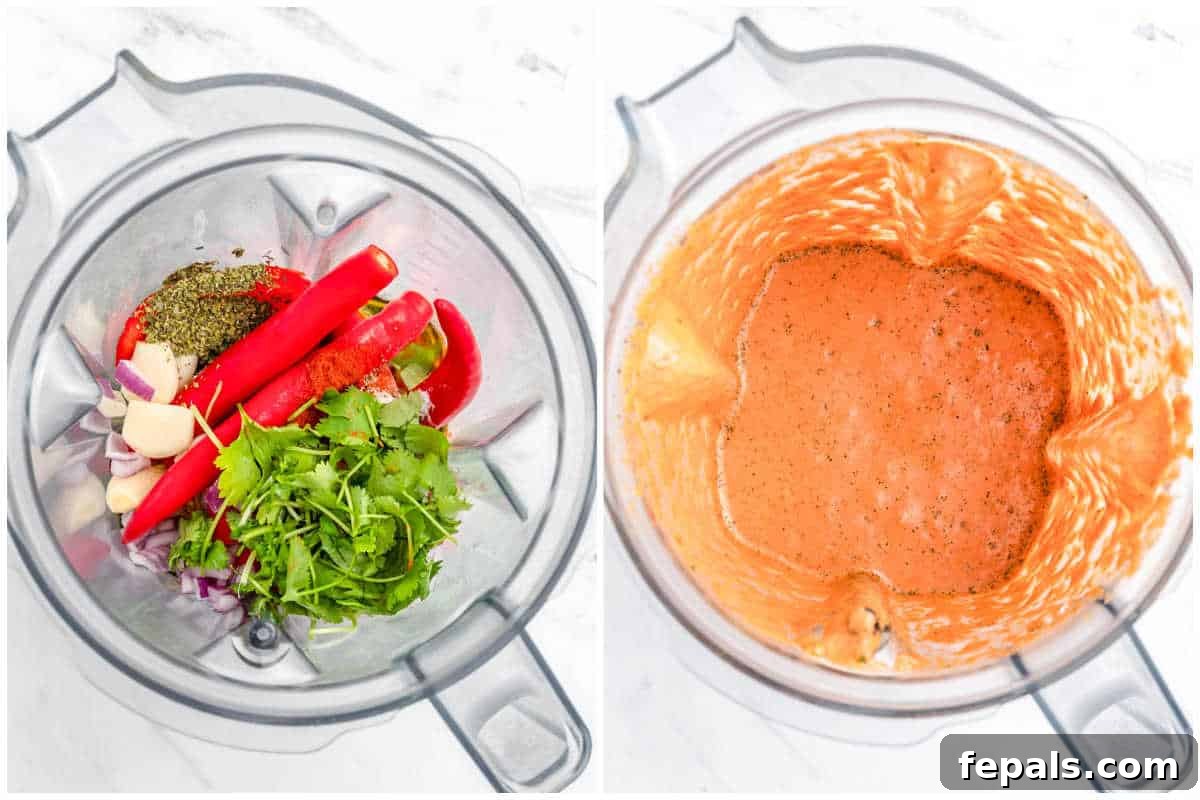
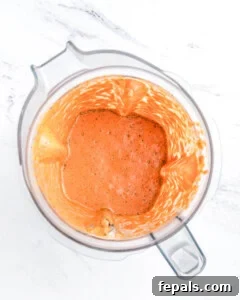
Step 2: Blend Until Perfectly Smooth: Secure the lid on your blender or food processor. Begin blending on a low speed, gradually increasing to high speed. Process the ingredients continuously until they are completely smooth and uniform in consistency. This typically takes about 1-2 minutes, depending on the power of your appliance. You want a beautifully emulsified sauce without any large chunks of vegetables or herbs. If needed, pause and scrape down the sides of the blender or food processor to ensure everything is thoroughly incorporated.
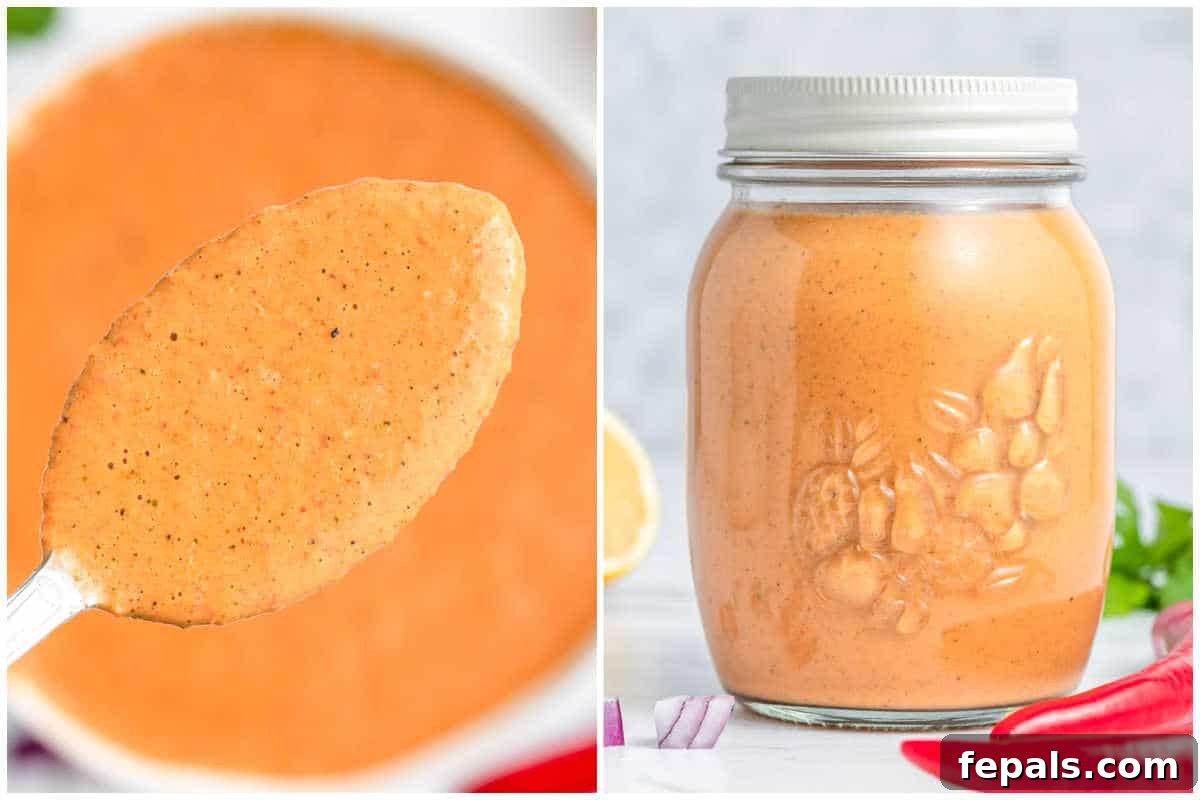
Step 3: Taste and Fine-Tune the Flavor: Once blended, carefully taste a small spoonful of the sauce. This is your opportunity to adjust the seasoning to your liking. Does it need more salt to bring out the flavors? A touch more lemon juice for extra brightness? Perhaps a pinch more chili if you’re craving more heat? Add small amounts, pulse a few times to incorporate, and taste again until you reach your desired flavor profile. Remember, flavors can intensify as the sauce rests.
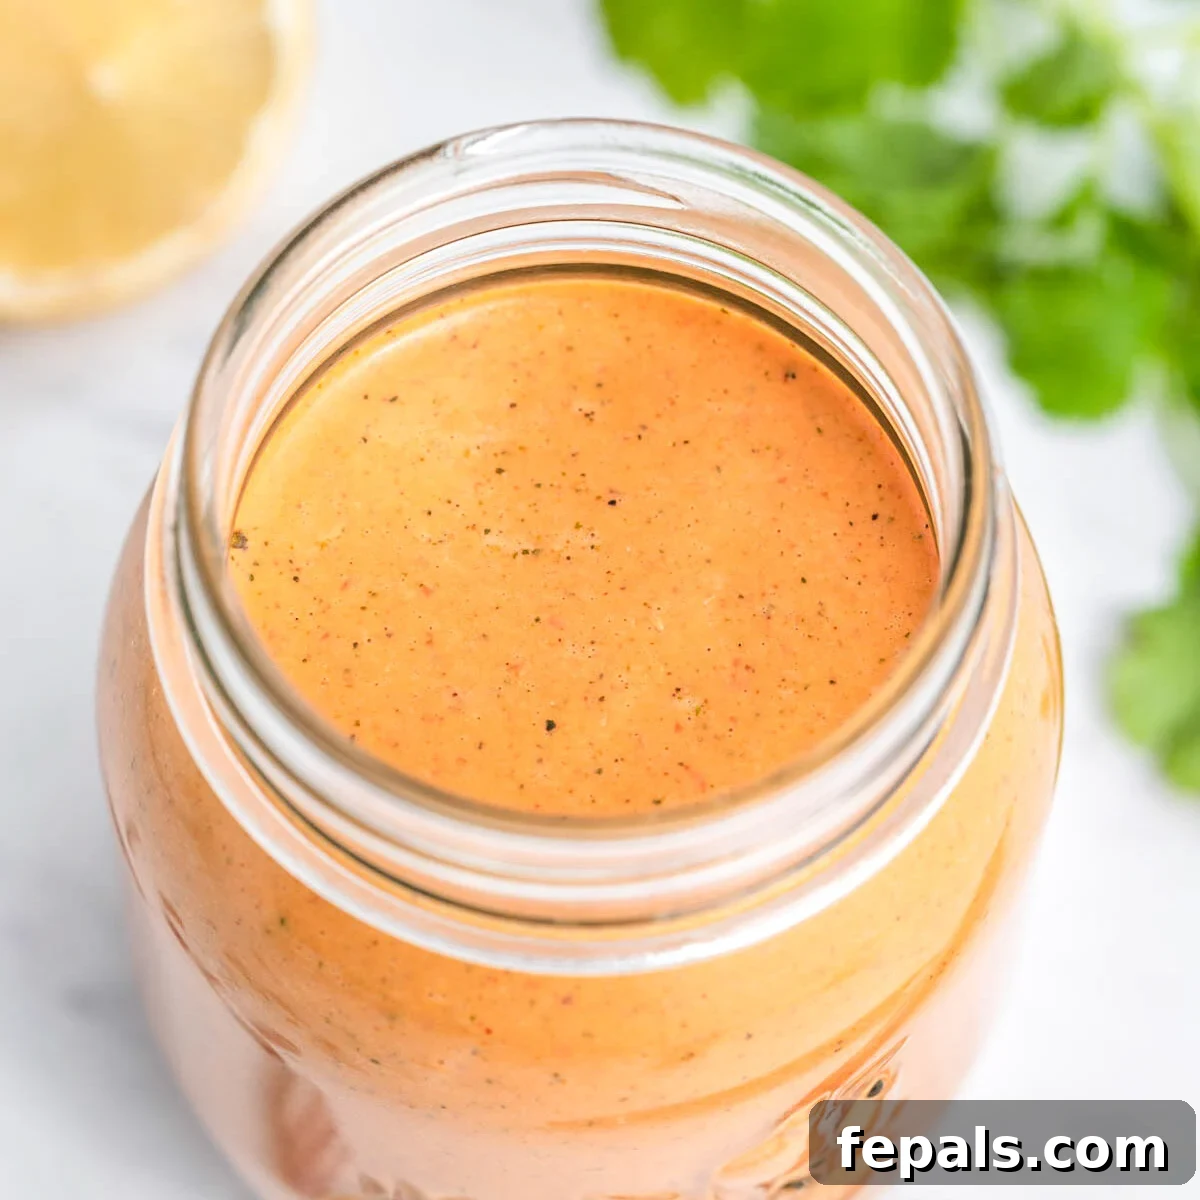
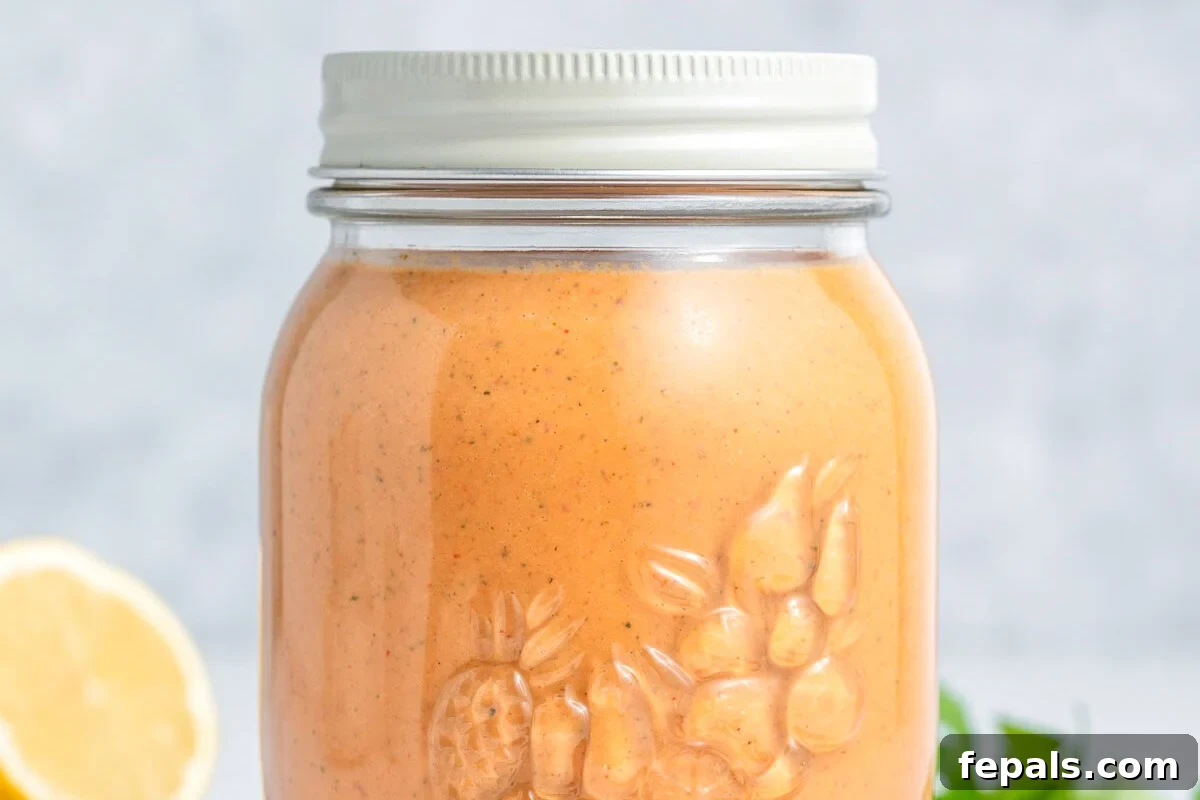
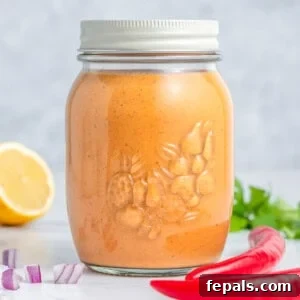
Step 4: Store for Optimal Flavor and Future Use: Once you’re satisfied with the taste, transfer your freshly made Peri Peri Sauce into a clean, airtight glass jar or container. Refrigerate it for at least an hour before serving to allow the flavors to fully meld and deepen. The sauce will keep well in the refrigerator for up to 1 week. Stir well before each use, as some natural separation may occur.
Creative Variations & Expert Tips for Your Peri Peri Sauce
This homemade Peri Peri Sauce is fantastic as is, but it also offers a canvas for creativity. Here are some variations to explore and expert tips to ensure your sauce is always at its best:
- For Grilling Perfection: Brush this vibrant sauce on grilled meat, poultry, or vegetables during the last few minutes of cooking. This technique allows the sauce to caramelize slightly, developing beautiful char marks and infusing the food with its incredible flavor without burning off all the deliciousness. It’s particularly amazing on chicken thighs and shrimp.
- Mastering the Heat Level: If you prefer a milder sauce, begin with just 4 chilies. Taste and gradually add more if you desire more heat. Remember, you can always add more spice, but it’s harder to remove it! For a super-mild version, you can deseed the chilies entirely before blending. For extreme heat, leave all the seeds and membranes in, or add a spicier chili like habanero.
- Enhance Flavor with Resting: For the most profound and integrated flavors, allow the sauce to chill overnight in the fridge. This resting period gives the smoky paprika, pungent garlic, and fiery chilies time to meld and harmonize, resulting in a richer, more complex taste profile the next day.
- Adjusting Consistency for Different Uses: If you plan to use the sauce as a thinner dressing or a comprehensive marinade, you can easily thin it out. Add an extra splash of lemon juice for added brightness, or a tablespoon or two of water or chicken broth until it reaches your desired drizzly consistency.
- Batch Cooking & Freezing: Don’t just make a single batch! Consider doubling or even tripling the recipe. This sauce freezes exceptionally well for up to three months. Freeze it in small jars, freezer-safe containers, or even ice cube trays for convenient, single-portion servings. This ensures you’re never without a supply of this flavor-packed condiment. Thaw overnight in the fridge when ready to use.
- Instant Creamy Dip Transformation: For a quick and irresistible creamy dip, simply mix a spoonful or two of your Peri Peri Sauce into plain Greek yogurt, mayonnaise, or sour cream. This creates a cooling yet spicy accompaniment that vanishes rapidly with crispy fries, tortilla chips, vegetable sticks, or even as a spread for sandwiches.
- Add a Touch of Sweetness: For a slightly sweeter, more complex flavor profile, you can roast the red bell pepper and onion before blending. Alternatively, add a teaspoon of honey or maple syrup to the blend for a subtle touch of sweetness that balances the heat.
- Herbal Twist: Experiment with different fresh herbs. While cilantro is classic, a combination of cilantro and parsley, or even a touch of fresh mint, can add an interesting dimension to the sauce.
Common Questions About Peri Peri Sauce
Curious about Peri Peri Sauce? Here are answers to some of the most frequently asked questions to help you master this delicious condiment:
This recipe is deeply inspired by the vibrant, fiery essence of traditional Mozambican and Portuguese Peri Peri sauces. While it may not adhere 100% to every single traditional method or ingredient (as variations exist even within those cultures), it absolutely captures the bold, spicy, and tangy soul of the original using fresh, readily available ingredients that deliver an incredibly delicious result. Think of it as a homage that brings that incredible flavor into your home kitchen with ease.
While fresh chilies generally provide the brightest and most vibrant kick, using dried African Bird’s Eye or arbol chilies is definitely an option and still yields a delicious sauce. To use them, simply soak the dried chilies in hot water for about 20-30 minutes until they become plump and rehydrated. Drain them thoroughly before adding them to your blender as usual. Using dried chilies will often lend a deeper, slightly smokier, and more concentrated flavor to your sauce, creating a wonderful complexity.
The defining chili for authentic Peri Peri Sauce is the African Bird’s Eye chili, also known as piri-piri. These small, potent peppers are native to Africa and are known for their intense heat and unique flavor. However, due to varying availability, many recipes and commercial sauces also utilize other red chili peppers such as Thai chilies, Fresno peppers, or even a blend of chilies to achieve the desired heat and flavor profile. Our recipe uses Thai red chilies as a fantastic and accessible alternative.
Peri Peri Sauce is renowned for its spicy kick, but its heat level can vary significantly. The spiciness primarily depends on two key factors: the type of chili peppers used and the quantity of those peppers. African Bird’s Eye chilies are naturally quite hot, but even then, how many you include will dictate the final intensity. Furthermore, removing the seeds and membranes from the chilies before blending can substantially reduce the heat, as these parts contain most of the capsaicin. This homemade recipe allows you complete control to adjust the spice to your exact preference.
Yes, absolutely! This homemade Peri Peri Sauce recipe is naturally both vegan and gluten-free. It uses only plant-based ingredients – fresh vegetables, herbs, spices, olive oil, vinegar, and lemon juice. It contains no animal products or gluten-containing ingredients, making it a fantastic option for those with dietary restrictions or preferences.
There is no difference! “Peri Peri” and “Piri Piri” are simply alternative spellings for the same pepper and the same style of sauce. Both terms refer to the African Bird’s Eye chili and the vibrant, spicy condiment made from it. The spelling often varies by region and preference, but they refer to the same delicious culinary tradition.
Storage Tips for Optimal Freshness & Flavor
To ensure your homemade Peri Peri Sauce stays fresh, flavorful, and ready for use whenever a craving strikes, proper storage is key. Follow these tips for both short-term refrigeration and long-term freezing:
- Refrigerator Storage: Transfer your freshly blended Peri Peri Sauce to a clean, airtight glass jar or container. It will keep beautifully in the refrigerator for up to 7 days. To help slow down any potential color fading on the surface, you can press a piece of plastic wrap directly onto the surface of the sauce before sealing the lid. Always give the sauce a good stir before each use, as some natural oil separation is common.
- Freezer Storage: This sauce freezes exceptionally well, making it perfect for meal prepping. For easy portioning, freeze the sauce in small, freezer-safe containers or even in ice cube trays. Once frozen solid in trays, you can pop out the cubes and transfer them to a freezer bag for more compact storage. It will maintain its quality in the freezer for up to 3 months. When you’re ready to use it, simply thaw the desired amount in the refrigerator overnight. You might notice a little oil separation upon thawing, but a quick stir or a 5-second re-blend in your food processor will bring it back to its smooth, emulsified consistency.
- Signs of Spoilage: Always trust your senses. If the sauce develops an off-odor, changes significantly in color, or shows any signs of mold, it’s best to discard it.
Endless Culinary Possibilities: How to Use Peri Peri Sauce
The beauty of this homemade Peri Peri Sauce lies in its incredible versatility. Its bold, spicy, and tangy profile makes it a fantastic addition to almost any meal. Prepare to discover new depths of flavor in your everyday cooking with these suggestions:
- Dynamic Dipping Sauce: Serve it alongside crispy sweet potato fries, golden potato wedges, crunchy tortilla chips, or even fresh vegetable sticks for an instant flavor boost.
- Perfect Marinade for Protein: This sauce is an exceptional marinade for grilling, baking, or pan-frying.
- Grilled or Baked Chicken: Marinate chicken breasts, thighs, wings, or even a whole spatchcocked chicken for at least 30 minutes (or up to 4 hours) to infuse it with incredible flavor and tenderize the meat. Then grill, bake, or roast to perfection.
- Shrimp or Fish: A quick 15-20 minute marinade for shrimp, salmon, cod, or white fish fillets will add a zesty, spicy dimension that’s truly irresistible.
- Tofu or Tempeh: For a delicious plant-based option, marinate cubed tofu or tempeh before grilling, baking, or pan-frying until golden and crispy.
- Roasted Vegetable Enhancer: Toss your favorite vegetables – broccoli, cauliflower, Brussels sprouts, carrots, or sweet potatoes – with a generous amount of Peri Peri Sauce before roasting. The sauce caramelizes beautifully, adding a spicy, smoky char that’s simply divine.
- Elevate Rice and Grain Bowls: Drizzle a spoonful over your grain bowls, rice bowls, or even quinoa salads for an instant burst of flavor that ties all the ingredients together.
- Spice Up Sandwiches and Wraps: Use it as a vibrant spread in sandwiches, wraps, or even burgers to add a tangy, spicy kick that will awaken your taste buds. Mix it with mayonnaise for a creamy Peri Peri aioli.
- Flavorful Addition to Soups and Stews: Stir a teaspoon or two into your favorite lentil soup, chicken stew, or vegetable chili during the last few minutes of cooking for an unexpected layer of warmth and complexity.
- Breakfast Booster: A dash of Peri Peri Sauce on scrambled eggs, a breakfast burrito, or even avocado toast can be a fantastic way to start your day with a kick!
Discover More Homemade Sauce Recipes
If you’ve enjoyed creating this Peri Peri masterpiece, you’re sure to love these other homemade sauce recipes that bring fresh flavors and healthy options to your table:
- How To Make Homemade Buffalo Sauce
- Honey Mustard Dipping Sauce
- Homemade Big Mac Sauce
- In-N-Out Sauce
- Homemade BBQ Sauce Recipe
- Homemade Tartar Sauce Recipe
- Lebanese Garlic Sauce
- Homemade Pizza Sauce
Thank you for joining me on this culinary adventure and for trying out this incredible homemade Peri Peri Sauce recipe. Your feedback is invaluable, so if you give this recipe a try, please do leave a comment and a rating below. Happy cooking!
Homemade Peri Peri Sauce Recipe

Ingredients
- 1 small red bell pepper
- 4-8 Thai red chilies (African Bird’s Eye peppers), adjust to taste
- 6 garlic cloves
- 1 small red onion, chopped
- 2 teaspoons smoked paprika
- ⅓ cup fresh cilantro, chopped
- 1 tablespoon dried oregano, or 3 tablespoons fresh
- ½ cup olive oil
- 1 tablespoon white wine vinegar
- 1 Lemon, juiced
- Salt and black pepper to taste (approx. 1 teaspoon each)
Instructions
-
In a blender or food processor, add all the peri peri sauce ingredients: 1 small red bell pepper, 4-8 Thai red chilies (depending on desired heat), 6 garlic cloves, 1 small red onion (chopped), 2 teaspoons smoked paprika, ⅓ cup fresh cilantro (chopped), 1 tablespoon dried oregano (or fresh), ½ cup olive oil, 1 tablespoon white wine vinegar, the juice of 1 lemon, and salt and black pepper to taste.

-
Blend on high speed until everything looks completely smooth and uniform. This will typically take about 1-2 minutes. Scrape down the sides of the blender as needed to ensure all ingredients are well incorporated.
-
Taste the sauce and adjust the salt, pepper, or lemon juice if needed. Pulse a few times after adding any adjustments to mix thoroughly.
-
Transfer the sauce to a clean, airtight jar and refrigerate for at least one hour before serving to allow flavors to meld. Store for up to 1 week. Stir before each use.

Notes
- This recipe yields approximately 1 ¾ cups of sauce. A serving size is typically 2 tablespoons.
- For the best texture, blend until the sauce is super smooth. Remember to scrape down the sides of your blender or food processor as needed during blending.
- Always taste and adjust seasoning (salt, lemon, or chili) after the initial blend. The flavors will continue to develop and bloom as the sauce rests in the fridge.
- Store your homemade Peri Peri Sauce in an airtight glass jar in the refrigerator for up to 1 week. Give it a good stir before each use, especially if it’s been sitting for a while.
- This sauce freezes beautifully. Portion it into small containers or ice cube trays and freeze for up to 3 months. Thaw in the fridge overnight and stir well before serving.
- It’s normal for a slight oil separation to occur after storing or thawing. Simply give the sauce a quick stir, or re-blend for 5 seconds, to restore its smooth consistency.
Nutrition
Calories: 84 kcal
Carbohydrates: 4g
Protein: 1g
Fat: 8g
Saturated Fat: 1g
Polyunsaturated Fat: 1g
Monounsaturated Fat: 6g
Sodium: 3mg
Potassium: 93mg
Fiber: 1g
Sugar: 1g
Vitamin A: 462 IU
Vitamin C: 30mg
Calcium: 15mg
Iron: 0.5mg
Nutrition information is automatically calculated and should only be used as an approximation. Actual values may vary based on specific ingredients and preparation methods.
Additional Info
Tried this recipe?
Mention @healthyfitnessmeals or tag #healthyfitnessmeals!