
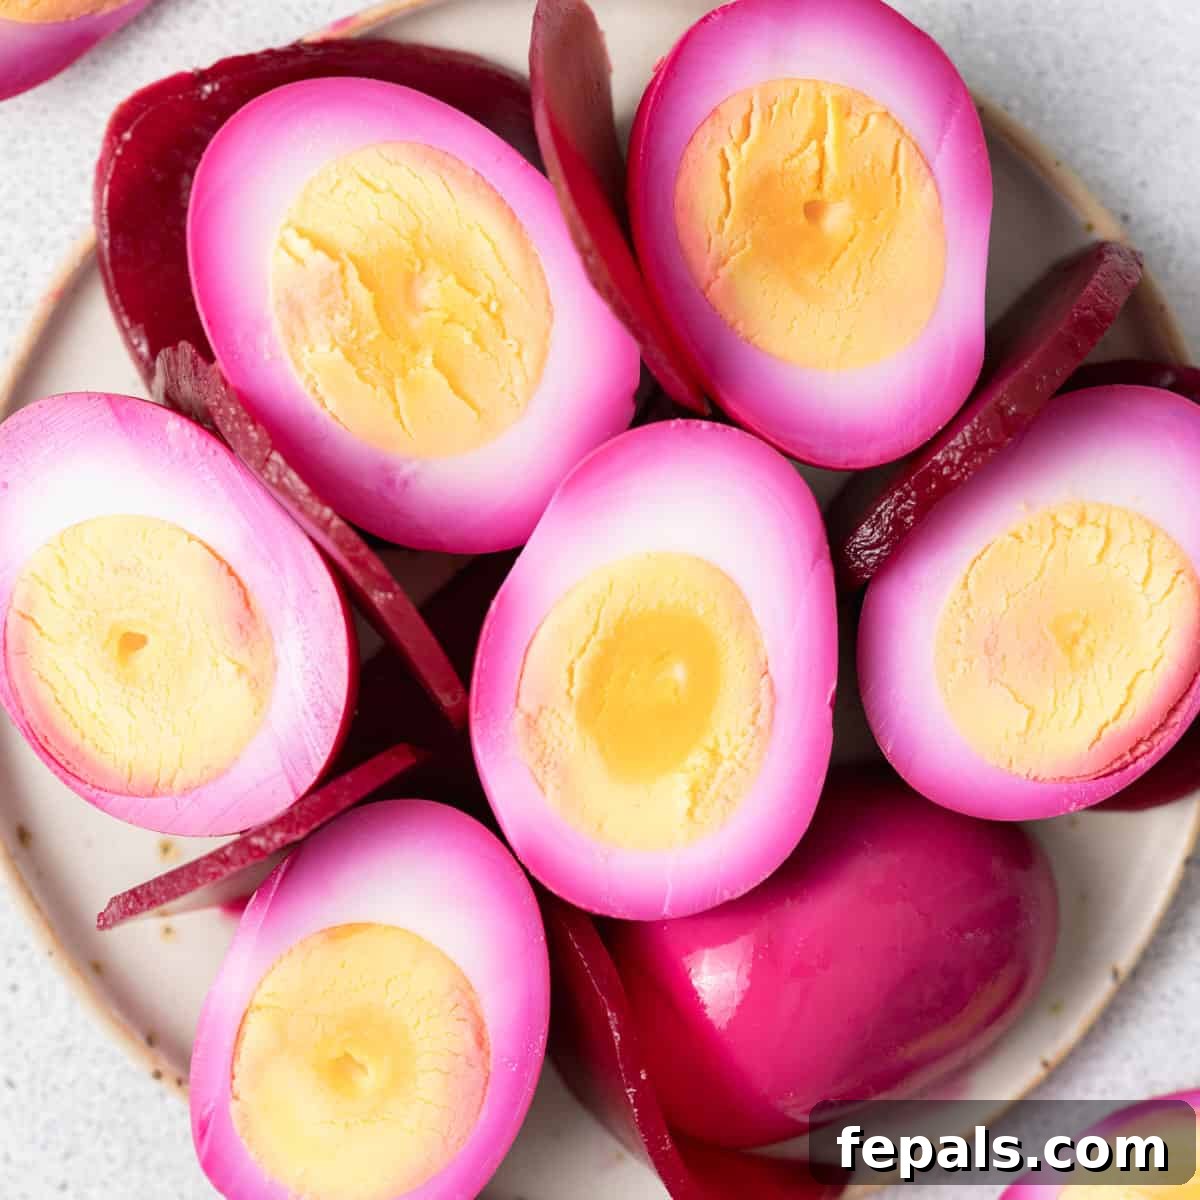
Unlock a world of vibrant color and irresistible tangy-sweet flavor with these incredible Beet Pickled Eggs. A true showstopper, they transform ordinary hard-boiled eggs into a gourmet delight, perfect for any occasion. Whether gracing your Easter brunch, adding a pop of color to spring gatherings, or serving as a delightful, protein-packed snack, these eggs are incredibly simple to prepare and promise a stunning result every single time. Their beautiful magenta hue and distinctive taste make them an instant favorite.
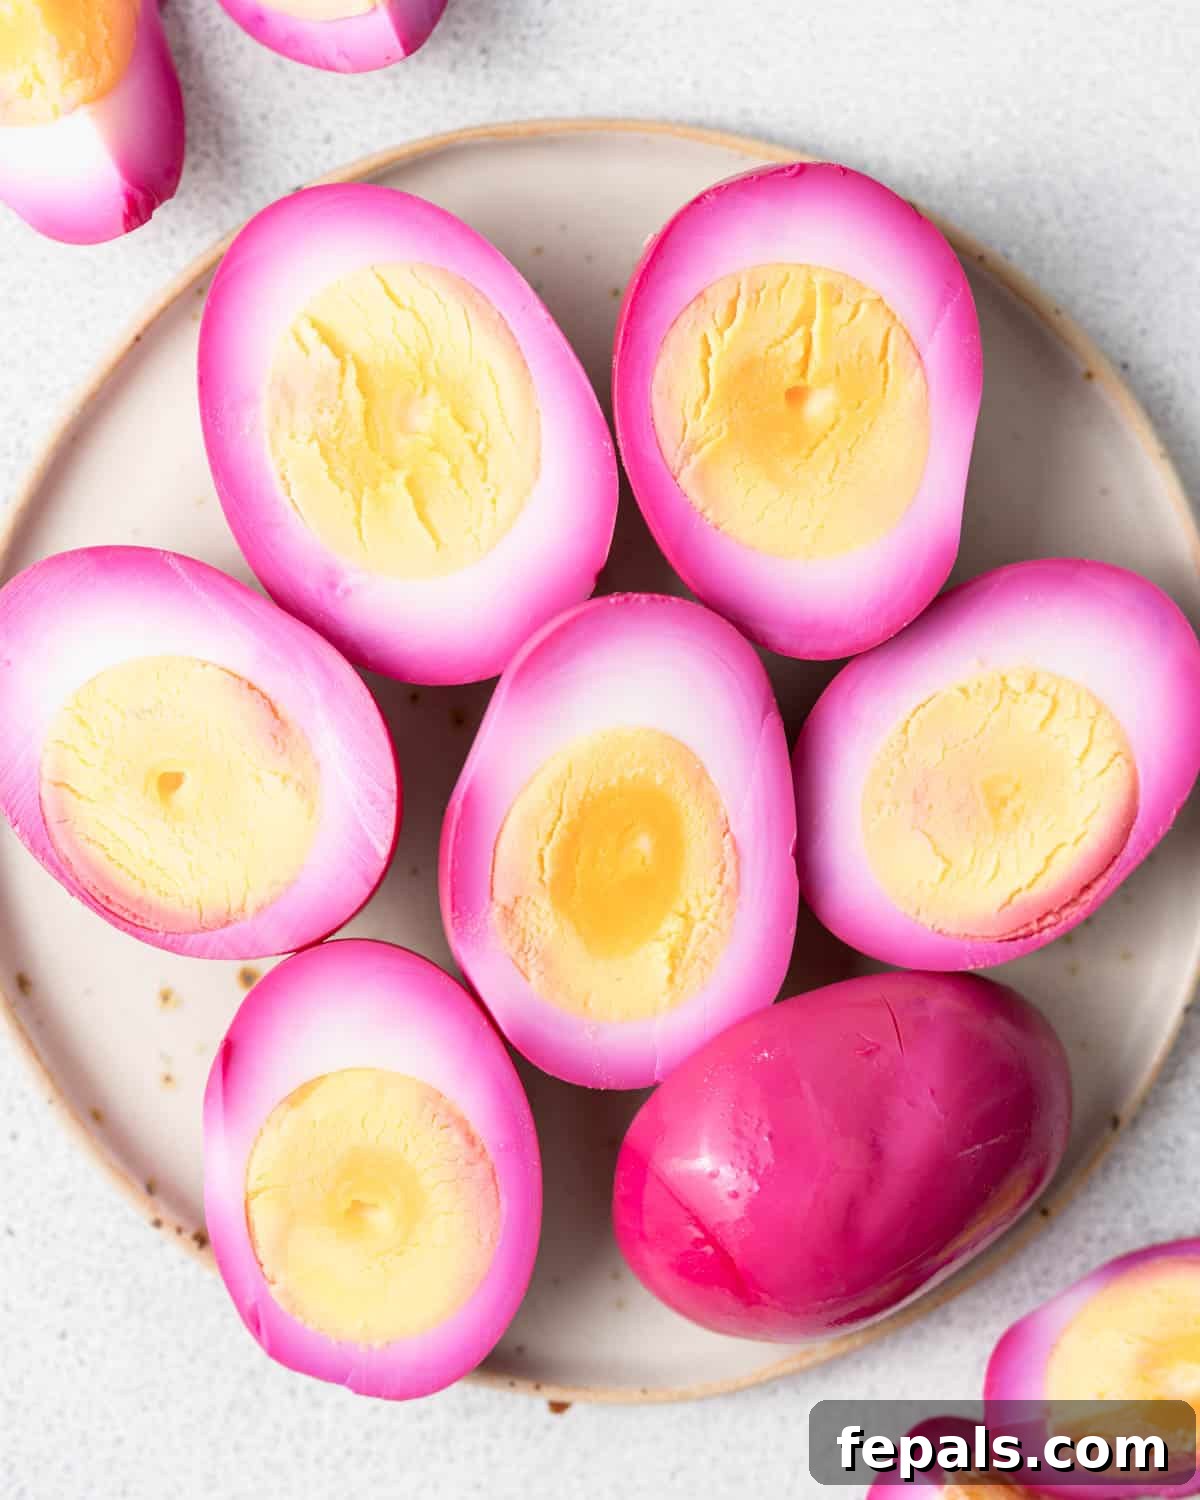
Beet-pickled eggs have long been a beloved classic in many kitchens, and for good reason. They effortlessly elevate plain hard-boiled eggs into a visually striking, flavor-packed treat. The magic happens as the sweet and tangy brine, infused with earthy beet goodness and a zesty vinegar kick, slowly permeates the eggs overnight. This process creates not only their iconic vibrant color but also a depth of flavor that’s utterly craveable. They are an absolute game-changer for quick, healthy snacks, a colorful addition to any salad, or a fun, easy way to boost your protein intake. Just imagine opening your fridge to a jar filled with these bright magenta beauties – it’s guaranteed to bring a smile to your face!
If you’re a fan of unique, healthy, and visually appealing snacks like these, you might also enjoy exploring my Keto Avocado Deviled Eggs for a creamy, low-carb option, or my Homemade Pickled Turnips for another satisfyingly tangy pickled delight.
Why You’ll Love These Beet Pickled Eggs!

These beet-pickled eggs are an absolute culinary gem, offering a perfect balance of bold, tangy, and subtly sweet flavors, all wrapped in a beautifully vibrant package. Their appeal deepens both in color and taste the longer they are allowed to sit in the brine, transforming into a rich ruby hue and an even more profound flavor profile.
They are exceptionally versatile, making them a fantastic addition to various occasions. Picture them as a standout item for Easter gatherings, a festive centerpiece for spring celebrations, or an ingenious solution for meal prep, ensuring you always have a healthy, flavorful snack on hand. For those looking to add an unexpected twist, they shine on a charcuterie board, impressing guests with their unique color and taste. I’ve personally found them to be a huge hit with my own children, especially as they grow older and become more conscious of incorporating adequate protein into their diets. Their exciting appearance and delicious taste make healthy eating fun and engaging for the whole family.
Beyond their stunning aesthetics and delicious taste, these pickled eggs are incredibly good for you. Hard-boiled eggs are a powerhouse of protein, essential vitamins (like B12 and D), and minerals. Beets contribute valuable antioxidants, fiber, and nitrates, which are beneficial for heart health. The pickling process itself also preserves the eggs naturally and can enhance the digestibility of nutrients. Plus, they are naturally gluten-free and can be easily adapted for various dietary needs.
Key Ingredients for Perfectly Pickled Eggs
Crafting these visually stunning and flavorful beet pickled eggs requires just a handful of simple ingredients. Each component plays a crucial role in achieving the desired taste and that unforgettable vibrant color. Below, you’ll find a detailed breakdown of everything you’ll need. The full measurements and a comprehensive recipe card are provided further down the page.
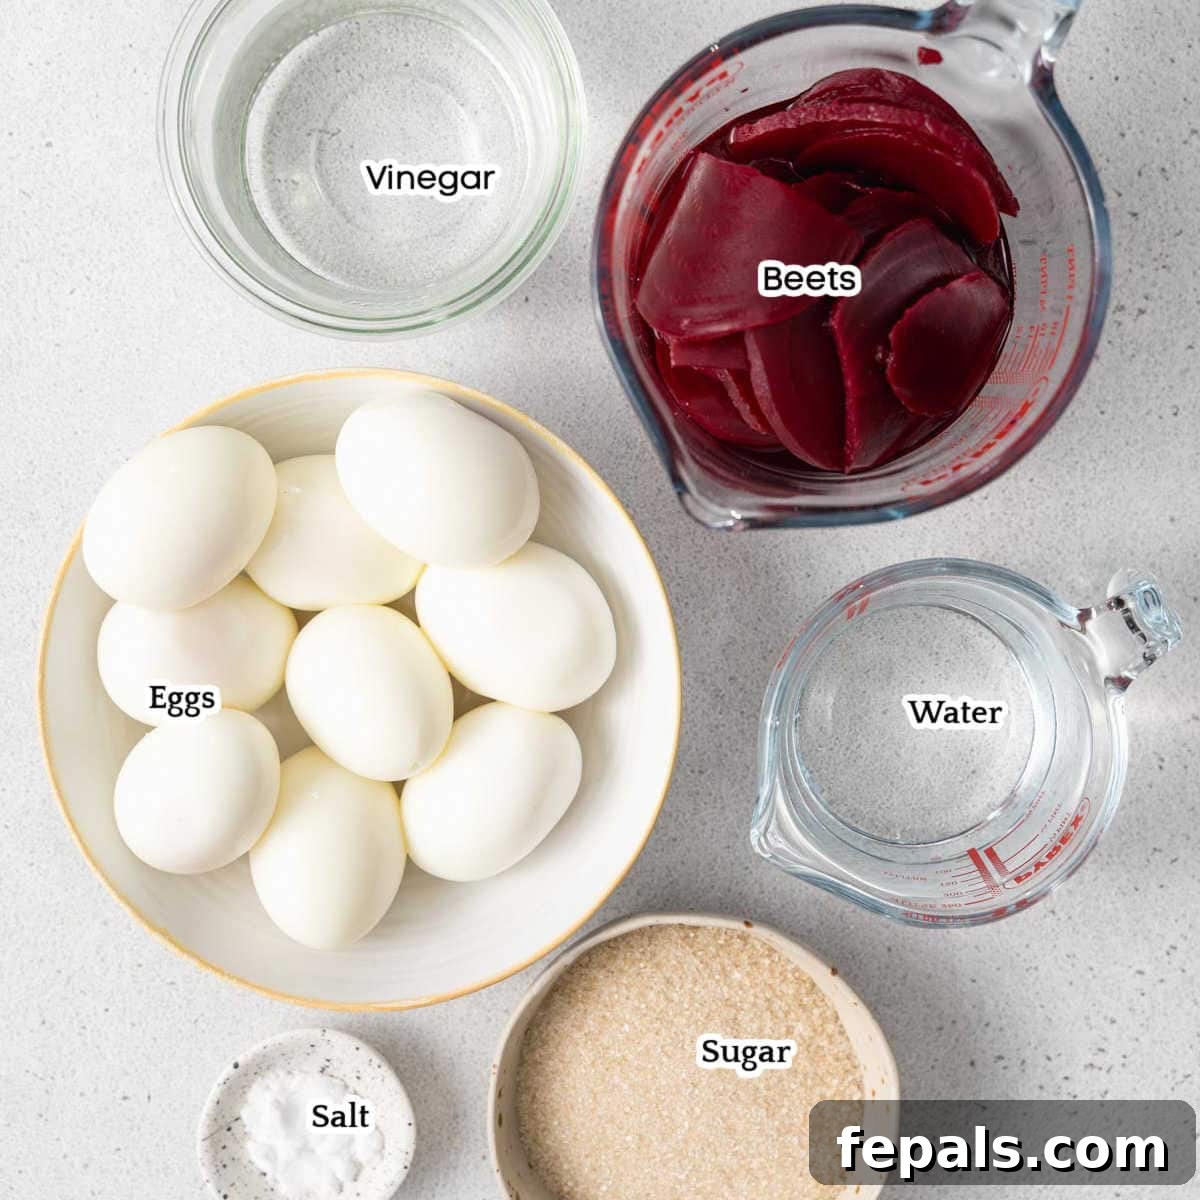
- Hard-boiled eggs: You’ll need 8 large, peeled hard-boiled eggs. The quality of your hard-boiled eggs is paramount here. For the easiest peeling and the best shape retention in the brine, always use freshly boiled and properly cooled eggs. Older eggs tend to peel more cleanly, but aim for a firm, fully cooked yolk.
- Sliced beets: One 15-ounce can of sliced beets, with all its liquid included, is essential. The vibrant liquid from the canned beets is a key component, responsible for infusing the eggs with that gorgeous magenta color. The beets themselves also add an earthy sweetness and a satisfying texture to the finished product.
- White vinegar: This provides the foundational, clean, and sharp tang that is characteristic of pickled foods. For a slightly milder, fruitier acidity that can add another layer of flavor, feel free to substitute with apple cider vinegar.
- Cane sugar: A touch of cane sugar balances the sharp acidity of the vinegar, introducing a gentle, caramel-like sweetness. This crucial balance prevents the eggs from being overwhelmingly sour. If you only have white granulated sugar on hand, it works perfectly as a 1:1 substitute.
- Kosher salt: Kosher salt is ideal for pickling because its larger crystals dissolve evenly in the brine and season the eggs without imparting an overly salty flavor. If you’re using finer table salt, remember to reduce the amount to about ¾ teaspoon to prevent over-salting, as table salt is denser.
- Water: Simple tap water is all that’s needed to dilute the brine just enough. This ensures the flavors can properly penetrate the eggs without making the overall taste too sharp or overpowering. It’s about achieving a harmonious blend of flavors.
Recipe Overview
How to Make Perfectly Vibrant Beet Pickled Eggs
Achieving these gorgeously colored and flavorful eggs is surprisingly straightforward. Follow these simple steps to prepare your Easter-ready, vibrant pickled eggs every time:
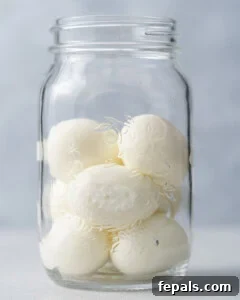
Step 1: Prepare Your Jar and Eggs. Begin by carefully placing your 8 peeled hard-boiled eggs into a clean 32-ounce Mason jar. Ensure the jar is thoroughly clean and sanitized to maintain the quality and longevity of your pickled eggs. Gently nestle the eggs to prevent breakage.
Step 2: Add the Beets. Once the eggs are in place, generously top them with the sliced beets, making sure to pour in all the accompanying liquid from the can. This beet juice is crucial for developing that beautiful magenta color and adding an earthy sweetness to the brine.
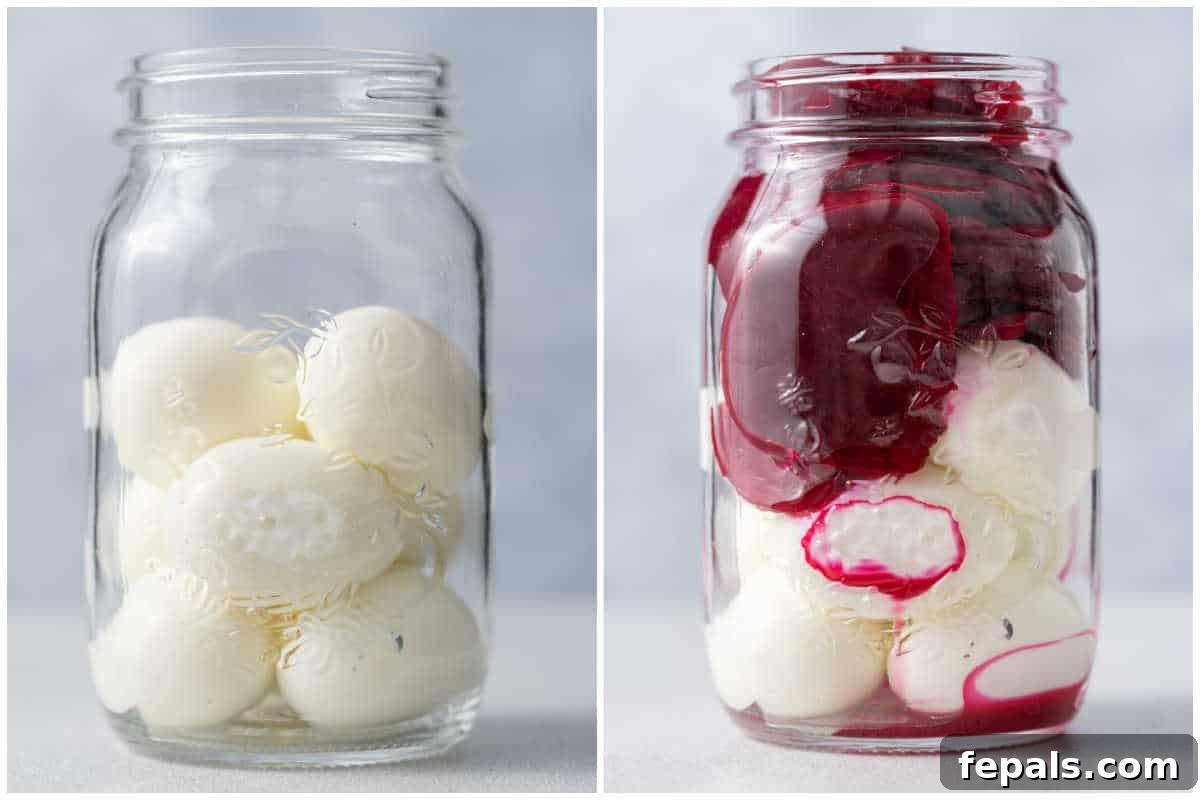
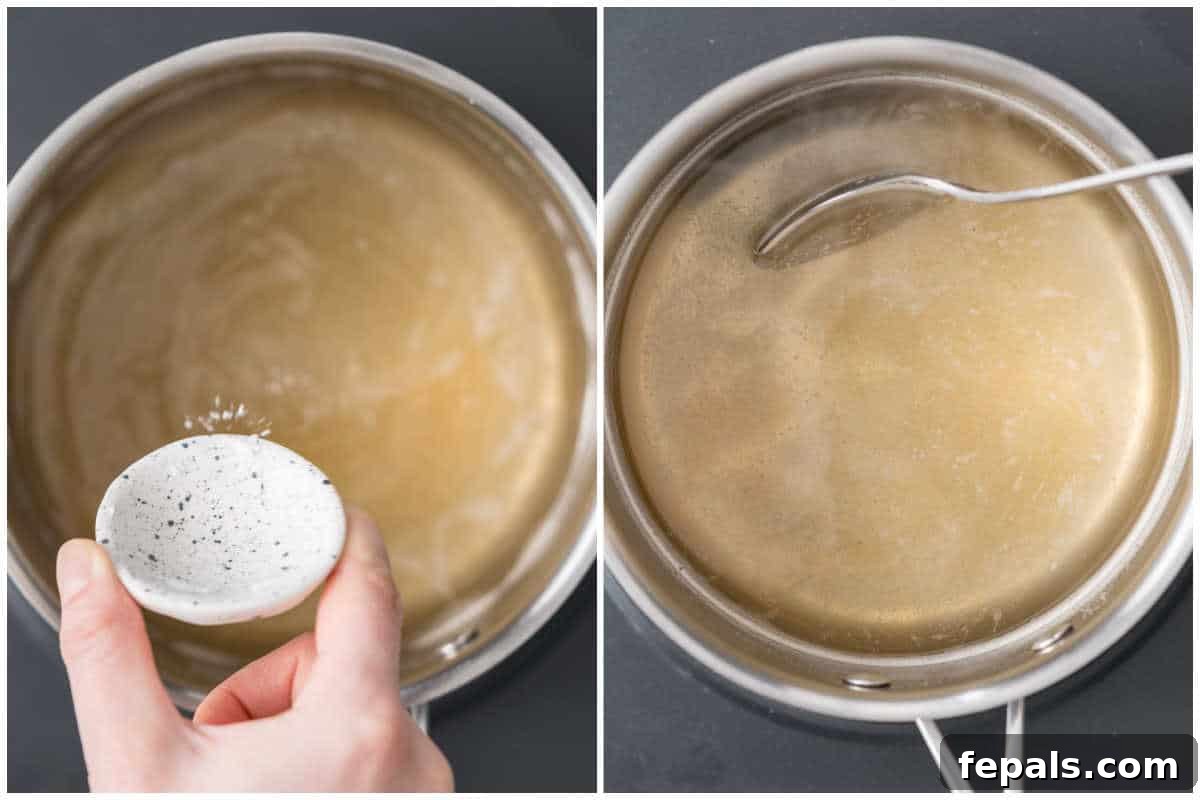
Step 3: Prepare the Brine. In a medium-sized saucepan, combine the water, cane sugar (or white sugar), white vinegar (or apple cider vinegar), and kosher salt. Place the saucepan over medium heat.
Step 4: Dissolve and Simmer the Brine. Stir the mixture continuously until all the sugar and salt have completely dissolved. Bring this brine mixture to a gentle boil, then reduce the heat to a simmer and let it cook for 2-3 minutes. This ensures all ingredients are fully incorporated and the brine is clear and ready.
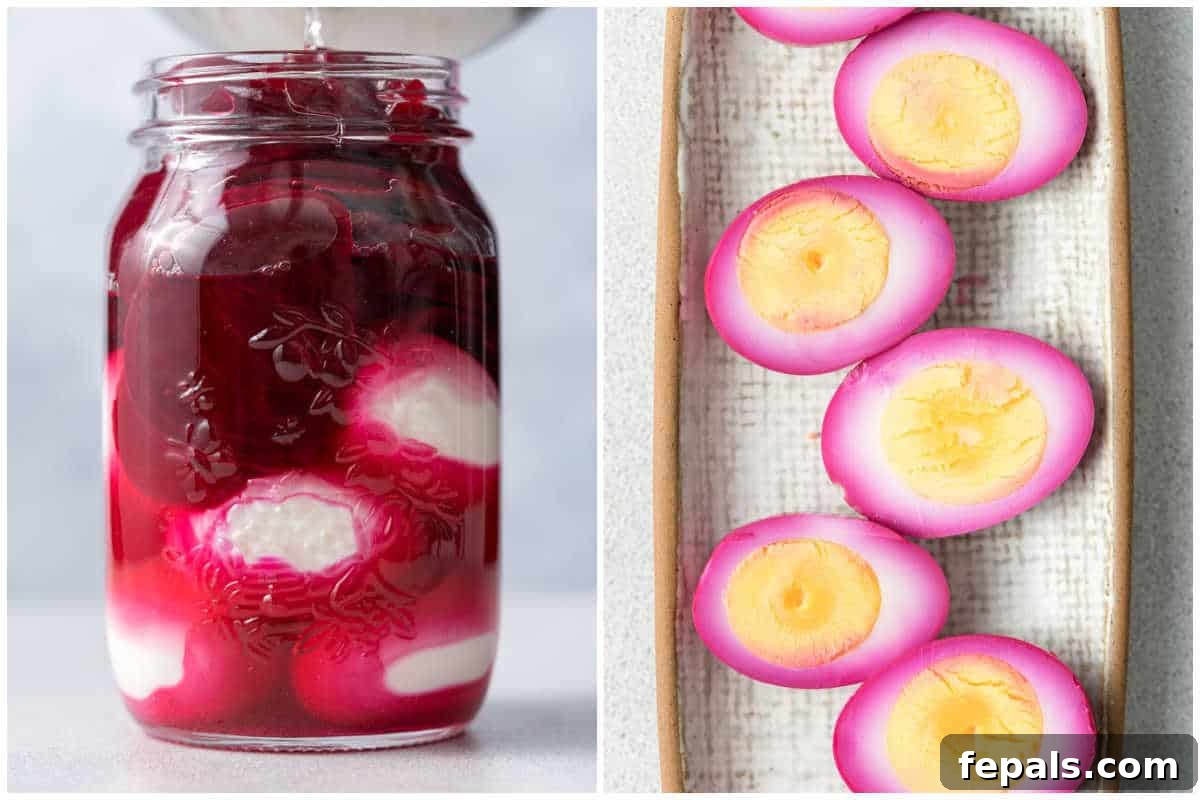
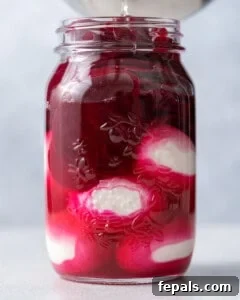
Step 5: Combine Eggs and Brine. Carefully pour the hot brine directly over the eggs and beets in the Mason jar. It’s important to ensure that all the eggs and beets are completely submerged in the liquid. Allow the jar to cool down to room temperature naturally on your countertop. Once cooled, secure the jar with a tight-fitting lid and transfer it to the refrigerator. For optimal flavor and color, let the eggs pickle for at least 8 hours, or ideally, overnight. Remember, the longer they sit, the deeper and more intense both the color and the tangy-sweet flavor will become.
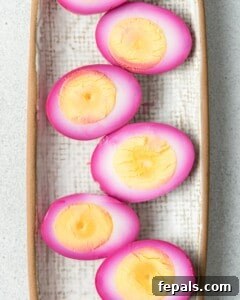
Step 6: Serve and Enjoy. When ready to serve, carefully remove the pickled eggs from the jar. For an impressive presentation that showcases their beautiful pink ring around the yolk, slice each egg in half. Arrange them elegantly on a platter and serve chilled, ready to be enjoyed as a delightful snack or part of a larger meal.
Exciting Flavor Variations
While the classic beet pickled egg is perfect on its own, there are many ways to customize the flavor profile to suit your preferences. Experiment with these variations to discover your new favorite!
- Spicy Beet Eggs: For those who love a kick, add thin slices of fresh jalapeño or a teaspoon of red pepper flakes to the jar along with the eggs and beets. The heat will infuse into the eggs, creating a delightful contrast to the sweet and tangy brine.
- Garlic & Herb Infusion: Introduce aromatic depth by adding a few smashed garlic cloves and a generous sprig of fresh dill or thyme to your pickling jar. The herbs will release their essential oils, giving the eggs a wonderfully savory and fragrant finish.
- Low-Sugar Option: If you’re mindful of sugar intake, you can reduce the amount of cane sugar in the brine. To ensure the flavor remains balanced and not overly acidic, consider adding an extra splash of apple cider vinegar, which offers a milder, fruitier tang that can compensate for less sweetness.
- Extra Tangy Twist: For a bolder, more pronounced sour flavor, replace a portion of the canned beet liquid with an equal amount of additional white vinegar. This will amplify the tartness, perfect for vinegar lovers. You can also add a tablespoon of mustard seeds or black peppercorns to the brine for an extra layer of complexity.
- Mediterranean Inspired: Add a bay leaf, a few black peppercorns, and a pinch of dried oregano to the brine for a savory, herbaceous twist reminiscent of Mediterranean flavors.
Expert Recipe Tips for Success
To ensure your beet pickled eggs turn out absolutely perfect every time, keep these valuable tips in mind:
- Patience for Deeper Color and Flavor: While 8 hours will give you a beautiful start, for the most intense color and robust flavor, allow your eggs to pickle for at least 24-48 hours. The gorgeous magenta hue will deepen significantly, and the tangy-sweet brine will penetrate further towards the yolk, resulting in a more flavorful egg. Some connoisseurs even let them sit for 3-4 days!
- Choose Your Vinegar Wisely: White vinegar provides a crisp, sharp tang. However, if you prefer a softer, slightly fruitier acidity, apple cider vinegar is an excellent substitute. It can mellow the overall flavor profile, making the eggs less aggressively tart, which is lovely for those who find white vinegar a bit too strong.
- Always Use Glass Jars: The vibrant beet juice is a powerful dye and will inevitably stain plastic containers. To avoid permanent discoloration and ensure your eggs are stored safely and beautifully, always opt for glass jars. A large Mason jar or any clean glass container with a tight-fitting lid works perfectly.
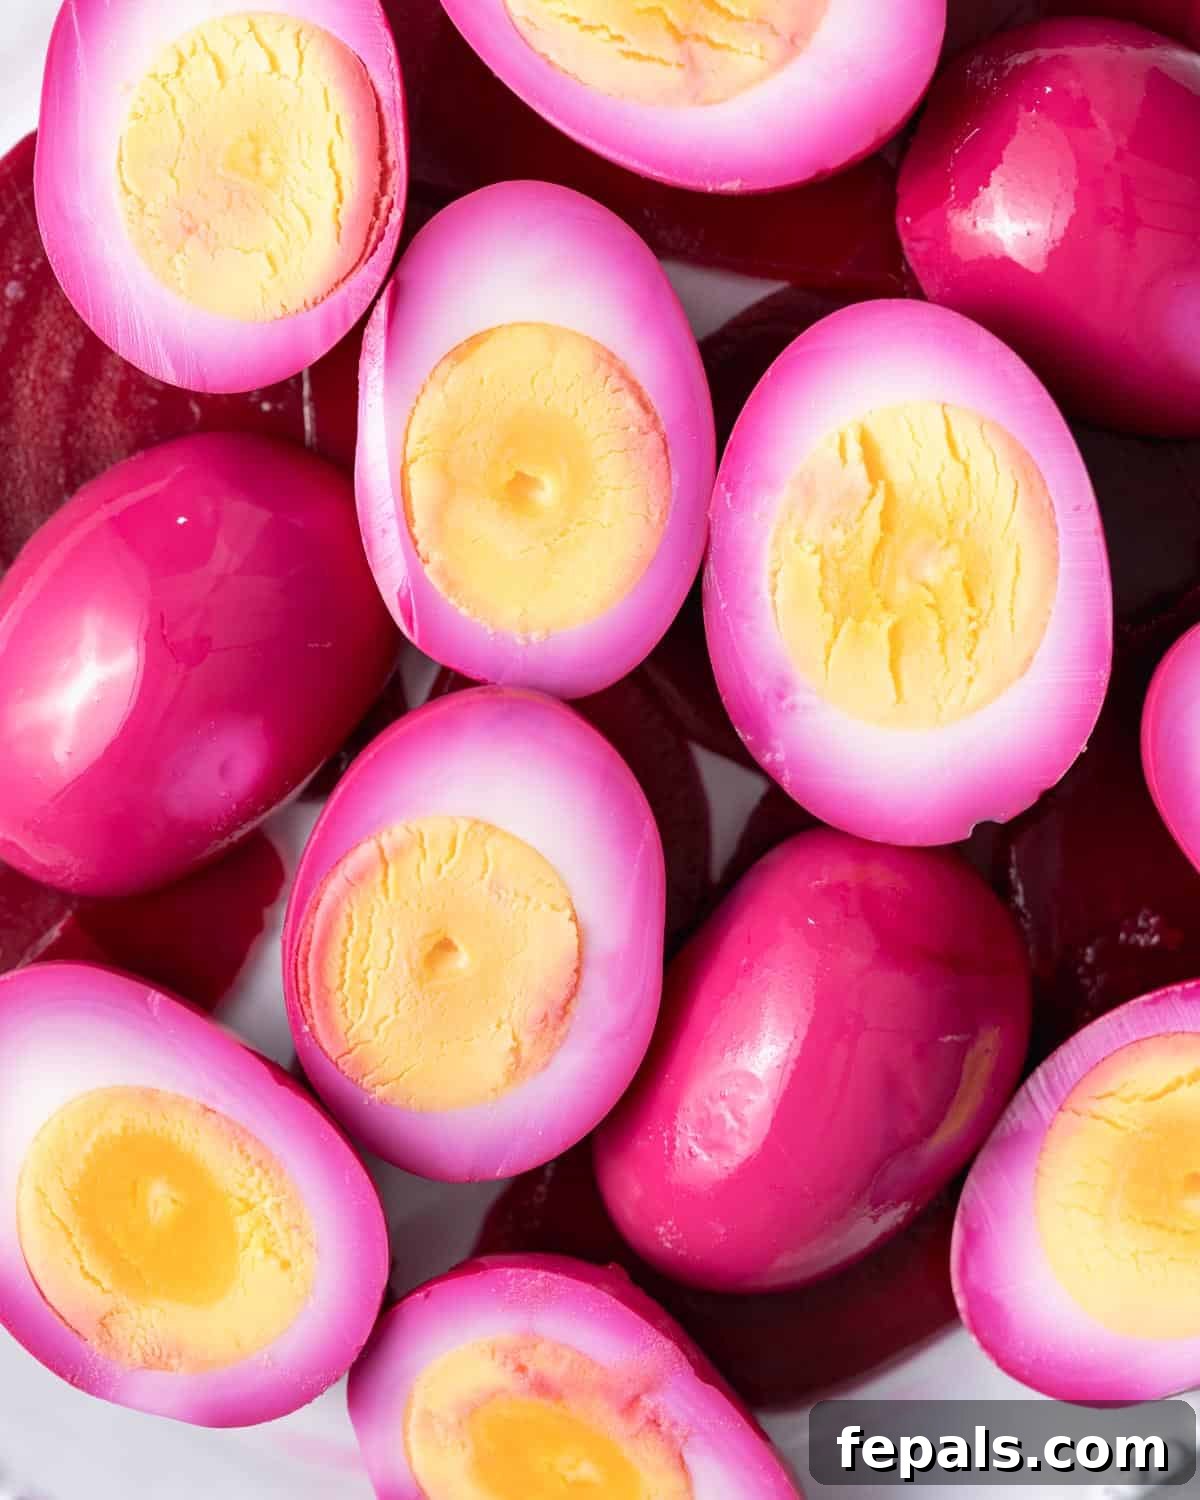
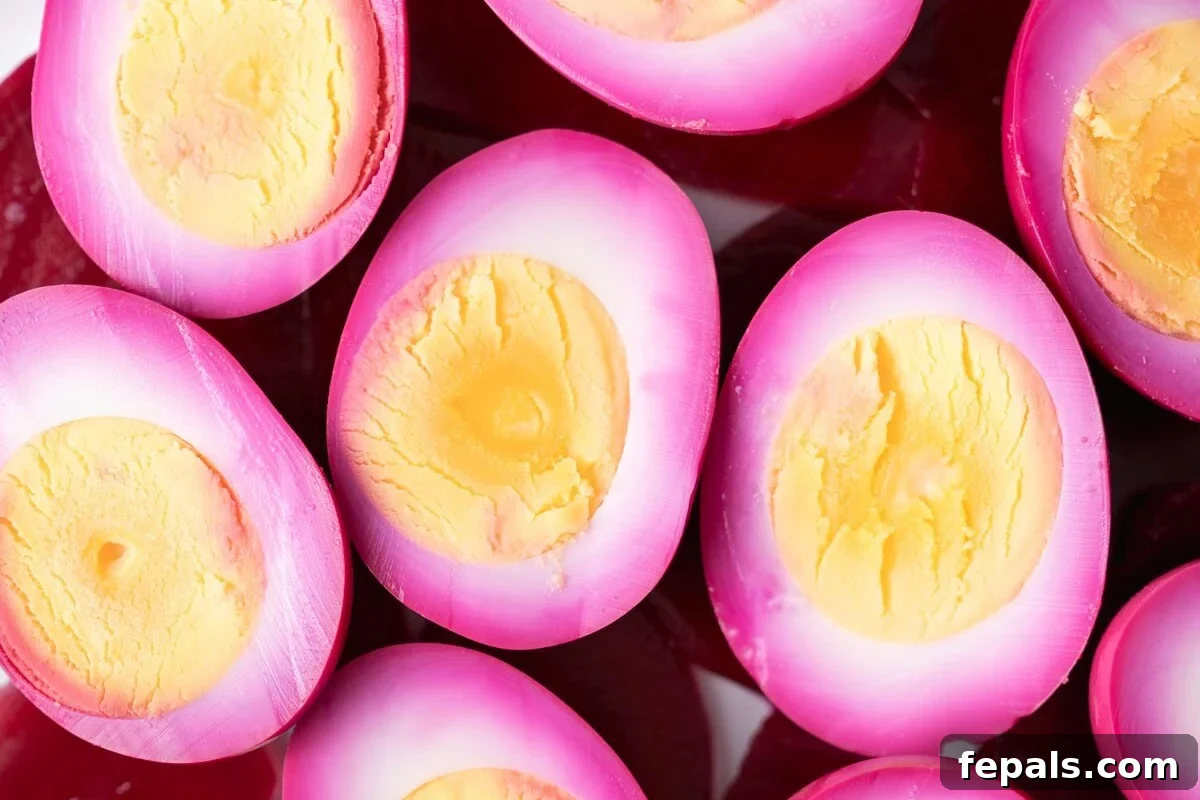
- Presentation Matters: To truly showcase the beautiful pink ring that forms around the yolk, slice the pickled eggs in half just before serving. This stunning visual contrast instantly elevates their appeal and makes them look incredibly appetizing on any platter or plate.
- Ensure Full Submersion: It’s crucial for the eggs to be completely submerged in the brine for even pickling and to prevent spoilage. If your brine doesn’t quite cover all the eggs, simply top off the jar with a mixture of equal parts water and vinegar until everything is fully covered.
- Perfect Hard-Boiled Eggs: Start with eggs that are easy to peel. Older eggs (about a week old) tend to peel better than very fresh ones. For perfect hard-boiled eggs, place them in a single layer in a saucepan, cover with about an inch of cold water, bring to a rolling boil, then turn off the heat, cover, and let sit for 10-12 minutes. Immediately transfer to an ice bath to stop cooking and cool them completely before peeling. This prevents a rubbery texture and greenish yolks.
- Versatile Serving Options: Don’t just think of them as a standalone snack! Chopped pickled eggs make an awesome, colorful addition to salads, grain bowls, or even potato salad. They provide instant protein, a burst of flavor, and a striking visual element.
Common Questions About Beet Pickled Eggs
How long should I let the eggs pickle for the best color and flavor?
While at least 8 hours will get you started with a lovely pink hue, for the most vibrant color and deepest, most intense tangy-sweet flavor, I highly recommend waiting 24-48 hours. If you can manage it, letting them sit for 3-4 days will yield an even more profound color that permeates closer to the yolk, and the flavors will be wonderfully complex. Up to a week is generally considered safe and will continue to enhance the taste.
Why aren’t my eggs turning fully pink inside?
This is a very common observation and completely normal! The pickling brine needs time to gradually work its way from the exterior of the egg towards the yolk. If you’re not seeing that full pink ring yet, simply give your eggs a few extra days in the refrigerator. Patience is key here, and you’ll eventually achieve that beautiful, characteristic pink hue all the way through.
How do I store leftovers?
To keep your pickled eggs fresh and delicious, always store them submerged in their brine in a sealed glass jar in the refrigerator. You can transfer them to a smaller container if needed, ensuring they remain fully covered by the liquid. They will typically stay good for 2-4 weeks, though they are often at their freshest and have the best texture within the first couple of weeks after preparation.
Can I freeze beet pickled eggs?
Absolutely not! Freezing is not recommended for pickled eggs. The whites of the eggs will become rubbery and watery upon thawing, and the vibrant color can also turn an unappetizing shade. To maintain their delicious taste and perfect texture, always stick to refrigerator storage.
Can I reuse the brine?
No, it is not advisable to reuse the brine. For food safety reasons and to ensure the best flavor, it’s always best to prepare a fresh batch of brine for each new batch of pickled eggs. Reusing brine can lead to bacterial growth and a diluted, less effective pickling solution.
Why are my pickled eggs rubbery?
Rubbery pickled eggs are usually a sign that the hard-boiled eggs were overcooked during the initial boiling process. To prevent this, cook your eggs just until the yolks are set, then immediately plunge them into an ice bath. This stops the cooking process and results in tender whites.
Why are my pickled eggs not flavorful?
If your pickled eggs lack flavor, they most likely haven’t had enough time to brine. The absorption of the tangy-sweet flavors takes time. Ensure they are fully submerged in the brine and allow them to sit in the refrigerator for at least 24-48 hours for the flavors to properly develop.
Can I make a larger batch?
Absolutely! This recipe is easily scalable. Simply adjust the quantities of eggs, beets, and brine ingredients proportionally to fill more jars. Just make sure you have enough clean glass jars on hand.
What if I don’t have canned beets?
You can use fresh beets! Simply boil or roast fresh beets until tender, then slice them and combine with some beet juice (you might need to supplement with a little extra water and a drop of red food coloring for intensity if not enough natural juice is produced). However, canned beets with their liquid are the most convenient and consistent for this recipe.
Troubleshooting Common Issues
Even with a simple recipe like beet pickled eggs, you might encounter a few minor issues. Here’s how to troubleshoot them and get back on track:
- Eggs Taste Too Salty: If your pickled eggs taste overly salty, it’s often an easy fix. You can try to balance the saltiness by adding a small splash of plain water or a pinch more sugar to your brine if there’s still room in the jar. Alternatively, when serving, pair them with unsalted foods to balance the palate.
- Not Tangy Enough? For those who prefer a more pronounced tang, you can easily adjust the acidity. I suggest adding another tablespoon of white vinegar (or apple cider vinegar) to your brine and letting the eggs sit for an additional 12-24 hours. This extra boost of acidity will permeate the eggs, increasing their tanginess.
- Color Not Vibrant Enough? Don’t worry if the color isn’t as deep as you’d hoped initially. This is almost always a matter of time. The exterior of the eggs will color first, and the magenta hue will slowly migrate inward. Simply let them sit longer in the refrigerator—an extra day or two can make a significant difference in achieving that intensely vibrant, characteristic pink.
Creative Serving Ideas for Beet Pickled Eggs
Beet-pickled eggs are far more versatile than many people realize, extending beyond a simple snack. Their unique flavor and stunning color make them a fantastic addition to a variety of dishes. Here are some creative and delicious ways you can enjoy them:
- High-Protein Snack: Enjoy them straight from the jar for a satisfying, high-protein snack that keeps you energized throughout the day.
- Elegant Avocado Toast: Slice them thinly and arrange them over creamy avocado toast. The vibrant pink against the green and the tangy flavor against the rich avocado create a delightful culinary experience.
- Upgraded Egg Salad: Chop them into your favorite egg salad recipe. The pickled eggs will add a fantastic tangy depth and a beautiful pink speckle, making your egg salad sandwich or dip truly stand out.
- Impressive Charcuterie Board: They are a show-stopping addition to any charcuterie or cheese board. Their color and unique flavor provide a fantastic contrast to cheeses, cured meats, and crackers.
- With Crackers and Goat Cheese: Pair a halved pickled egg with a cracker spread with creamy goat cheese. The tanginess of the egg and cheese creates a harmonious flavor combination.
- In Salads and Grain Bowls: Cube or slice them and toss them into your daily green salads, pasta salads, or hearty grain bowls for a boost of protein, color, and flavor. They pair especially well with greens, quinoa, and roasted vegetables.
- Deviled Eggs Reinvented: For a truly unique appetizer, use pickled eggs to make deviled eggs. The pink whites will create an eye-catching base for a traditional or creatively flavored yolk filling.
- Alongside Roasted Meats: Serve them as a tangy side dish alongside roasted chicken, pork, or even a hearty vegetarian loaf. Their acidity can help cut through the richness of the main course.
Explore More Delicious Egg Snacks
If you’ve enjoyed the versatility and nutritional benefits of these beet pickled eggs, you’ll be delighted to discover other fantastic egg-based recipes that are perfect for snacks, light meals, or appetizers. Eggs are an incredible source of protein and can be prepared in countless delicious ways:
- Copycat Starbucks Egg White Bites
- Hearty Breakfast Egg Sandwich
- Fluffy Cottage Cheese Egg Bites
- Fun Halloween Deviled Eggs
- Creamy Deviled Egg Potato Salad
- Fresh Avocado Egg Salad Sandwich
- Keto-Friendly Deviled Eggs
- Nutritious Avocado Toast with Eggs
Thank you for joining me on this culinary adventure. I hope you thoroughly enjoy preparing and savoring these delightful beet pickled eggs. Your feedback means a lot to me; if you try this recipe, please consider leaving a comment and a rating below to share your experience!
Beet Pickled Eggs
Classic recipe of hard-boiled eggs pickled with beets, vinegar, sugar, and spices for that signature pink hue and tangy flavor.
Equipment
- 1 32 Ounce Mason Jar
Ingredients
- 8 large hard-boiled eggs, peeled
- 15 ounces sliced beets with liquid, one can or one pack
- 1 cup white vinegar or apple cider vinegar
- ½ cup cane sugar, or white sugar
- 1 teaspoon kosher salt
- 1 cup water
Instructions
-
Place the peeled 8 large hard-boiled eggs in a clean 32-ounce Mason jar.

-
Top them with the 15 ounces sliced beets with liquid, including all the liquid from the can.
-
In a medium saucepan over medium heat, combine the 1 cup water, ½ cup cane sugar, 1 teaspoon kosher salt, and 1 cup white vinegar or apple cider vinegar. Stir until everything dissolves.
-
Bring the mixture to a boil and let it simmer for 2-3 minutes until fully dissolved and clear.
-
Carefully pour the hot brine over the eggs and beets in the jar, making sure everything is submerged. Let the jar cool to room temperature, then cover and refrigerate for at least 8 hours or overnight. The longer they sit, the deeper the color and flavor.
-
Slice in halves and arrange on a platter to serve.



Notes
- Use fresh hard-boiled eggs for the best texture and even pickling.
- Pack the jar tightly with beets on top so eggs stay submerged in brine.
- For a deeper pink color and bolder flavor, pickle 24-48 hours instead of just overnight.
- Store in the fridge in the sealed jar up to 2 weeks.
- Serve chilled; slice in half for snacks, salads, or deviled eggs.
- Always use a clean jar and utensils to keep them safe longer.
Nutrition
Serving: 1 egg | Calories: 106kcal | Carbohydrates: 6g | Protein: 7g | Fat: 5g | Saturated Fat: 2g | Polyunsaturated Fat: 1g | Monounsaturated Fat: 2g | Cholesterol: 187mg | Sodium: 396mg | Potassium: 236mg | Fiber: 1g | Sugar: 4g | Vitamin A: 278IU | Vitamin C: 3mg | Calcium: 36mg | Iron: 1mg
Nutrition information is automatically calculated, so should only be used as an approximation.