
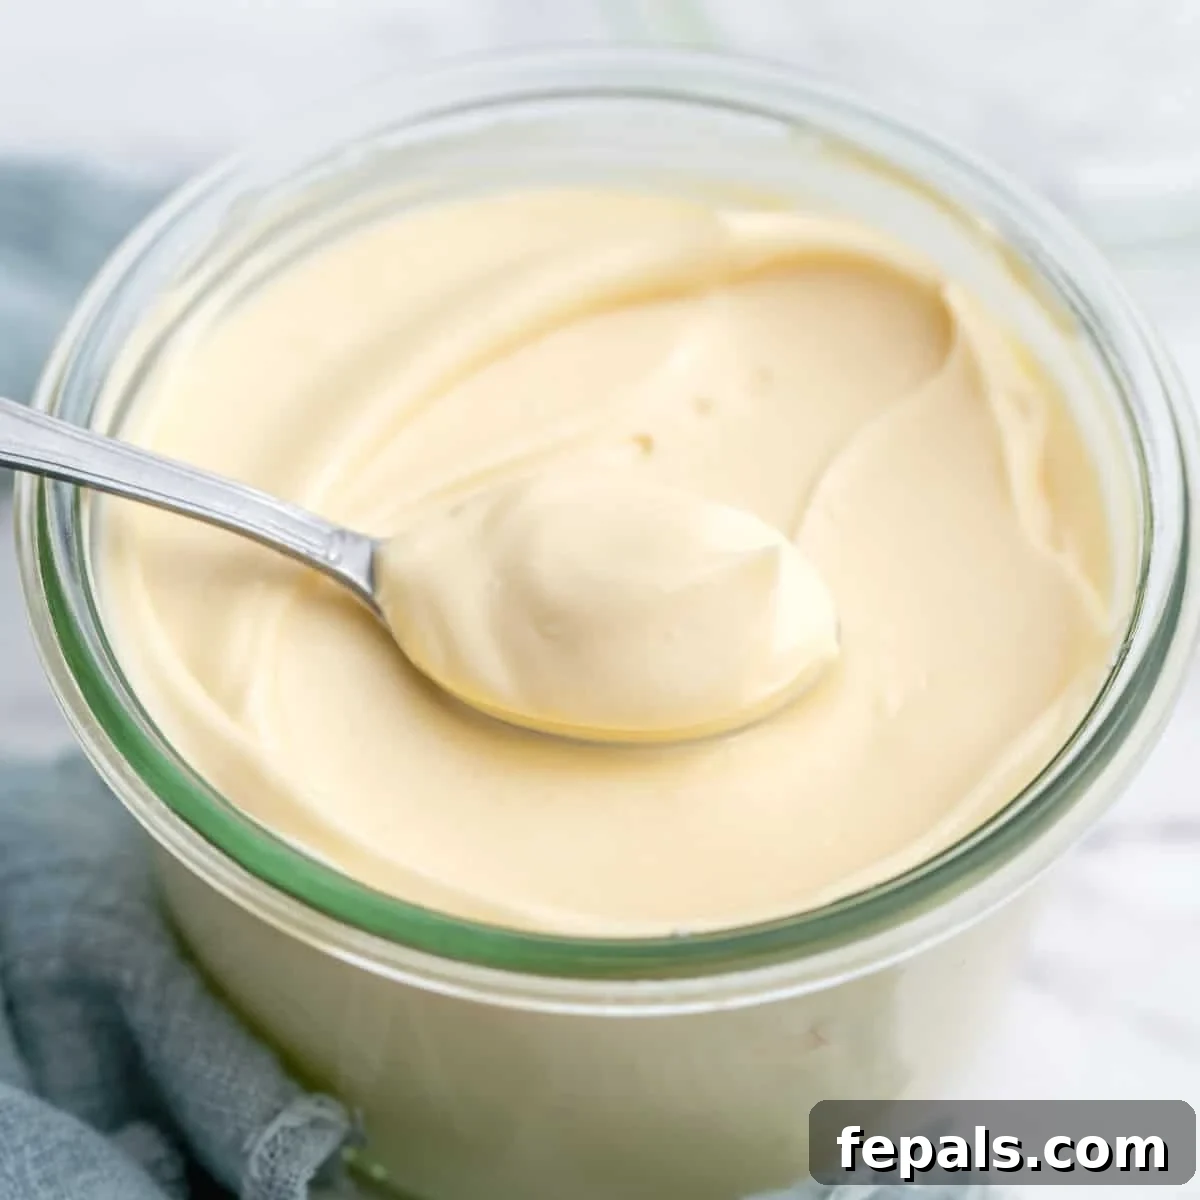
This Homemade Mayonnaise is thick, creamy, and boasts a fresh, vibrant tang you simply can’t find in store-bought versions. It’s incredibly versatile, perfect for elevating your favorite sandwiches, adding richness to potato salad, or stirring into quick tuna or chicken salads when you crave something simple, satisfying, and bursting with flavor.
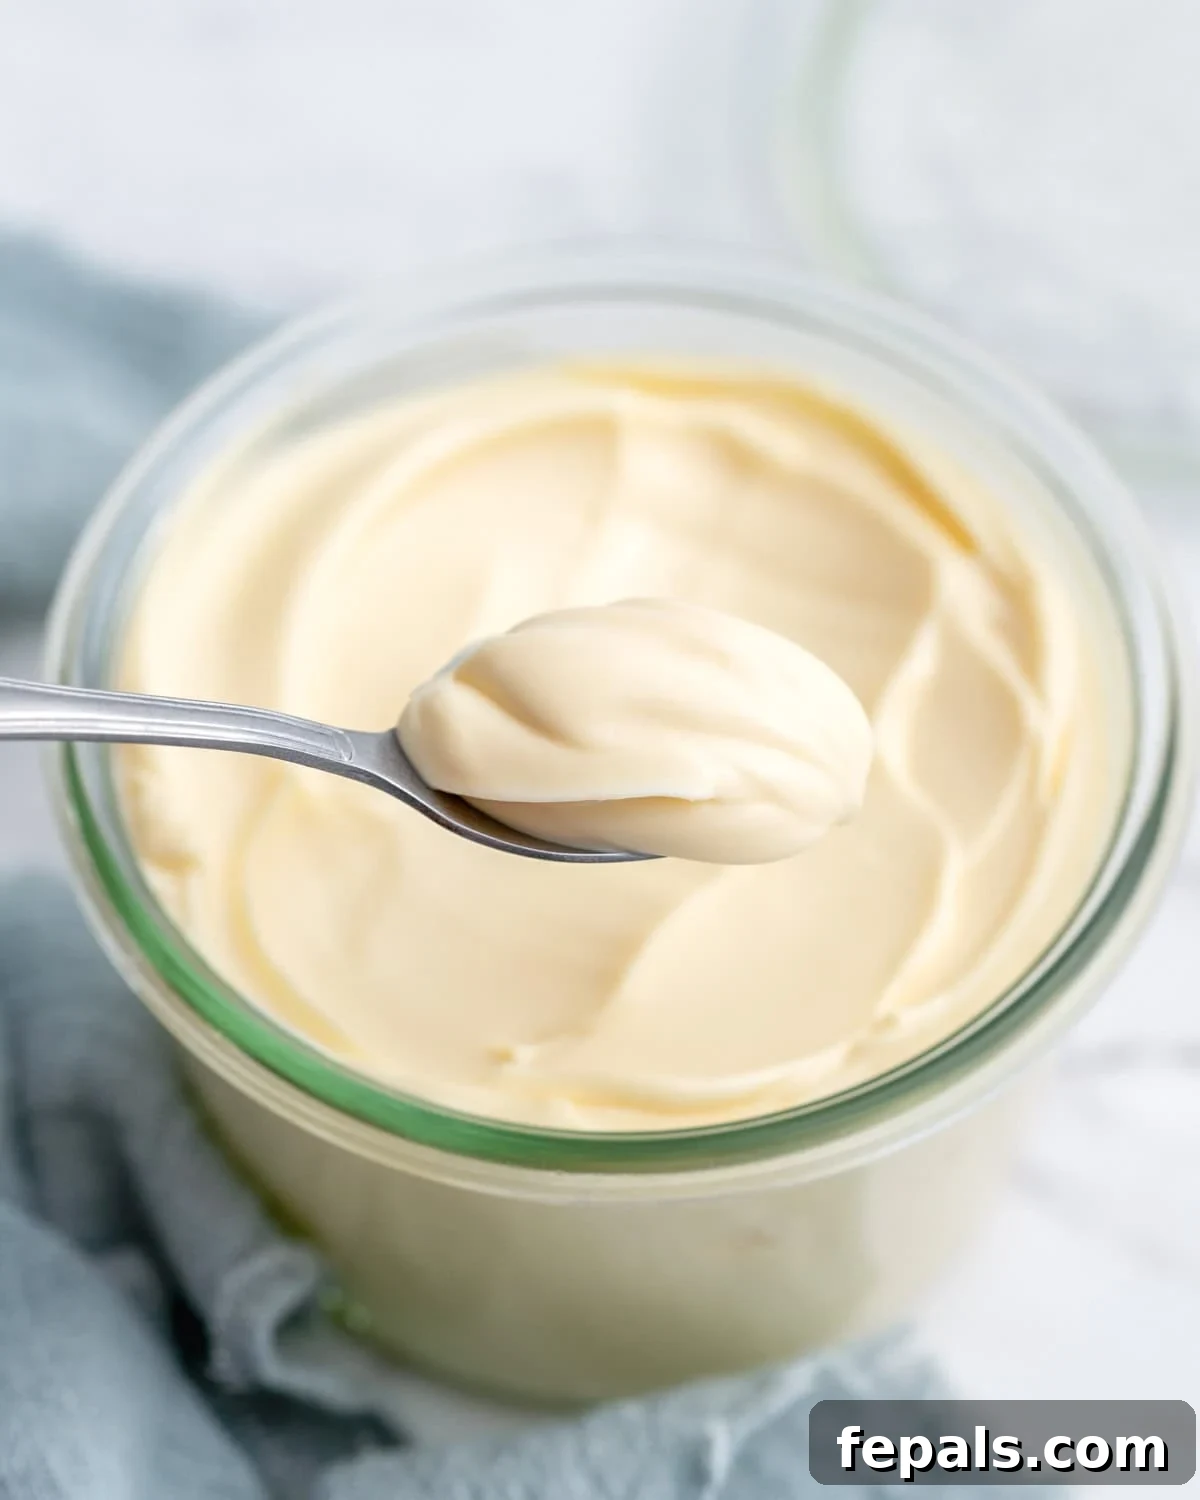
Homemade mayonnaise is a kitchen staple reborn. Forget the bland, additive-filled jars from the supermarket shelf. Discover the unparalleled richness, velvety texture, and vibrant fresh flavor of mayonnaise crafted in your own kitchen. This simple recipe transforms humble ingredients into a luxurious condiment that promises to elevate everything it touches – from everyday sandwiches to gourmet salads and delectable dips. Prepare to be amazed by how easy it is to create this culinary masterpiece, a true testament to the power of fresh, wholesome ingredients.
Why Homemade Mayonnaise?
The appeal of homemade mayonnaise extends far beyond its superior taste. When you make mayonnaise from scratch, you gain complete control over its ingredients, ensuring a product free from preservatives, artificial flavors, and unwanted sugars often found in commercial brands. My family and I made the switch years ago, tired of deciphering long lists of unrecognizable additives. The difference was immediately noticeable, not just in flavor, but also in the pure satisfaction of knowing exactly what we were eating. Using a high-quality, neutral oil like avocado oil also means your mayo is packed with healthier fats, contributing to a more nutritious diet without compromising on indulgence. It’s a foundational condiment that empowers you to create countless delicious dishes with confidence and wholesome ingredients.
For more fantastic from-scratch condiments, be sure to try my Homemade Tartar Sauce, perfect for fish nights, or this quick In-N-Out Sauce copycat that promises to level up your burgers and fries.
Key Ingredients for the Perfect Homemade Mayo
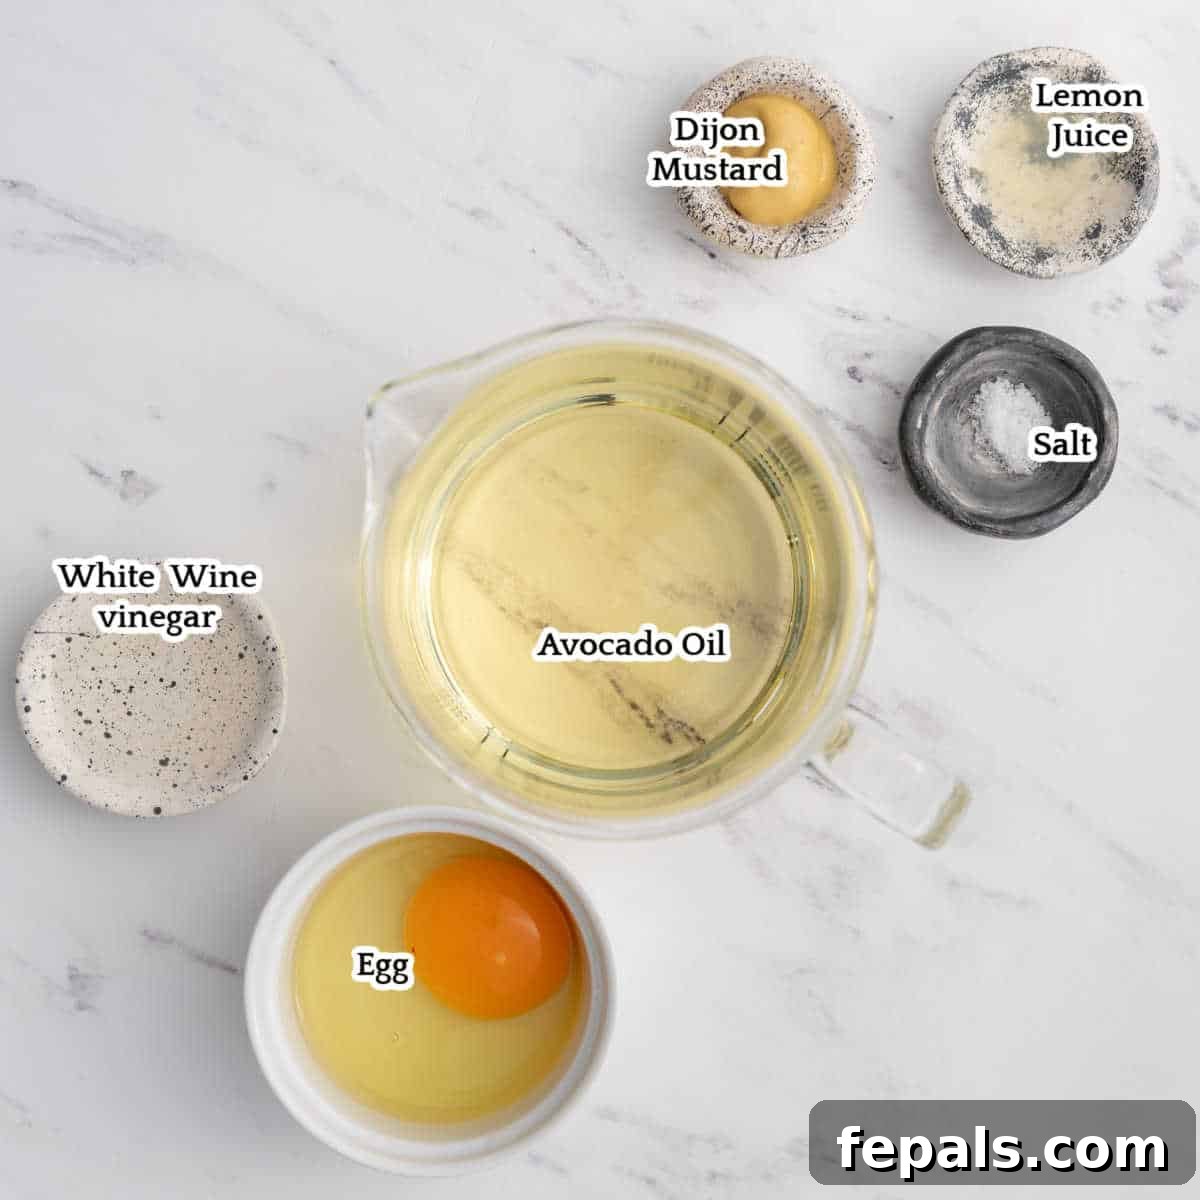
Here’s a detailed look at everything you need to make a fresh batch of Homemade Mayonnaise. Full measurements are conveniently listed further down in the recipe card.
-
Large Egg (Room Temperature): The humble egg is the emulsifying hero of mayonnaise. Using a fresh, large egg is crucial, but its temperature is equally important. A room-temperature egg yolk emulsifies much more readily with the oil, creating a stable, homogenous mixture. Cold eggs can be stubborn, slowing down the emulsification process or even causing it to break entirely. The lecithin in the yolk acts as a natural emulsifier, effectively binding the oil and water components together into that creamy consistency we all love. For best results, let your egg sit out on the counter for 30-60 minutes before you begin.
-
Avocado Oil: For a mayonnaise that boasts a clean, neutral flavor profile and a healthy fat content, avocado oil is the undisputed champion. Its mild taste allows the bright notes of lemon and vinegar to shine through, without any competing bitterness. Beyond flavor, avocado oil is rich in monounsaturated fats, making your homemade mayo a healthier choice compared to many other oils. If avocado oil isn’t available, light olive oil or grapeseed oil are excellent alternatives due to their similarly neutral characteristics. Important: Always skip extra-virgin olive oil, as its robust, sometimes peppery flavor can easily overwhelm and even turn your mayonnaise bitter.
-
White Wine Vinegar or Red Wine Vinegar: Vinegar provides the essential tang and acidity that balances the richness of the oil and critically aids in the emulsion process. White wine vinegar offers a classic, bright, and crisp flavor that defines traditional mayonnaise. If you prefer a slightly deeper, fruitier, and rounder tang, red wine vinegar is a fantastic choice and performs equally well in terms of emulsification. The acidity also acts as a natural preservative, extending the useful shelf life of your homemade condiment.
-
Fresh Lemon Juice: A squeeze of fresh lemon juice adds another layer of vibrant acidity and a delightful citrusy zing. This brightens the overall flavor, making the mayonnaise taste incredibly fresh and lifting its rich profile. While freshly squeezed is always recommended for the best, most dynamic flavor, 100% bottled lemon juice is a solid backup when fresh isn’t around and will still contribute the necessary acidity. Adjust the amount to your personal preference for tang.
-
Dijon Mustard: More than just a flavor enhancer, smooth Dijon mustard plays a vital role in the emulsification process. The mustard’s natural emulsifiers help stabilize the mixture, ensuring a consistently thick and creamy texture. Its subtle pungent and tangy notes contribute to the complex and sophisticated flavor profile of the mayonnaise. While yellow mustard works in a pinch, the flavor stays flatter and less nuanced. Opt for smooth Dijon, not the whole-grain variety, for the best texture and flavor.
-
Fine Sea Salt: Salt is indispensable for seasoning and bringing out all the flavors in your mayonnaise. Fine sea salt dissolves easily and distributes evenly throughout the mixture, ensuring every bite is perfectly seasoned. Start with the recommended amount and adjust to taste. If using table salt, which is often finer and saltier by volume, start with a slightly smaller amount and add more as needed. A perfectly seasoned mayonnaise is a game-changer for any dish it accompanies!
How to Make Homemade Mayonnaise: A Step-by-Step Guide
Achieving that perfect, luscious, and creamy mayonnaise texture every single time is simpler than you might imagine, especially with the right technique and an immersion blender. Here’s a detailed guide to ensure your success, even if you’re a beginner:
Step 1: Gather and Combine Ingredients in a Tall Jar.
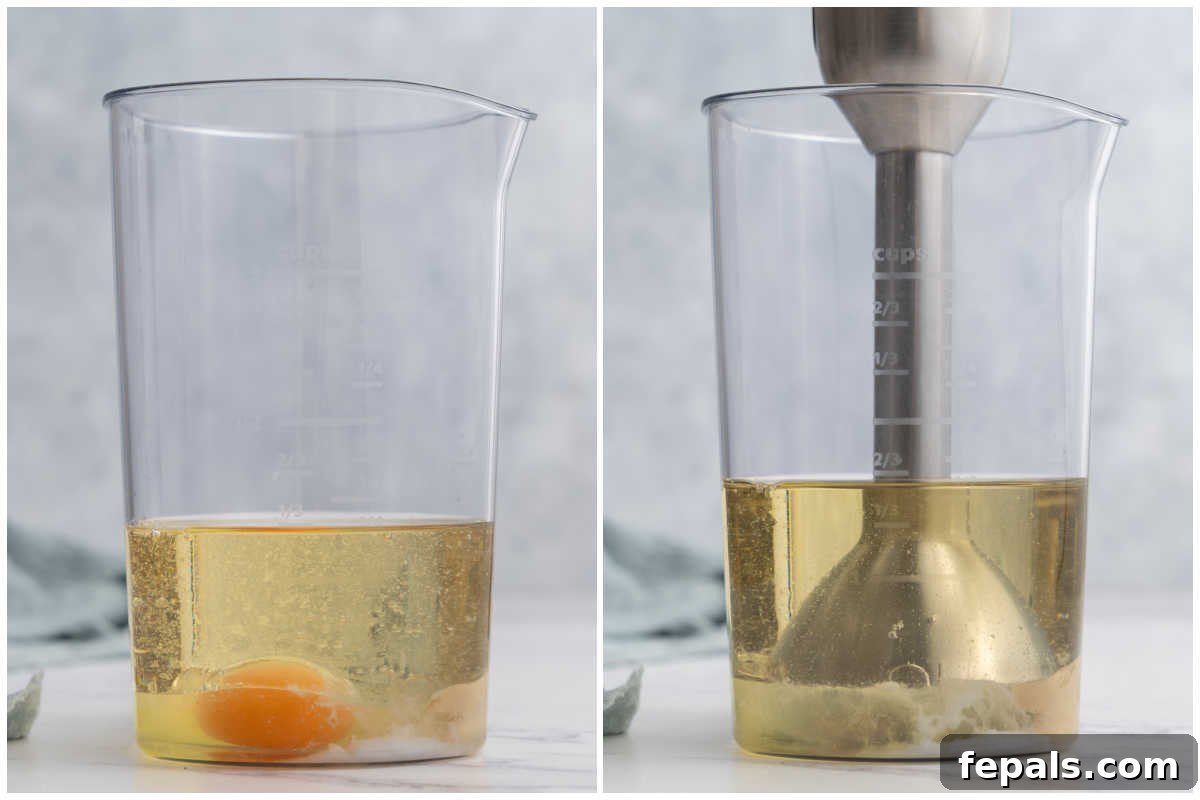
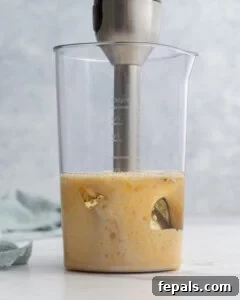
Begin by cracking your room-temperature large egg directly into the bottom of a tall, narrow jar or the container specifically designed for your immersion blender. This narrow vessel is key for effective emulsification, as it allows the blender blade to create a strong vortex. Next, carefully add the white wine vinegar (or red wine vinegar), Dijon mustard, fresh lemon juice, and fine sea salt on top of the egg. Finally, pour the full cup of avocado oil (or your chosen neutral oil) over all the other ingredients. Allow it to settle for a few moments; you’ll see the oil mostly floating on top of the other, denser ingredients, with the egg yolk often visible at the bottom. This layering is precisely what we want for a successful, swift emulsion.
Step 2: Position Your Immersion Blender.
Gently insert your immersion blender into the jar. The critical step here is to ensure the blender head sits firmly and completely at the very bottom of the jar, ideally directly over the egg yolk. Do not turn it on yet. This precise positioning is crucial because the powerful blending action will start from the bottom, quickly forming a stable emulsion with the egg and gradually incorporating the oil as the blender head moves upwards. If you don’t start at the bottom, the ingredients won’t emulsify correctly, and you might end up with separated liquid.
Step 3: Begin Blending for Initial Emulsification.
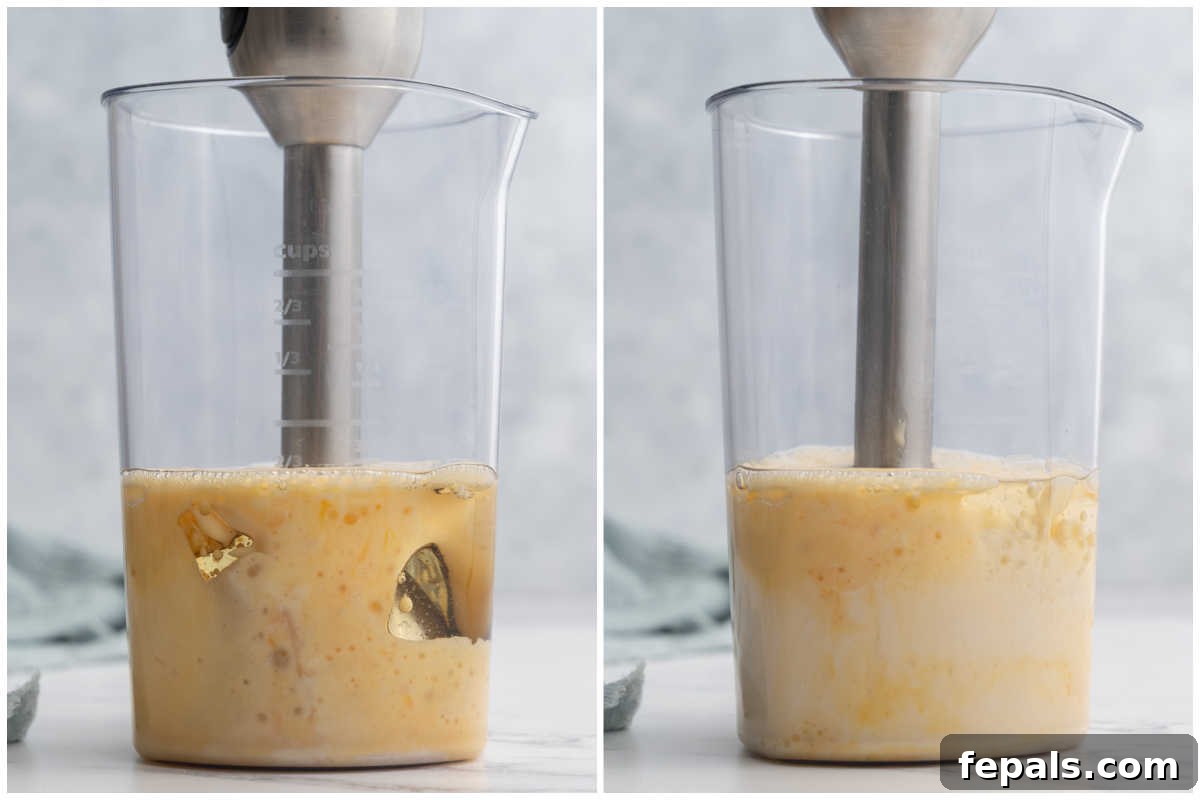
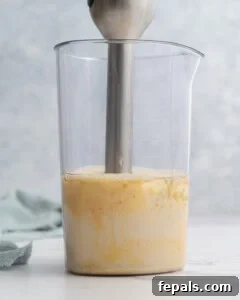
Once the immersion blender is securely at the bottom of the jar, turn it on to its highest speed. Hold it absolutely still and firmly pressed against the bottom of the jar for the first 12-15 seconds. During this initial phase, you’ll observe a remarkable transformation: a thick, creamy white emulsion will start forming rapidly at the base of the jar, effectively trapping and binding the egg yolk, vinegar, and mustard. The magic of emulsification begins right before your eyes as the high-speed blades work to combine the ingredients into a stable mixture.
Step 4: Gradually Incorporate the Remaining Oil.
After you see a stable, thick white mayonnaise forming at the bottom (usually around the 12-15 second mark), begin to slowly move the immersion blender upwards, very gradually. As you lift it, the already emulsified mayonnaise will begin to draw in the oil from the top of the jar. Continue to move the blender head up and down in slow, deliberate motions, ensuring all the oil is fully incorporated into the creamy base. This gentle movement helps to gradually integrate all the oil without breaking the delicate emulsion.
Step 5: Achieve Desired Thickness and Creaminess.
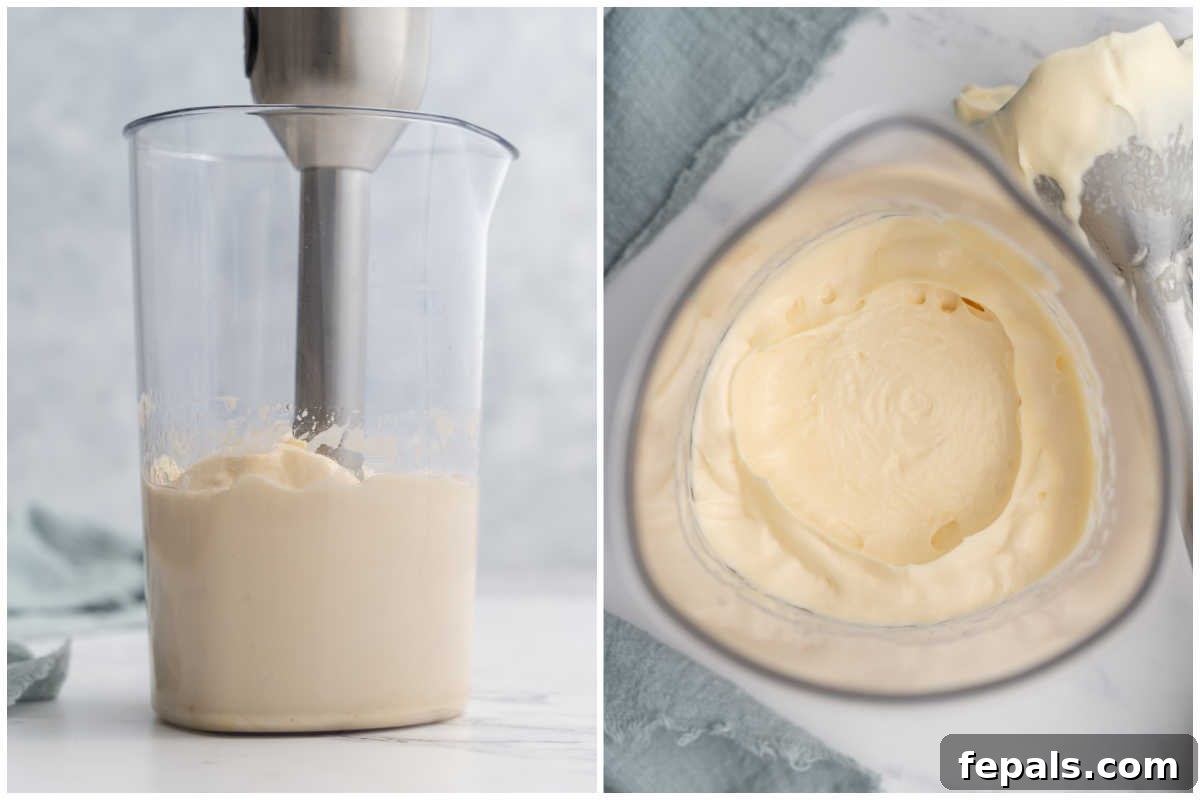
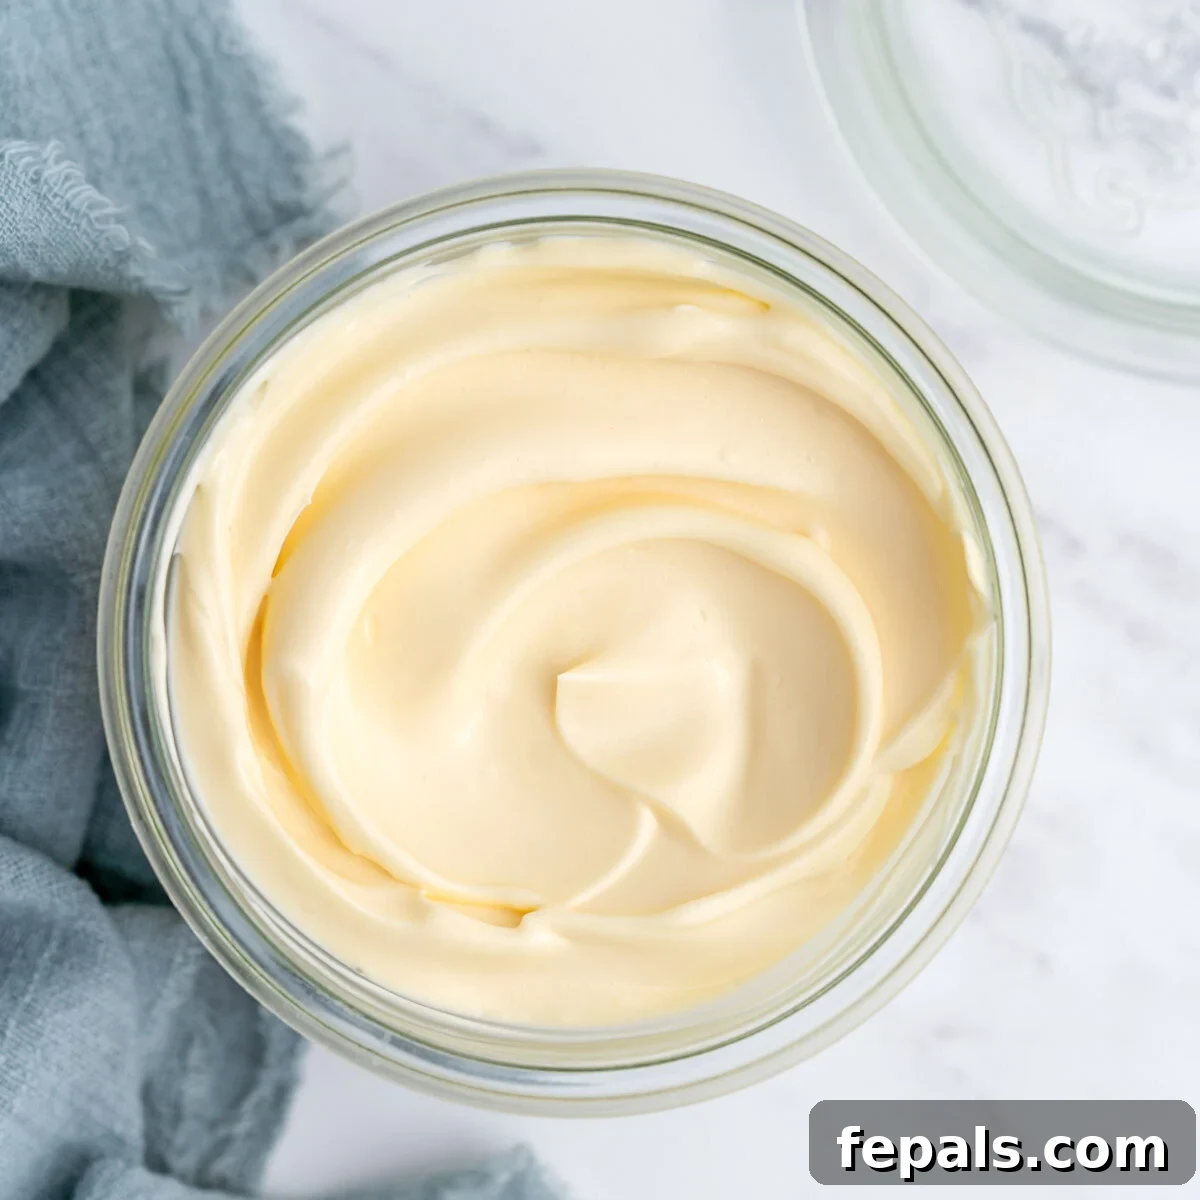
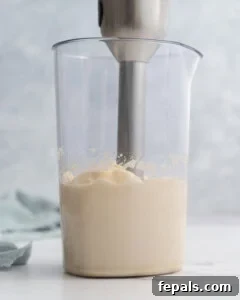
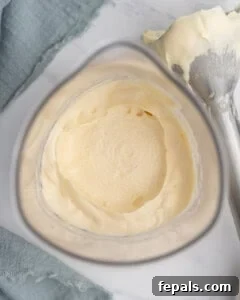
Keep blending and moving the immersion blender up and down slowly until the entire mixture in the jar is uniformly thick, smooth, and creamy. The mayonnaise should have a glossy, pale yellow appearance and hold its shape beautifully, clinging to the blender head when lifted. The entire process, from start to finish, should only take about 60-90 seconds with a good immersion blender. Avoid over-blending once it’s fully emulsified, as this can sometimes introduce too much air or even risk breaking the emulsion.
Step 6: Taste, Adjust, and Store.
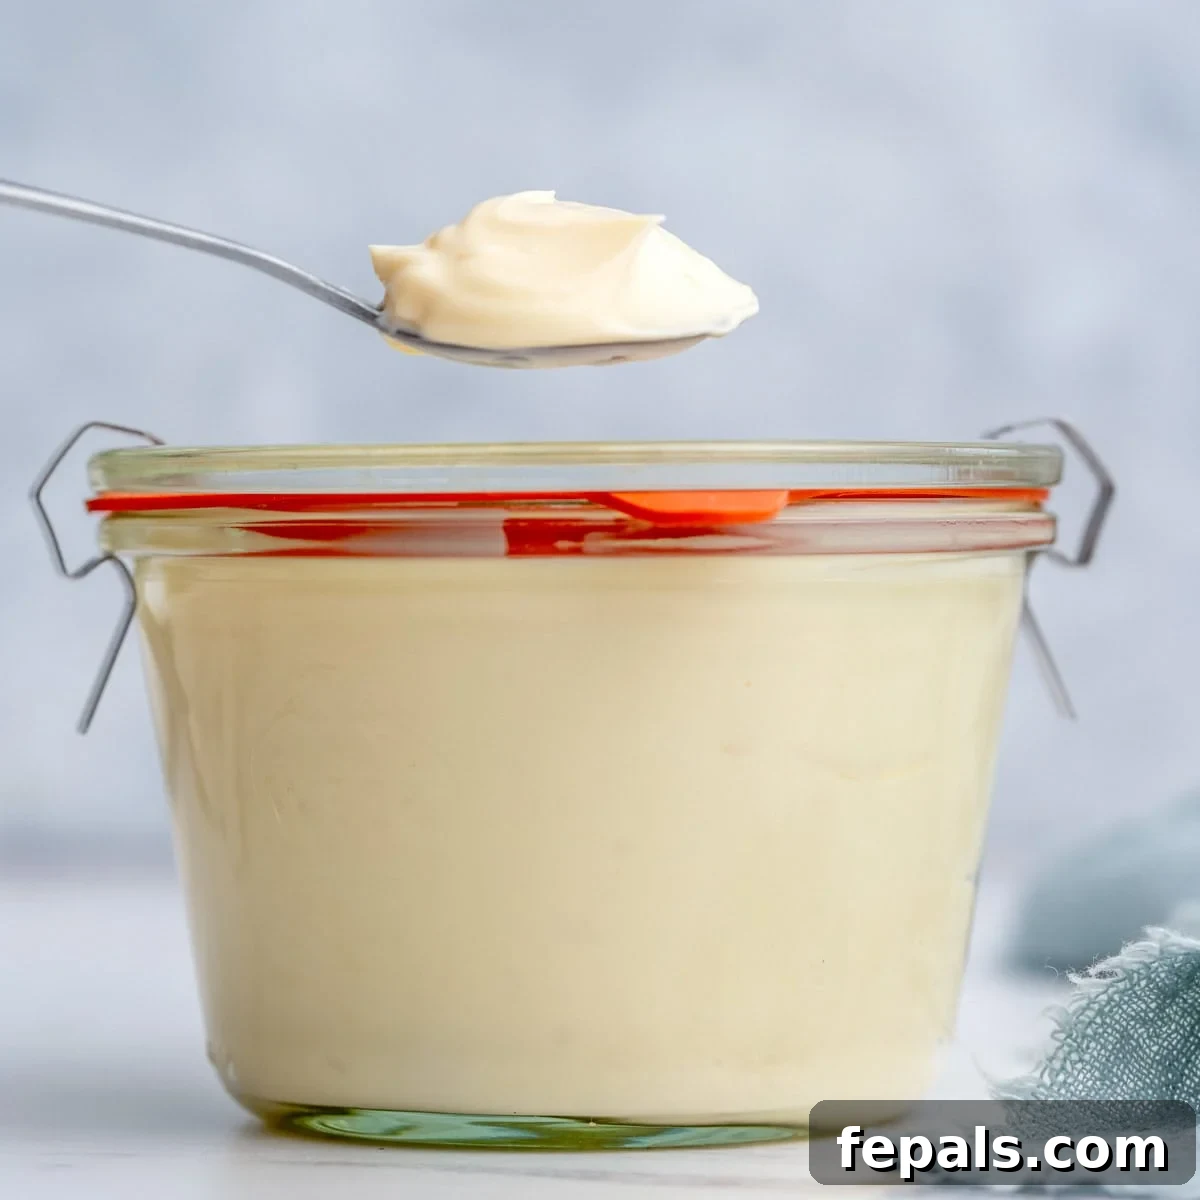
Now is the time to taste your freshly made mayonnaise! Dip a clean spoon and assess the flavor. Does it need more tang? Add a tiny bit more lemon juice or vinegar, stirring well. A touch more salt to enhance the flavors? Stir it in. If you find it too tart, a very small pinch of sugar (¼ to ½ teaspoon max) can help balance the acidity without making it overtly sweet. Once you’re satisfied with the flavor, transfer the mayonnaise into a clean, airtight glass jar or container. Store it in the main compartment of your refrigerator (where temperatures are most consistent, unlike the door) for up to one week.
Essential Tips for the Best Homemade Mayonnaise
-
Embrace Room-Temperature Eggs: This is arguably the most crucial tip for mayonnaise success. Eggs that are at room temperature (allow them to sit out for 30-60 minutes before use) emulsify far more easily and efficiently than cold eggs straight from the fridge. The warmer yolk allows the fats and liquids to combine without resistance, resulting in a silkier, more stable, and consistently creamy mayonnaise texture. Don’t skip this simple step; it makes all the difference!
-
The Power of Slow Oil Addition (for Traditional Blenders/Whisking): While an immersion blender often allows for a convenient “dump and blend” method, if you’re using a traditional upright blender, food processor, or whisking by hand, the oil must be added very slowly. Start with just a few drops at a time, incorporating fully before adding more in a thin, steady stream. This gradual addition is absolutely essential to form a stable emulsion and prevent the mayonnaise from separating. Patience is key in these methods!
-
Choose a Neutral-Flavored Oil Wisely: The oil constitutes the bulk of your mayonnaise, so its flavor profoundly impacts the final product. Avocado oil is highly recommended for its clean, buttery taste and excellent health benefits. Other fantastic neutral options include grapeseed oil, sunflower oil, or light (not extra-virgin) olive oil. Strong-flavored oils like extra-virgin olive oil can impart a bitter, grassy, or overly pungent taste that significantly detracts from the mayonnaise’s delicate balance.
-
Acid is Your Ally (Both for Flavor & Stability): Lemon juice and vinegar are not just for tang; they are fundamental for the stability of your emulsion. The acidity helps denature the proteins in the egg, making them better emulsifiers, and also provides a necessary counterpoint to the richness of the oil, preventing it from tasting flat. Don’t be shy about adjusting the acid levels to your taste, but always ensure there’s enough to contribute to both delightful flavor and structural integrity.
-
Adjusting Thickness and Consistency: If your homemade mayonnaise turns out too thick for your liking, don’t fret! You can easily thin it out by whisking in a teaspoon of warm water (or a few drops of hot water) at a time until it reaches your preferred creamy consistency. If it’s too thin, unfortunately, it’s often a sign of a broken emulsion, which typically requires a rescue mission (see troubleshooting below).
-
Proper Storage for Freshness and Safety: Due to the raw egg content, homemade mayonnaise has a shorter shelf life than its commercial counterparts. Always store it in a clean, airtight glass jar or container in the coldest part of your refrigerator (typically the back of the main shelves, not the door, where temperatures fluctuate). It will keep beautifully for up to one week. Always give it a quick smell and visual check before using – if it develops an off-smell, changes color, or shows any signs of separation or mold, it’s best to discard it.
-
Flavor Variations to Explore: Once you’ve mastered the basic recipe, the possibilities for customization are endless! Stir in finely minced roasted garlic for a homemade aioli, a pinch of smoked paprika for a smoky mayo, fresh herbs like dill, chives, or tarragon, a dash of sriracha or chipotle powder for a spicy kick, or even a touch of honey for a subtle sweetness that pairs wonderfully with certain dishes. Experiment to find your signature flavor combinations!
Common Questions About Homemade Mayonnaise
Why did my mayonnaise separate (break), and how can I fix it?
Mayonnaise separates when the emulsion breaks, meaning the oil and water components fail to stay bound together into a stable mixture. This usually happens for a few key reasons: the oil was added too quickly (especially with a traditional blender or whisk), the egg was too cold, or the ingredients weren’t blended sufficiently at the start to form a strong emulsion.
How to fix it: Don’t despair! A broken mayonnaise can often be rescued. In a clean bowl or jar, whisk a fresh egg yolk (at room temperature) with about a teaspoon of the broken mayonnaise until it combines. Once a new, stable base forms, slowly drizzle in the remaining broken mayonnaise, whisking continuously and vigorously until a new, thick emulsion forms. This process takes patience, but it works surprisingly well!
Can I use just the egg yolk instead of the whole egg?
Yes, you absolutely can use just the egg yolk. Using only the yolk will result in an even richer, denser, and often more stable mayonnaise, as the yolk contains most of the lecithin (the primary emulsifier). However, using the whole egg, as this recipe suggests, produces a lighter, fluffier texture that many people prefer, and it still emulsifies beautifully and reliably, especially with an immersion blender. If you’re looking for an extra-luxurious, dense mayo, feel free to experiment with just the yolk, ensuring it’s at room temperature.
How long does homemade mayonnaise last in the fridge?
Due to the presence of raw egg, homemade mayonnaise has a shorter shelf life than its commercial counterparts, which contain pasteurized eggs and various preservatives. When stored correctly in a clean, airtight container in the main compartment of your refrigerator (where the temperature is most consistent and cold, avoiding the door), it will typically last up to one week. The acidity from the lemon juice and vinegar, along with the salt, acts as a natural preservative, but it’s always wise to perform a quick “sniff test” and visual check before using. Discard it immediately if it develops an off-smell, changes color, or shows any signs of separation or mold.
Can I make homemade mayonnaise in a regular blender or food processor?
Absolutely! While an immersion blender makes the process incredibly fast and almost foolproof, a regular blender or food processor can also yield excellent results. The key difference lies in the oil addition: you must add the oil in a very slow, thin, and steady stream through the top opening (feeder tube) of the blender or food processor while the machine is running. This slow addition allows the emulsion to form gradually and prevents it from breaking. If you add the oil too quickly, it will likely separate into oil and liquid.
What if my mayonnaise is too thin?
If your mayonnaise turns out too thin, it likely means the emulsion didn’t fully form, or it broke. See the “Why did my mayo separate?” answer above for instructions on how to try and rescue it with a fresh egg yolk. Unfortunately, simply re-blending a thin, separated mayonnaise often won’t fix the issue without adding a new emulsifying agent to re-establish the bond between the oil and water.
Is it safe to eat raw eggs in homemade mayonnaise?
The consumption of raw eggs carries a small risk of salmonella. To minimize this risk, it is highly recommended to use fresh, high-quality eggs from a reputable source, or those specifically labeled as pasteurized. If you are pregnant, elderly, have a compromised immune system, or are generally concerned about raw egg consumption, using store-bought pasteurized eggs is an excellent and safer alternative. Pasteurized eggs have been gently heated to kill bacteria without actually cooking the egg, offering the same creamy result with reduced risk.
Can I make a vegan mayonnaise using this method?
While this specific recipe relies on eggs as the emulsifier, you can certainly make delicious vegan mayonnaise! Vegan mayonnaise recipes typically use plant-based alternatives like aquafaba (the liquid from a can of chickpeas) or certain plant-based milks as the emulsifying agent, combined with a neutral oil, acid, and mustard. Though this recipe is not vegan, there are many fantastic plant-based recipes available if you prefer an egg-free option.
More Delicious Homemade Condiments & Sauces
Once you’ve mastered the art of homemade mayonnaise, you’ll likely be inspired to explore other delicious condiments and sauces you can easily make from scratch. Elevate your meals and impress your guests with these fantastic homemade options, all offering superior flavor and control over ingredients:
- Homemade Big Mac Sauce
- Homemade Pesto Sauce
- Homemade Ranch Dressing
- Lebanese Garlic Sauce
- Honey Mustard Dipping Sauce
- Easy Chimichurri Sauce
- Homemade BBQ Sauce
- Green Goddess Dressing
Thanks for stopping by and trying one of my recipes. If you enjoyed it, please consider leaving a rating and sharing your thoughts in the comments section below. Your feedback really helps, and I always love hearing from you!
Homemade Mayonnaise Recipe
By: Rena Awada
Skill Level: Beginner
Servings: 16 tablespoons
Prep Time: 5 mins
Blending Time: 1 min
Total Time: 6 mins
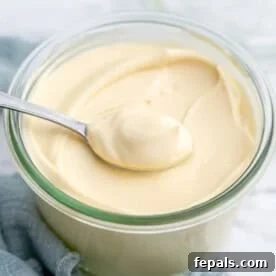
Fresh, creamy, and ready in under 5 minutes, this homemade mayonnaise is a staple in our fridge! This recipe uses avocado oil for clean flavor and healthy fats.
Ingredients
- 1 large egg, room temperature
- 1 cup avocado oil, or light olive oil
- 2 teaspoons white wine vinegar, or red wine vinegar
- 1 teaspoon lemon juice
- 1 teaspoon Dijon Mustard
- ¼ teaspoon sea salt
Instructions
-
Add the whole 1 large egg, 2 teaspoons white wine vinegar, 1 teaspoon Dijon Mustard, 1 teaspoon lemon juice, and ¼ teaspoon sea salt to a tall jar or the jar of your immersion blender. Pour in the 1 cup avocado oil and let it settle for a few seconds.

-
Slowly insert your immersion blender into the jar or container, making sure it sits firmly at the bottom. Try to position it directly over the egg yolk.
-
Turn on the blender and blend for about 12-15 seconds, until the ingredients emulsify. Hold the blender firmly down without moving it at first, allowing the emulsion to form at the bottom.
-
After the base has thickened, slowly move the immersion blender up and down. This will gradually incorporate the remaining oil from the top into the creamy mayonnaise.
-
Continue blending until the entire mixture is uniformly thick, smooth, and creamy, with a glossy appearance.
-
Taste the mayonnaise and adjust the seasoning if needed. You may add more lemon juice, a tiny pinch of sugar to balance tang, or a bit more salt. Transfer the mayonnaise into a lidded jar or airtight container and store it in the fridge for up to one week.


Notes
- This recipe yields approximately one cup of mayonnaise, which is about 16 tablespoons.
- For the smoothest and quickest emulsion, always use room-temperature ingredients, especially the egg.
- No immersion blender? A food processor or high-speed blender works too. Just be sure to drizzle the oil in very slowly in a thin stream while the machine is running.
- For a richer, denser, and often more stable mayonnaise, consider using just one room-temperature egg yolk instead of the whole egg.
- If raw egg is a concern, use store-bought pasteurized eggs for the same creamy result with reduced risk.
- If your mayonnaise turns out too tangy, add a tiny pinch of sugar (¼ to ½ teaspoon max) after blending to help balance the acidity without making it sweet.
- Store homemade mayonnaise in a clean, airtight jar in the main fridge compartment (not the door, as temperatures fluctuate more there) for up to 1 week. Consistent cold temperatures help prevent separation and maintain freshness.
Nutrition
- Serving:
- 1 tablespoon
- Calories:
- 125 kcal
- Carbohydrates:
- 0.1 g
- Protein:
- 0.4 g
- Fat:
- 14 g
- Saturated Fat:
- 2 g
- Polyunsaturated Fat:
- 2 g
- Monounsaturated Fat:
- 10 g
- Trans Fat:
- 0.001 g
- Cholesterol:
- 12 mg
- Sodium:
- 44 mg
- Potassium:
- 5 mg
- Fiber:
- 0.01 g
- Sugar:
- 0.02 g
- Vitamin A:
- 17 IU
- Vitamin C:
- 0.1 mg
- Calcium:
- 2 mg
- Iron:
- 0.1 mg
Nutrition information is automatically calculated and should only be used as an approximation.
Additional Info
- Course: Condiment
- Cuisine: American