
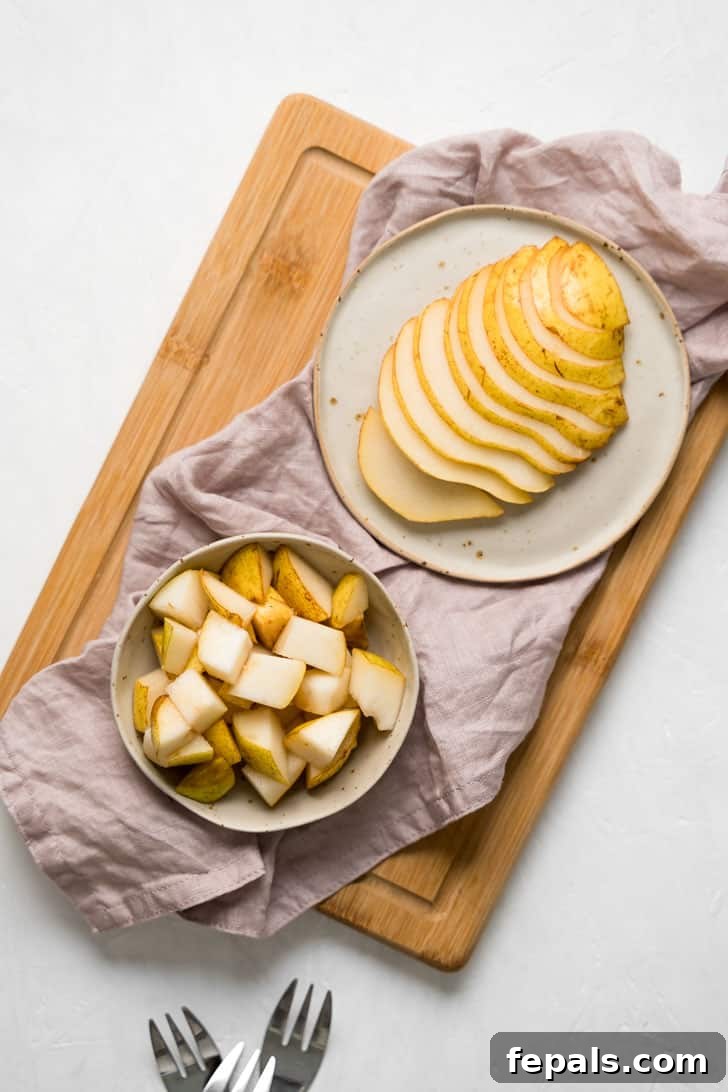
As the vibrant hues of autumn begin to emerge, so too does a bounty of seasonal fruits, with the crisp, sweet pear taking center stage. Knowing how to cut a ripe pear effortlessly, whether into elegant slices or practical cubes, is a skill that will serve you well for a myriad of culinary delights. From sophisticated charcuterie boards and refreshing fruit salads to wholesome snacks for growing toddlers, preparing fresh pear has never been easier or more rewarding. This comprehensive guide will walk you through simple, foolproof methods, ensuring you’re always ready to enjoy this delightful fruit.
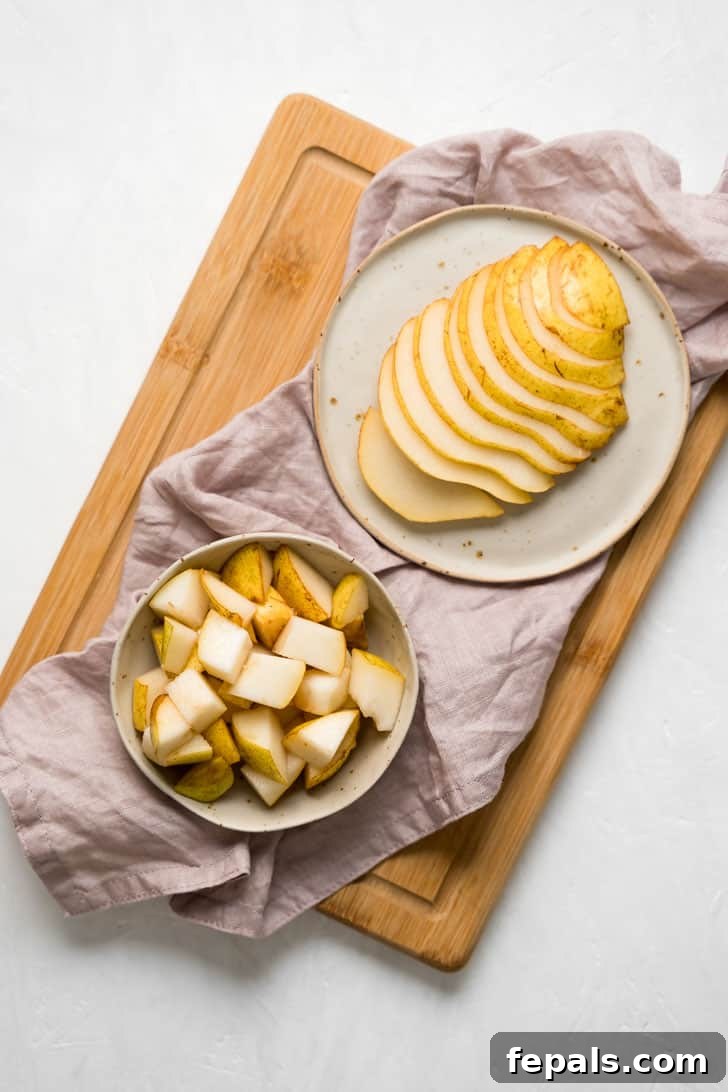
Pears come in a wonderful array of varieties, each offering its unique texture and flavor profile. Whether you prefer the classic sweetness of a Bartlett pear, the firm crispness of an Asian pear, or the subtle spice of a Bosc, the techniques for cutting them remain largely the same. Many people find the task of slicing or cubing pears daunting, especially when preparing ingredients for a gourmet salad or ensuring bite-sized pieces for a young child. However, with the right approach, it’s remarkably simple. This guide is designed to demystify the process, making pear preparation a breeze for everyone.
Follow our detailed, step-by-step instructions to master the art of cutting a pear perfectly every time. You’ll be surprised at how quickly you can transform a whole pear into beautifully prepared pieces, ready for any occasion. Let’s delve into the world of pears and unlock their full potential!
Why Pears Are a Delightful and Nutritious Choice
Pears are more than just a delicious treat; they are a powerhouse of nutrition and versatility. Available in numerous varieties such as Anjou, Comice, Bosc, Bartlett, and the unique Asian pear, each offers a slightly different experience. Despite their individual nuances, all pears share several compelling characteristics that make them a fantastic addition to any diet:
- Exquisite Flavor: Ripe pears are incredibly juicy and boast a naturally sweet flavor that ranges from subtly floral to intensely honey-like, depending on the variety. Their tender, yielding flesh makes them an absolute joy to bite into. Pears aren’t just for snacking; their sweetness and texture make them versatile additions to a wide range of dishes, from refreshing salads and savory cheese boards to delightful pizza toppings, comforting pies, and elegant cakes.
- Abundant Health Benefits: Beyond their taste, fresh pears are packed with essential nutrients. They are an excellent source of dietary fiber, crucial for digestive health and maintaining stable blood sugar levels. Pears also provide a wealth of antioxidants, which help combat free radicals in the body, supporting overall cellular health. Additionally, they contain significant amounts of Vitamin C, a key immune booster, and Vitamin K, important for blood clotting and bone health. These nutritional components make pears a smart choice for a healthy lifestyle.
- Convenient and Quick Snack: In today’s fast-paced world, finding healthy and convenient snack options is a priority. Pears fit this perfectly. With just a few simple steps, you can have a fresh, wholesome snack ready in moments. Our method for slicing and cubing pears is designed to be incredibly easy and efficient, transforming a whole fruit into perfectly portioned pieces for immediate enjoyment or meal prep.
Mastering the Art of Ripeness: How to Tell if a Pear is Ready to Eat
Unlike many other fruits, determining the ripeness of a pear can be a bit challenging, as their color doesn’t always change dramatically. Simply looking at the fruit won’t give you the full picture. The most reliable method to ascertain if a pear is perfectly ripe and ready to be enjoyed is the “neck test.”
To perform this test, gently apply pressure with your thumb to the top of the pear, near the stem. If the flesh yields slightly to your gentle touch, the pear is ripe. This area, known as the “neck,” ripens from the inside out, making it the ideal spot to check. A pear that is ready to eat will feel soft but not mushy at the neck, while the broader body of the pear may still be firm.
Conversely, an unripe pear will feel hard all over and will not give way when pressure is applied to the neck. Unripe pears often have a slightly greener hue compared to their ripe counterparts, but this can vary greatly by variety. When you’re at the grocery store or farmer’s market, make sure to give your prospective pears the “neck test” to ensure you bring home fruit that’s ready to be savored. If a pear feels too hard, you can ripen it at room temperature on your counter for a few days, checking daily until it passes the test.
Essential Tools for Cutting Pears
Before you begin, gathering the right tools will make the pear-cutting process much smoother and safer. You’ll only need a few basic kitchen items:
- Sharp Knife: A good quality chef’s knife or a paring knife, sharpened beforehand, will allow for clean, precise cuts with minimal effort and reduce the risk of slippage.
- Cutting Board: A sturdy wooden or plastic cutting board provides a stable surface for cutting, protecting your countertops and ensuring safety.
- Small Spoon or Melon Baller (Optional): While a knife can suffice, a small spoon or a melon baller can make coring the pear much easier and more efficient, especially for removing seeds cleanly.
How to Thinly Slice a Pear: A Step-by-Step Guide
Cutting and slicing a pear is an incredibly simple task once you know the technique. Follow these straightforward steps to achieve perfect, thin pear slices:
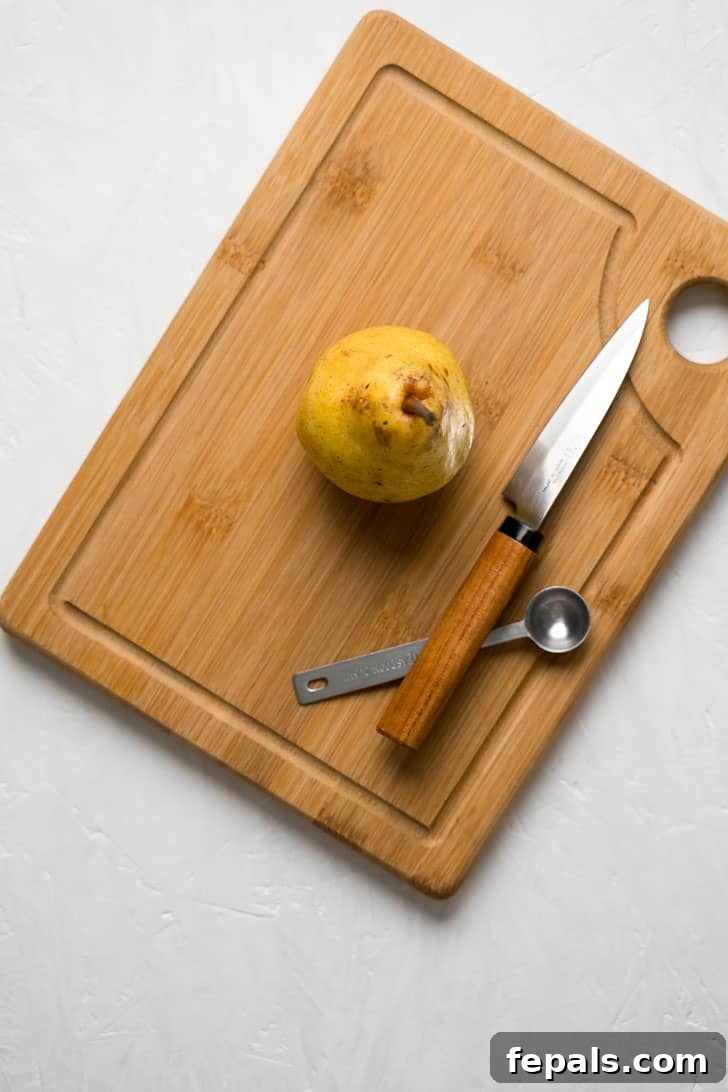
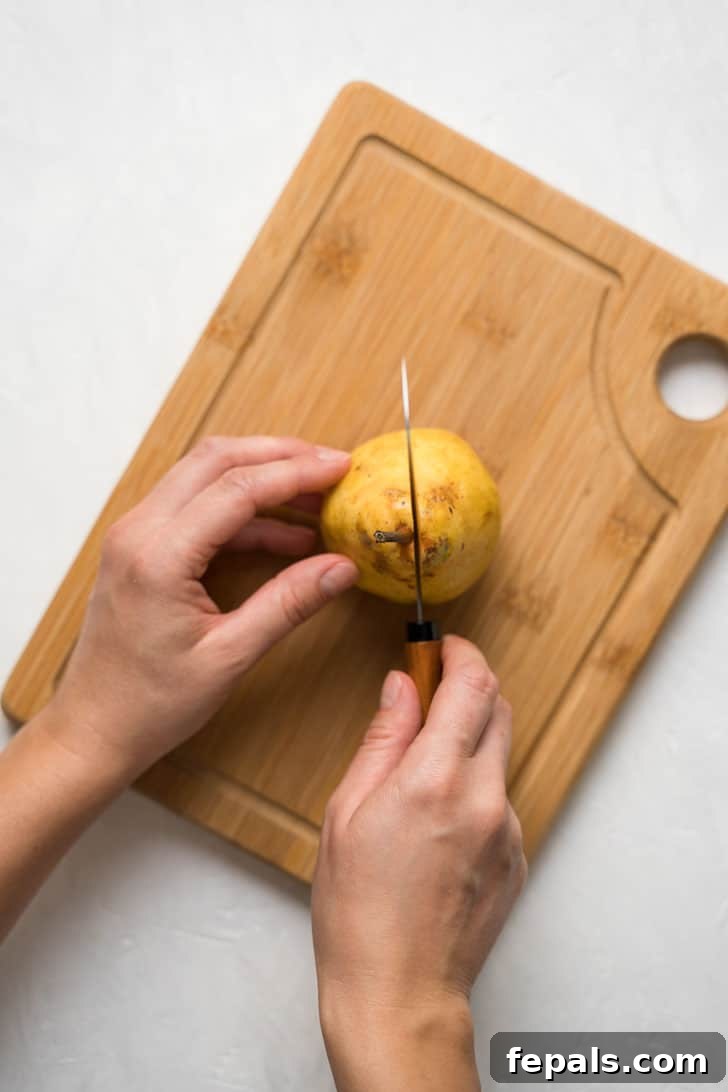
- Wash and Prepare: Start by thoroughly washing your pear under cool running water. For an extra clean, consider a quick rinse in a bowl with a tablespoon of white vinegar mixed into water, then dry the pear completely. Place the pear upright on its bottom on a stable wooden cutting board.
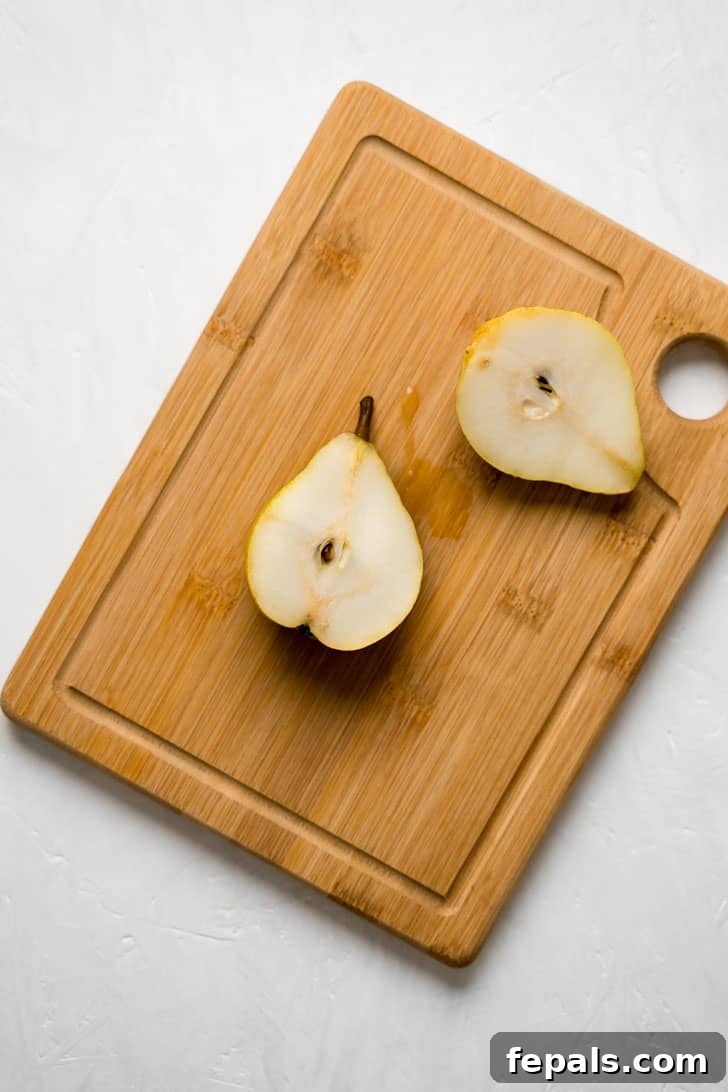
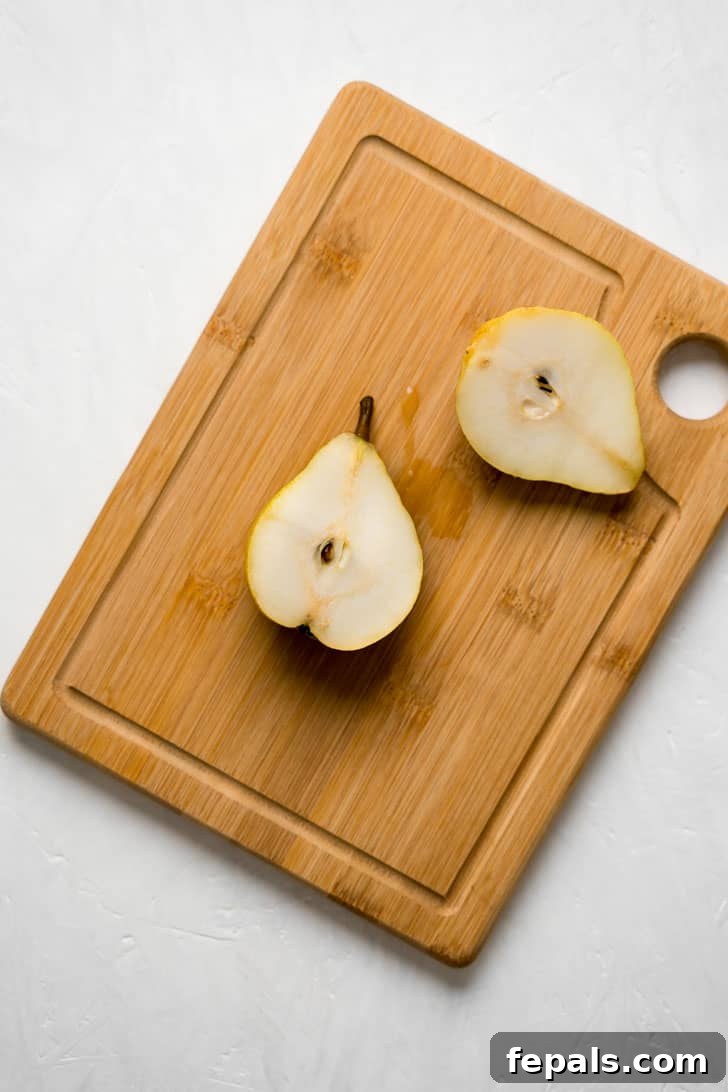
- Halve the Pear: Hold the pear firmly with one hand. With your sharp knife, carefully slice the pear lengthwise from the stem to the bottom, cutting directly through the center. Continue cutting until your knife reaches the cutting board. Gently pull the two halves of the pear apart.
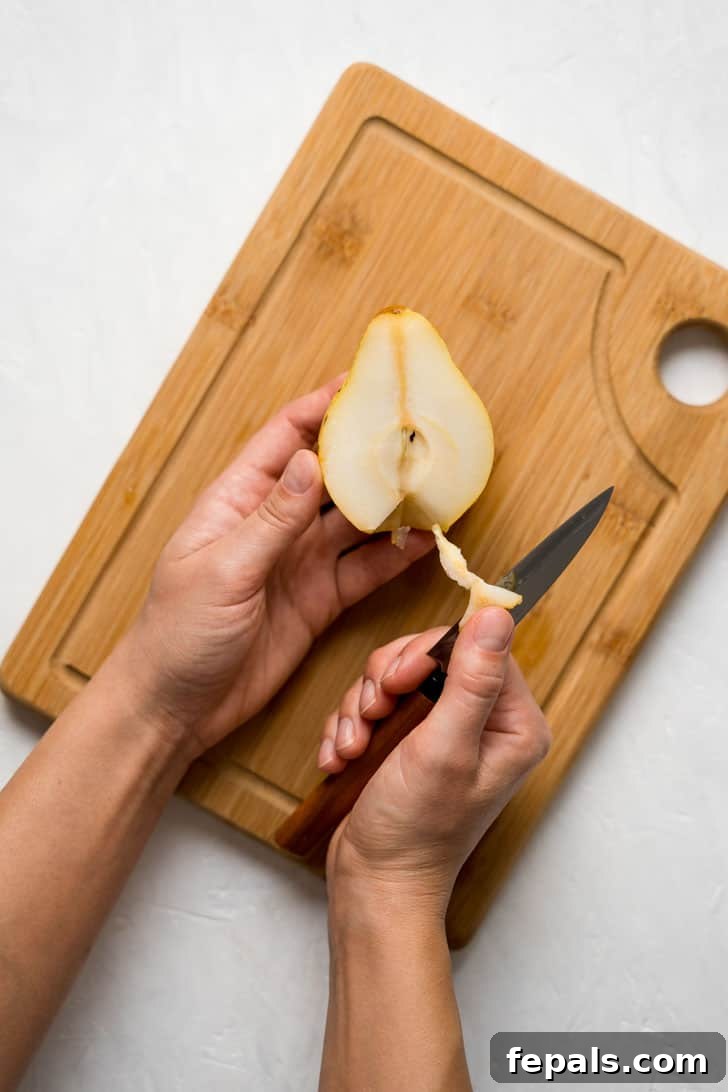
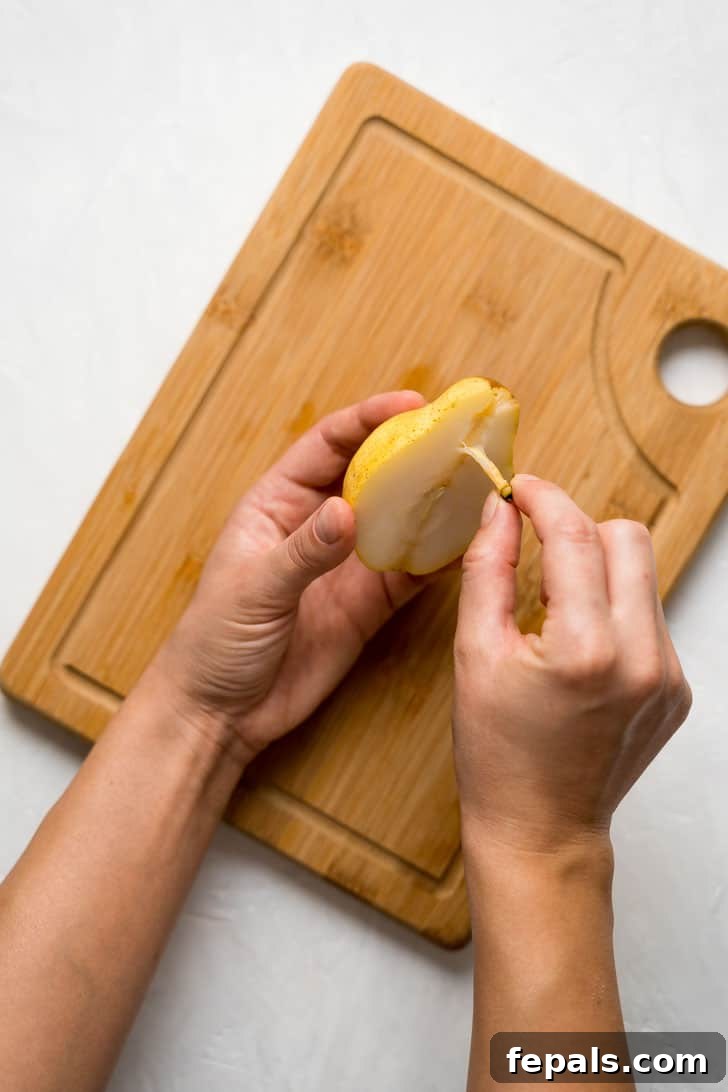
- Remove the Stem and Bottom (Optional): For a cleaner presentation, you may wish to remove the woody stem and the fibrous blossom end. Carefully cut around the stem at the top of the pear and pull it out. Similarly, trim off the small, firm area at the bottom.
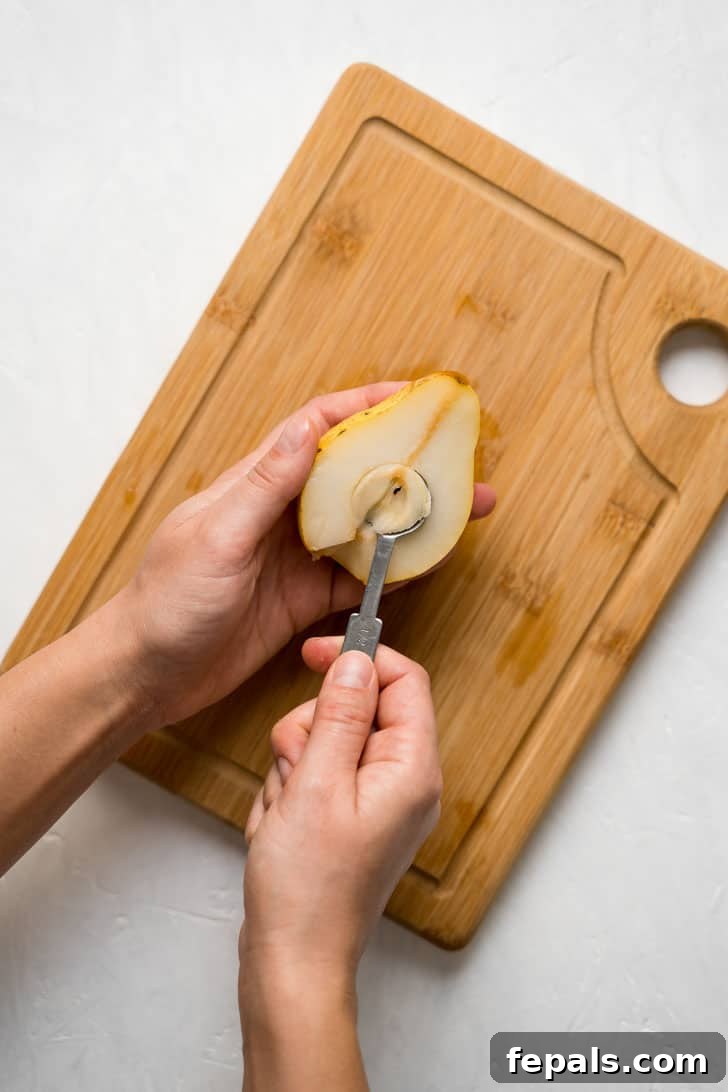
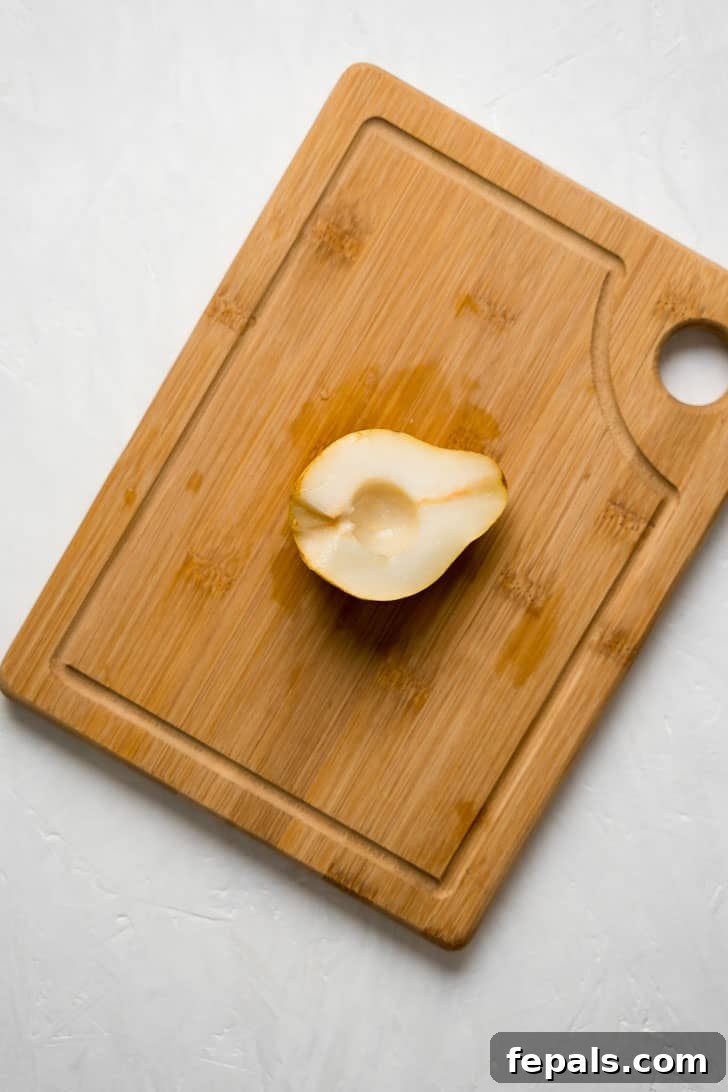
- Core the Pear: Using your small spoon or a melon baller, scoop out the fibrous core and seeds from the center of each pear half. This is often the easiest and cleanest way to remove the seeds without wasting too much fruit. Discard the core.
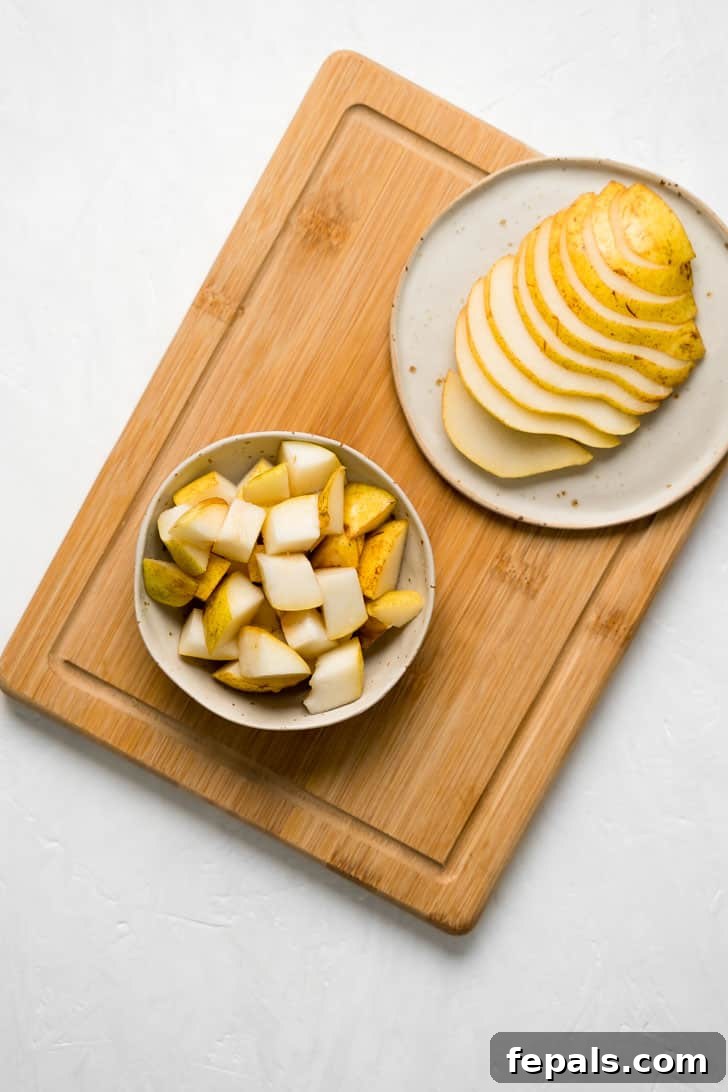
- Slice the Pear: Place each cored pear half flat-side down on the cutting board. With the knife, carefully slice the pear into uniform ¼-inch thick slices. You can make them thinner or thicker depending on your preference and intended use.
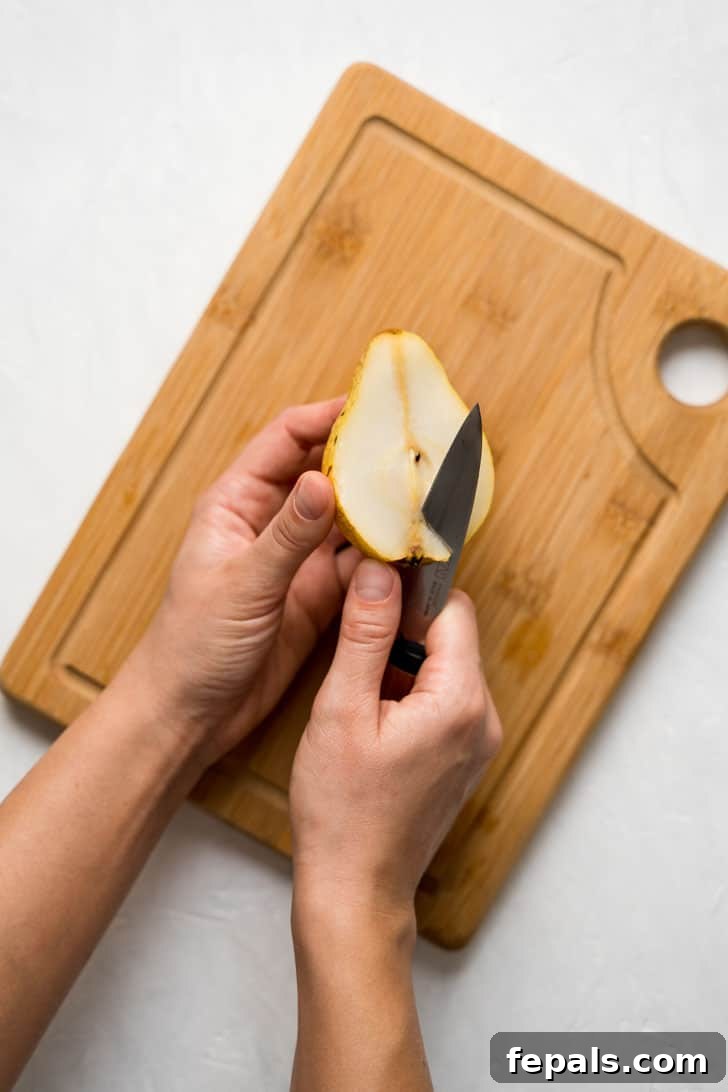
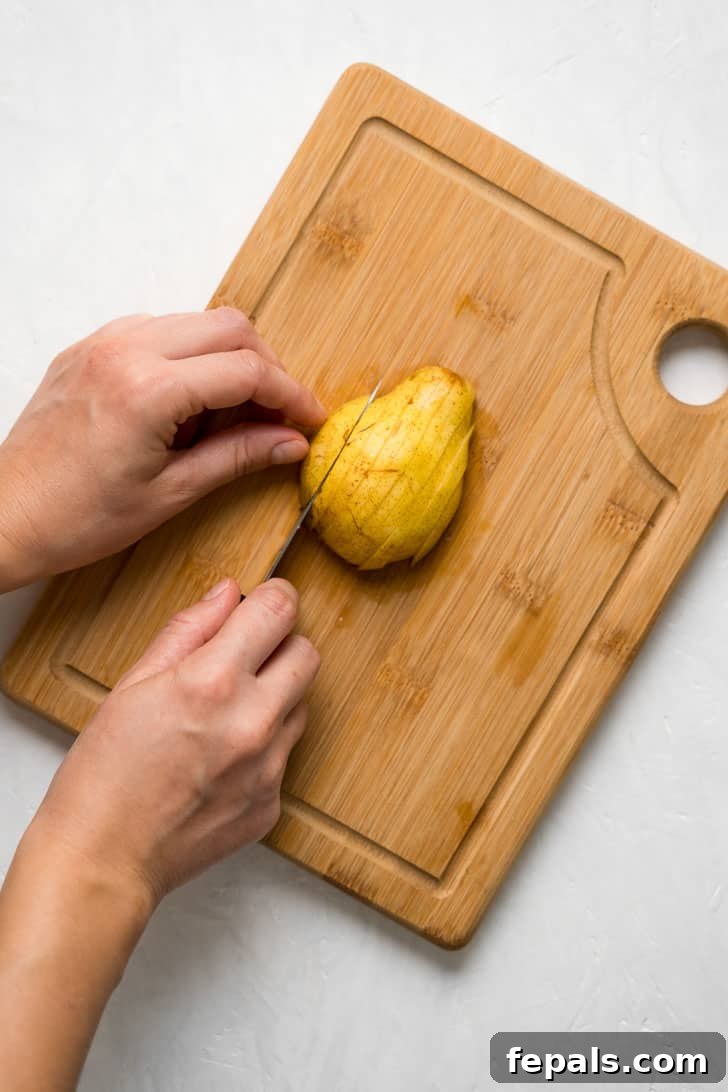
Once sliced, your pear is ready to be enjoyed! Serve these beautiful slices on their own for a simple, refreshing snack, or pair them with your favorite plant-based nut butter for a more filling treat. They also make an elegant addition to any platter or plate.
How to Cut a Pear Into Cubes for Versatile Use
Transforming your pear slices into neat cubes is just as easy and opens up even more culinary possibilities. Once you’ve completed the slicing steps above, continue with these simple instructions:
- Arrange Slices: Gather your pear slices and stack a few of them neatly together on your cutting board.
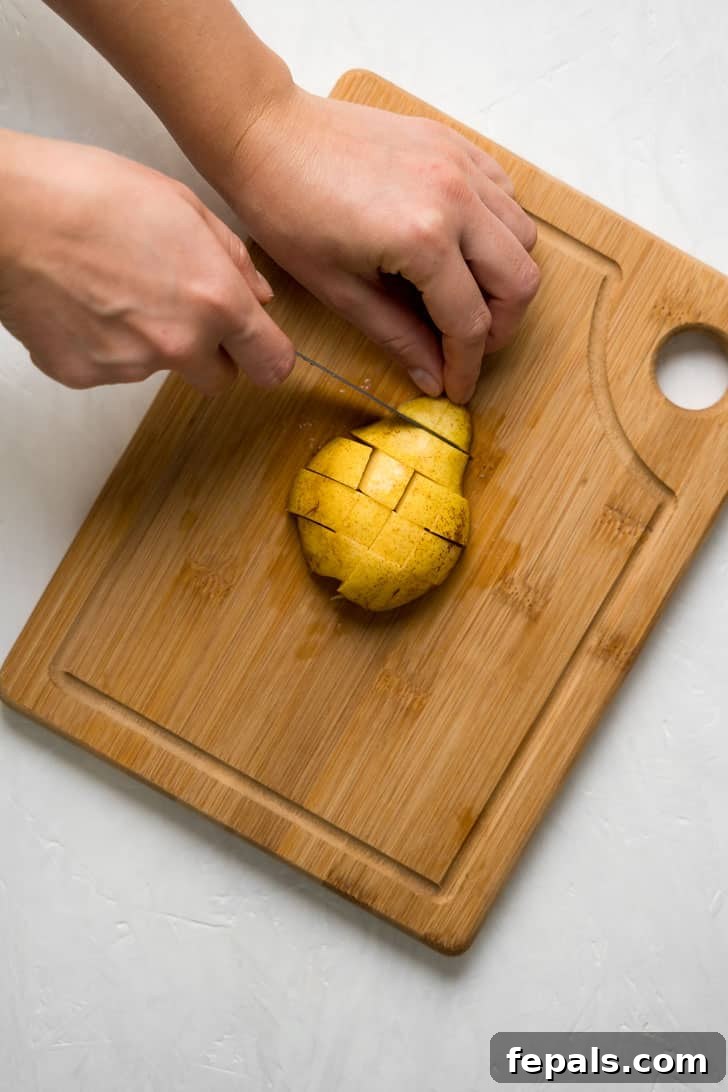
- Cube the Slices: With your knife, carefully cut through the stacked pear slices in the opposite direction from your initial cuts. Aim for even cuts across the slices to create uniform, bite-sized cubes. You can vary the size of the cubes depending on their intended use, from small pieces for a toddler to larger chunks for a fruit salad.
And just like that, you have perfectly cubed pear! These cubes are wonderful as a small, healthy snack, ideal for adding to breakfast cereals, oatmeal, or yogurt, or as a sweet and juicy component in a fresh green salad.
Frequently Asked Questions About Pears
Yes, absolutely! The skin of a pear is not only edible but also contains a significant amount of nutrients and dietary fiber, often more than the flesh itself. Eating the skin can boost your fiber intake and provide additional antioxidants. Just be sure to wash the pear thoroughly before consuming.
No, it is generally recommended to discard the core of a pear. While not toxic, the core contains tough, fibrous compounds and seeds that are hard to digest and can cause discomfort. Pear seeds also contain a small amount of amygdalin, which can convert to cyanide in the digestive system if consumed in large quantities, though the risk from a few seeds is minimal. For best taste and digestion, always remove the core.
Once pears are ripe, it is best to place them in the refrigerator. This helps to slow down the ripening process and maintains their fresh flavors and crisp texture for a longer period. Storing ripe pears in the refrigerator can extend their shelf life by several days compared to leaving them at room temperature. If your pears are unripe, keep them on the counter until they pass the “neck test” before refrigerating.
Pears, like apples, are prone to enzymatic browning when exposed to air. To prevent this, simply spritz or toss the cut pear pieces with a little lemon juice, lime juice, or pineapple juice. The acidity in these juices acts as an antioxidant, inhibiting the browning process. You can also use a mixture of water and a small amount of white vinegar for a similar effect, rinsing briefly before serving if you’re concerned about a vinegar taste.
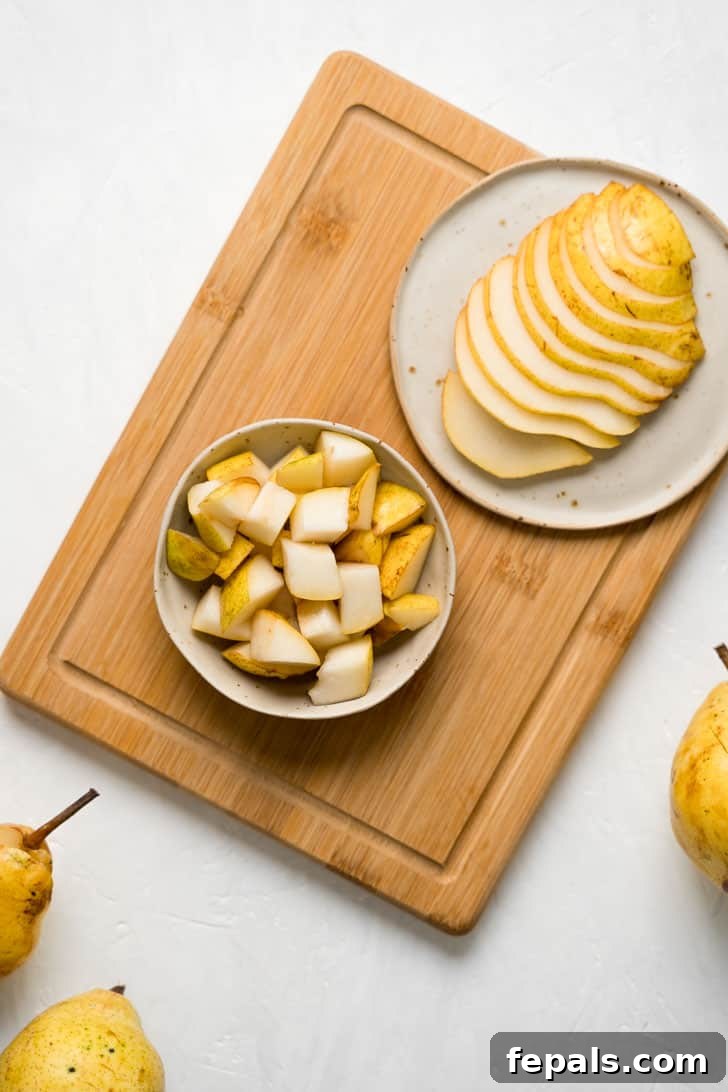
Sliced pears are perfect for elegant presentations on charcuterie boards, pairing wonderfully with cheeses, nuts, and cured meats. They’re also great for a simple snack, dipping into nut butter, or adding to sandwiches and wraps. Cubed pears are highly versatile for fruit salads, oatmeal, yogurt parfaits, smoothies, or even baked goods like muffins and crumbles. They can also be gently cooked into compotes for desserts or baby food.
How to Store Cut Pears for Lasting Freshness
Proper storage is key to enjoying your cut pears for as long as possible and preventing them from turning brown and unappetizing. Follow these guidelines to keep your pear slices or cubes fresh and delicious:
- Prevent Browning: Before storing, it’s highly recommended to treat your cut pear pieces to prevent enzymatic browning. Spritz or gently toss the slices with a small amount of lemon juice. Other acidic options like lime juice or even a light drizzle of honey diluted in water can also work effectively.
- Choose the Right Container: Once treated, transfer your pear slices or cubes into a reusable airtight container or a resealable plastic bag. Ensure as much air as possible is removed from the bag to minimize oxidation, which contributes to browning.
- Refrigerate Immediately: Place the sealed container or bag in the refrigerator. Cut pears will remain fresh and delicious for up to four days when stored properly.
Prepping and storing sliced fruit in advance is a fantastic strategy for meal planning. It ensures you always have healthy, fresh fruit readily available in seconds, making it perfect for quick after-school snacks, elegant additions to charcuterie boards, convenient work snacks, or simply to grab and enjoy any time you crave a sweet, healthy bite.
Explore More Fruit and Vegetable Cutting Methods
Mastering the art of cutting pears is just the beginning! Expand your culinary skills with these other helpful how-to guides for preparing various fruits and vegetables:
- How to Cut a Potato Into Home Fries
- How to Cut a Cantaloupe Melon
- How to Cut an Apple Into Slices
- Cutting a Pomegranate
- DIY Almond Milk at Home

Get My Free eBook!
Grab my free ebook featuring 20 of my top 30-minute family-friendly healthy dinner recipes. Simply subscribe to our newsletter to receive your copy!
We love to see your creations! Please use our hashtag #healthyfitnessmeals on INSTAGRAM for a chance to be featured! FOLLOW Healthy Fitness Meals on FACEBOOK | INSTAGRAM | PINTEREST | TWITTER for all of our latest blog posts and recipes.
How to Cut a Pear (Into Slices or Cubes)
Equipment
-
1 sharp knife
-
1 wooden cutting board
-
1 small spoon or melon baller (for coring)
Ingredients
- 1 medium pear fruit, with skin on (e.g., Bartlett, Anjou, Bosc)
- 1 tbsp white vinegar or lemon juice, optional, for washing or preventing browning
Instructions
-
Wash and Prepare: First, wash the pear thoroughly under cool running water. For a deeper clean, you can use a bowl of water containing about a tablespoon of white vinegar, then rinse and dry the pear thoroughly. Place the pear upright on its bottom on a stable wooden cutting board. Ensure you have a sharp knife and a small spoon (or melon baller) handy.
-
Halve the Pear: Hold the pear firmly with one hand. Gently slice the pear lengthwise from top to bottom, cutting directly through the center where the stem is. Continue cutting until your knife reaches the wooden cutting board, then carefully pull the two halves of the pear apart.
-
Remove Stem and Bottom: Carefully cut around the stem at the top of the pear and pull it out. You can also trim the small, firm blossom end from the bottom of each half for a cleaner finish. Discard these parts.
-
Core the Pear: Using the small spoon or melon baller, scoop out the fibrous core and all the seeds from the center of each pear half. This method makes removing the core quick and easy, minimizing fruit waste.
-
Slice the Pear: Place each cored pear half flat-side down on the cutting board. With your sharp knife, carefully slice the pear into uniform ¼-inch thick slices. Adjust the thickness based on your preference or recipe requirements.
How to Cut a Pear Into Cubes
-
Cube the Slices: To create cubes, gather a few of your pear slices and stack them neatly on the cutting board. With the knife, carefully cut through the stacked slices in the opposite direction from your initial cuts, ensuring you cut across the slices to form desired cube sizes.
Notes
- Always use a sharp knife for safety and efficiency.
- Consider a quick vinegar-water bath for thorough cleaning of the pear before cutting.
- To prevent browning, lightly spritz or toss cut pear slices/cubes with lemon juice before storing.
- Store any leftover cut pear pieces in an airtight container or bag in the refrigerator for up to four days.
- Serve cut pears on their own, with other favorite fruits, or alongside plant-based nut butter for a delicious snack.
Nutrition
Carbohydrates: 27g
Protein: 1g
Fat: 0.3g
Sodium: 2mg
Potassium: 179mg
Fiber: 5g
Sugar: 17g
Vitamin A: 50IU
Vitamin C: 8mg
Calcium: 17mg
Iron: 0.3mg
Nutrition information is automatically calculated, so should only be used as an approximation.