
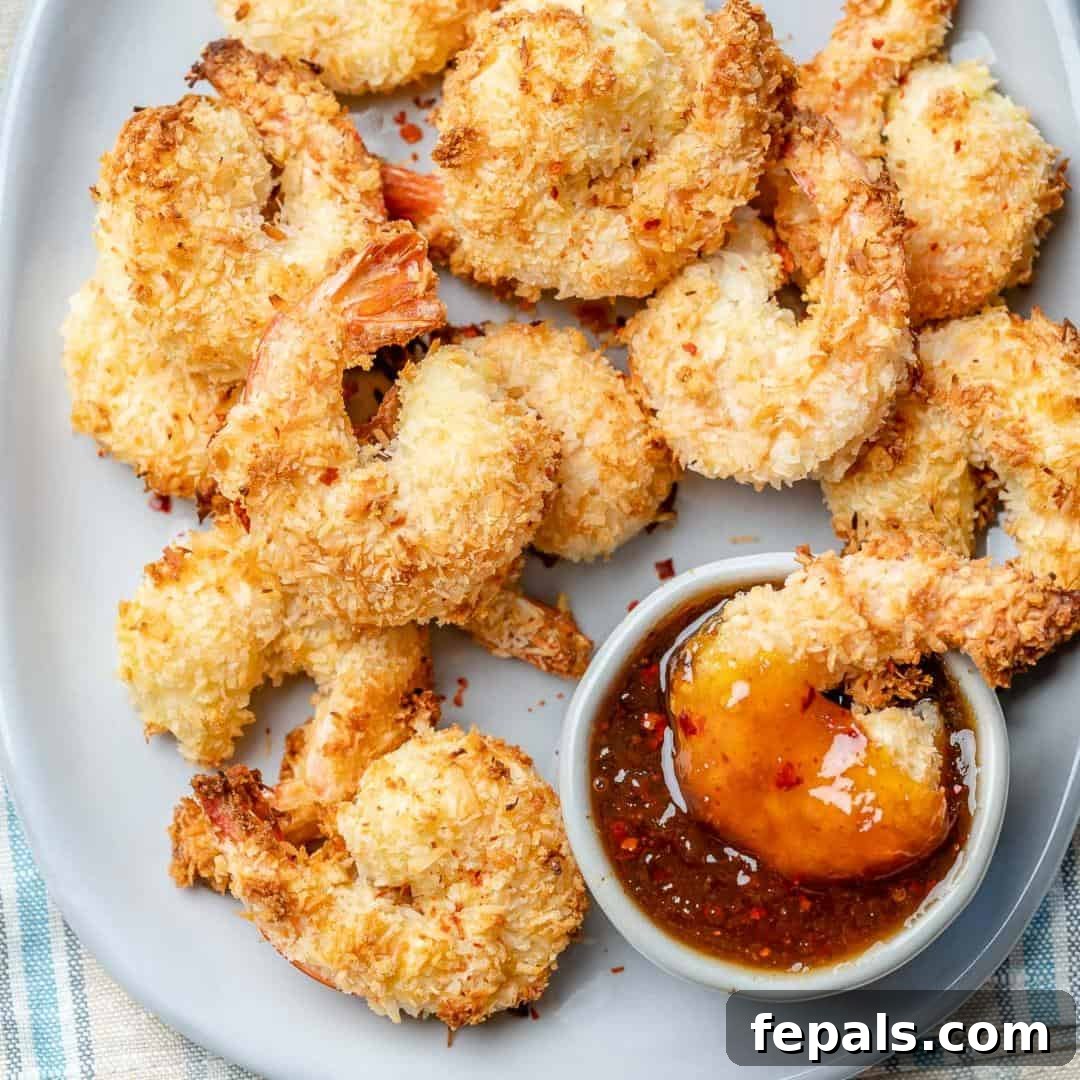
Deliciously Crispy Baked Coconut Shrimp Recipe: Your Healthy & Easy Indulgence
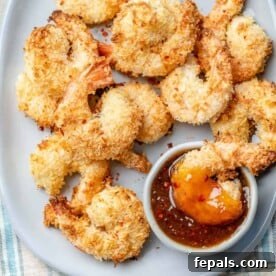
Craving a taste of the tropics without the guilt of deep-frying? Look no further than these incredible Baked Coconut Shrimp! Each succulent shrimp is coated in a perfectly crisp, golden-brown coconut and panko crust, offering a delightful crunch with every tender bite. Far easier than traditional methods and bursting with sweet and savory flavors, this recipe is ideal for a vibrant appetizer, a satisfying main course, or a unique salad topper. Get ready to impress your family and friends with a dish that’s as wholesome as it is delicious.
If you’re a true shrimp aficionado, you’ll also adore our Honey Walnut Shrimp and our zesty Kung Pao Shrimp Recipe, offering diverse and equally mouth-watering ways to enjoy this versatile seafood.
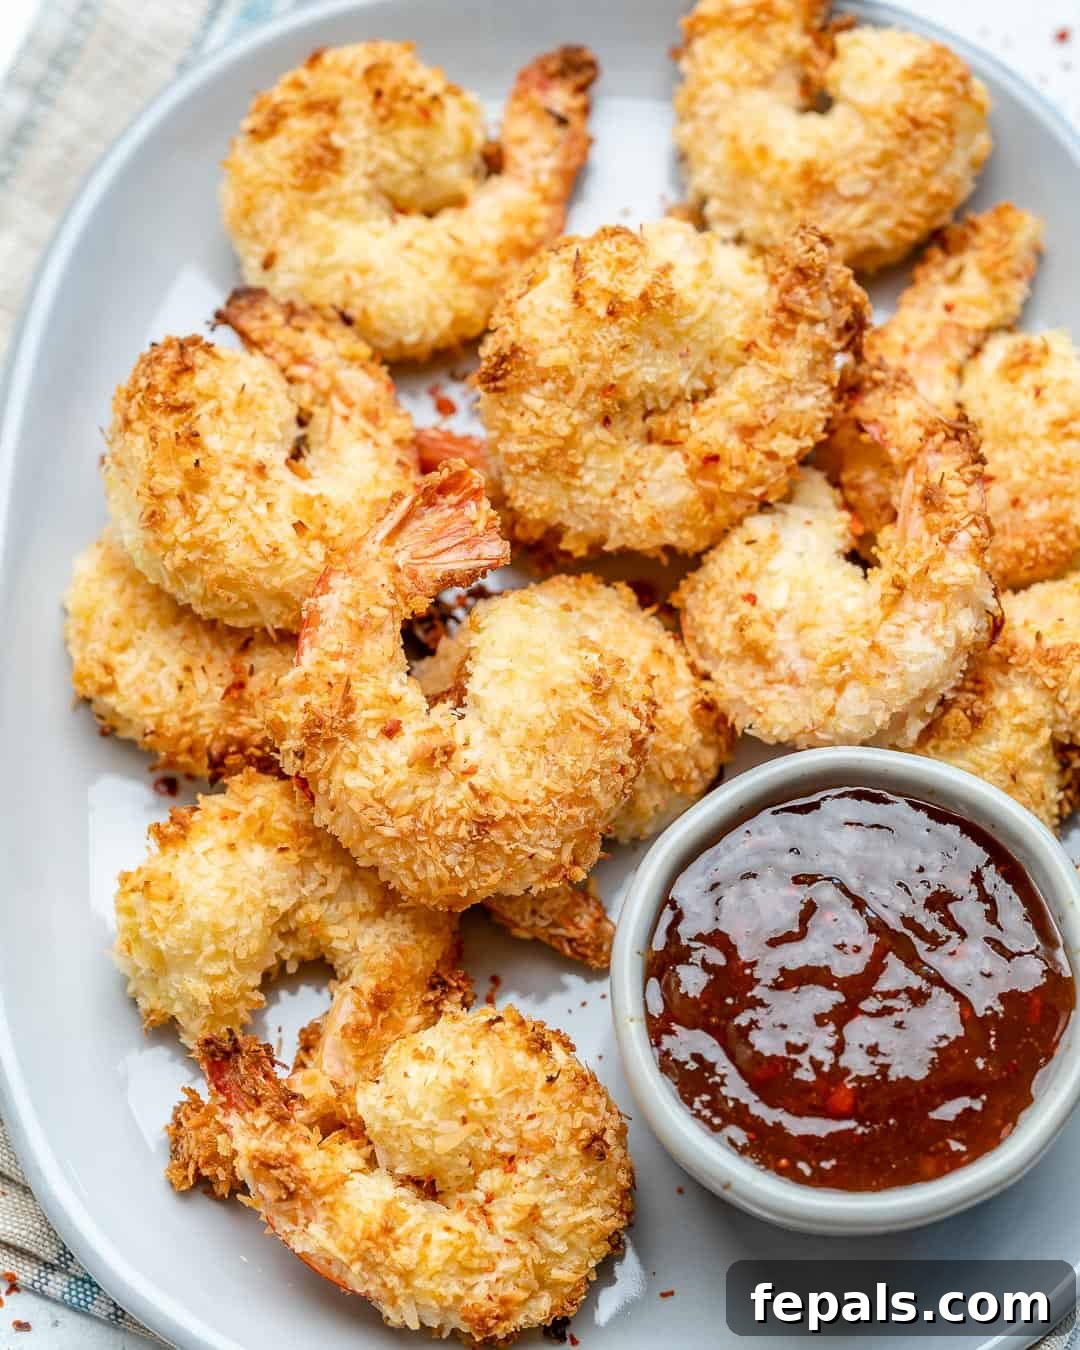
This fantastic Coconut Shrimp recipe features plump, raw shrimp enveloped in a homemade coconut breading mixture and then baked to absolute perfection in the oven. I’ve always loved the convenience of Costco coconut shrimp but wanted a healthier alternative to their deep-fried version. That’s why I created this baked recipe, delivering all the crispiness and flavor without the excess oil. For those who prefer, this recipe is also incredibly adaptable to the air fryer, offering an even faster route to crispy bliss – details on air frying can be found further down!
Elevate your weeknight meals with more incredible shrimp dishes like my savory Garlic Shrimp Spaghetti or the light and flavorful Healthy Shrimp Scampi.
Why You’ll Fall in Love with This Baked Coconut Shrimp Recipe
This recipe isn’t just another way to cook shrimp; it’s a game-changer that combines health, flavor, and convenience. Here’s why these baked coconut shrimp will quickly become a favorite in your kitchen:
- Unbelievably Crispy, Not Greasy: Forget the heavy grease that often comes with fried coconut shrimp. By baking these, we achieve an incredible crunch and a golden exterior that rivals any fried version, all while keeping them much lighter and healthier. Each shrimp is beautifully tender and juicy on the inside, encased in that satisfyingly crisp outer layer.
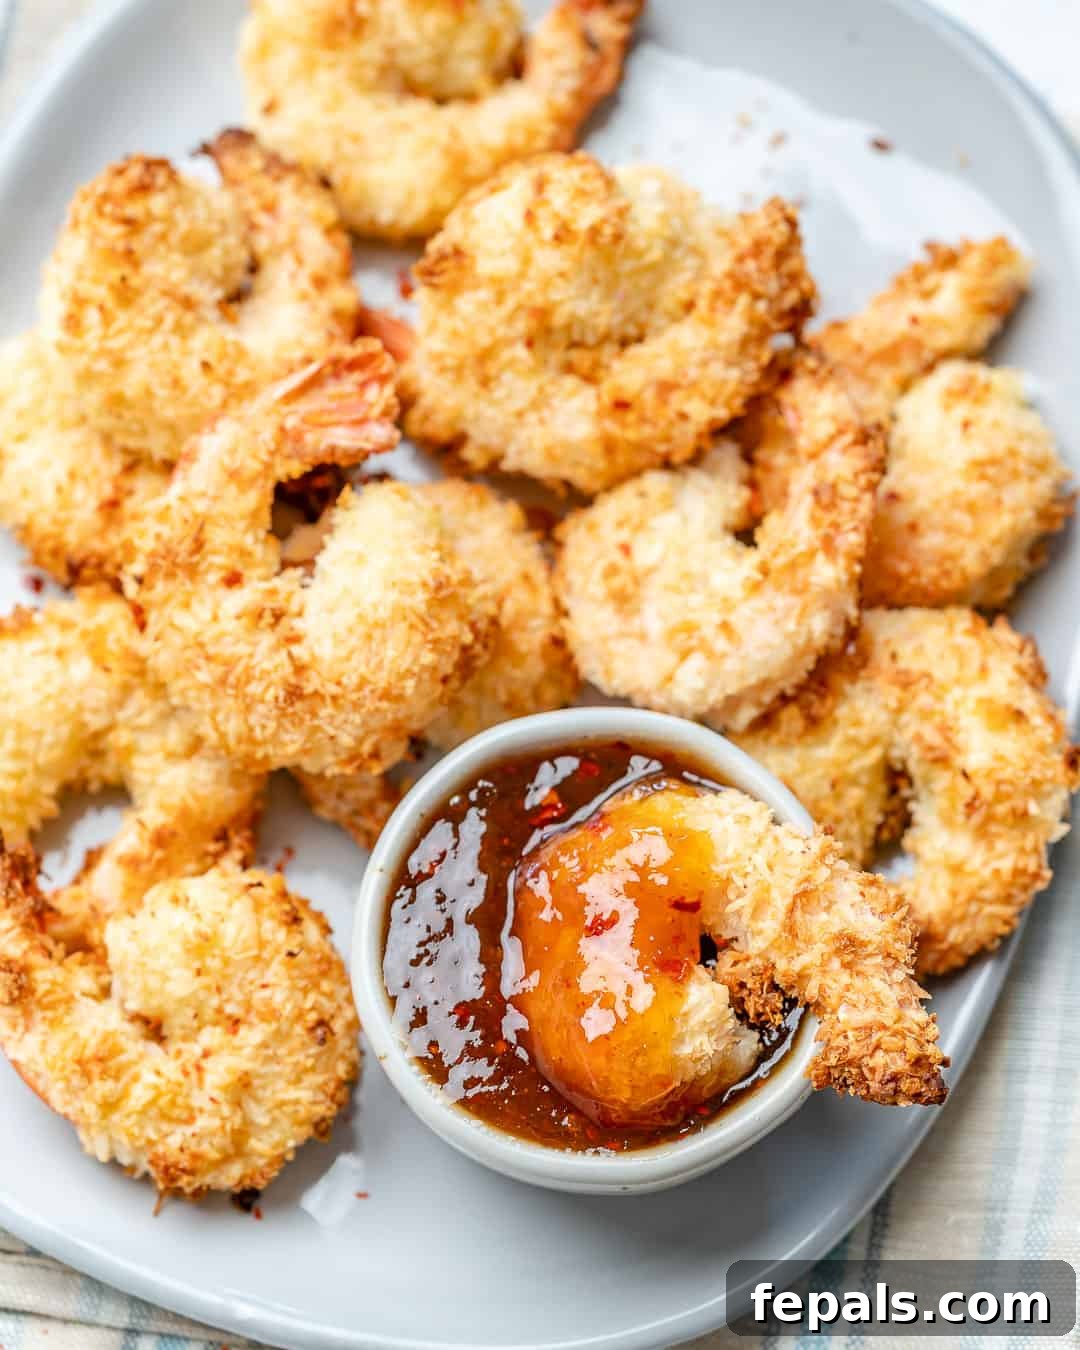
- A Dipping Sauce That Steals the Show: What’s crispy coconut shrimp without an amazing dipping sauce? Our special sweet and spicy concoction is an absolute winner. Made with vibrant sugar-free apricot preserves, a hint of tangy apple cider vinegar, fresh garlic, and a kick of chili flakes, this sauce perfectly complements the rich coconut flavor of the shrimp. It’s so good, you might want to double the batch!
- Effortlessly Easy & Quick to Prepare: This recipe is designed for busy home cooks. From start to finish, you can have a batch of these delectable shrimp ready in just about 30 minutes. The simple breading process and quick baking time make it an ideal option for a fast weeknight dinner, last-minute appetizer for guests, or a convenient meal prep component.
- Remarkably Versatile: Whether you’re looking for an elegant appetizer to kick off a dinner party, a light and satisfying main course, or a delightful protein boost for your salads, these baked coconut shrimp fit the bill. Their appealing presentation and irresistible flavor make them suitable for almost any occasion.
- A Healthier Indulgence: By opting for baking or air frying instead of deep-frying, this recipe significantly cuts down on unhealthy fats and calories, allowing you to enjoy the classic flavors of coconut shrimp without any compromise on your health goals. It’s a smart choice for a nutritious and delicious meal.
Key Ingredients for the Best Baked Coconut Shrimp
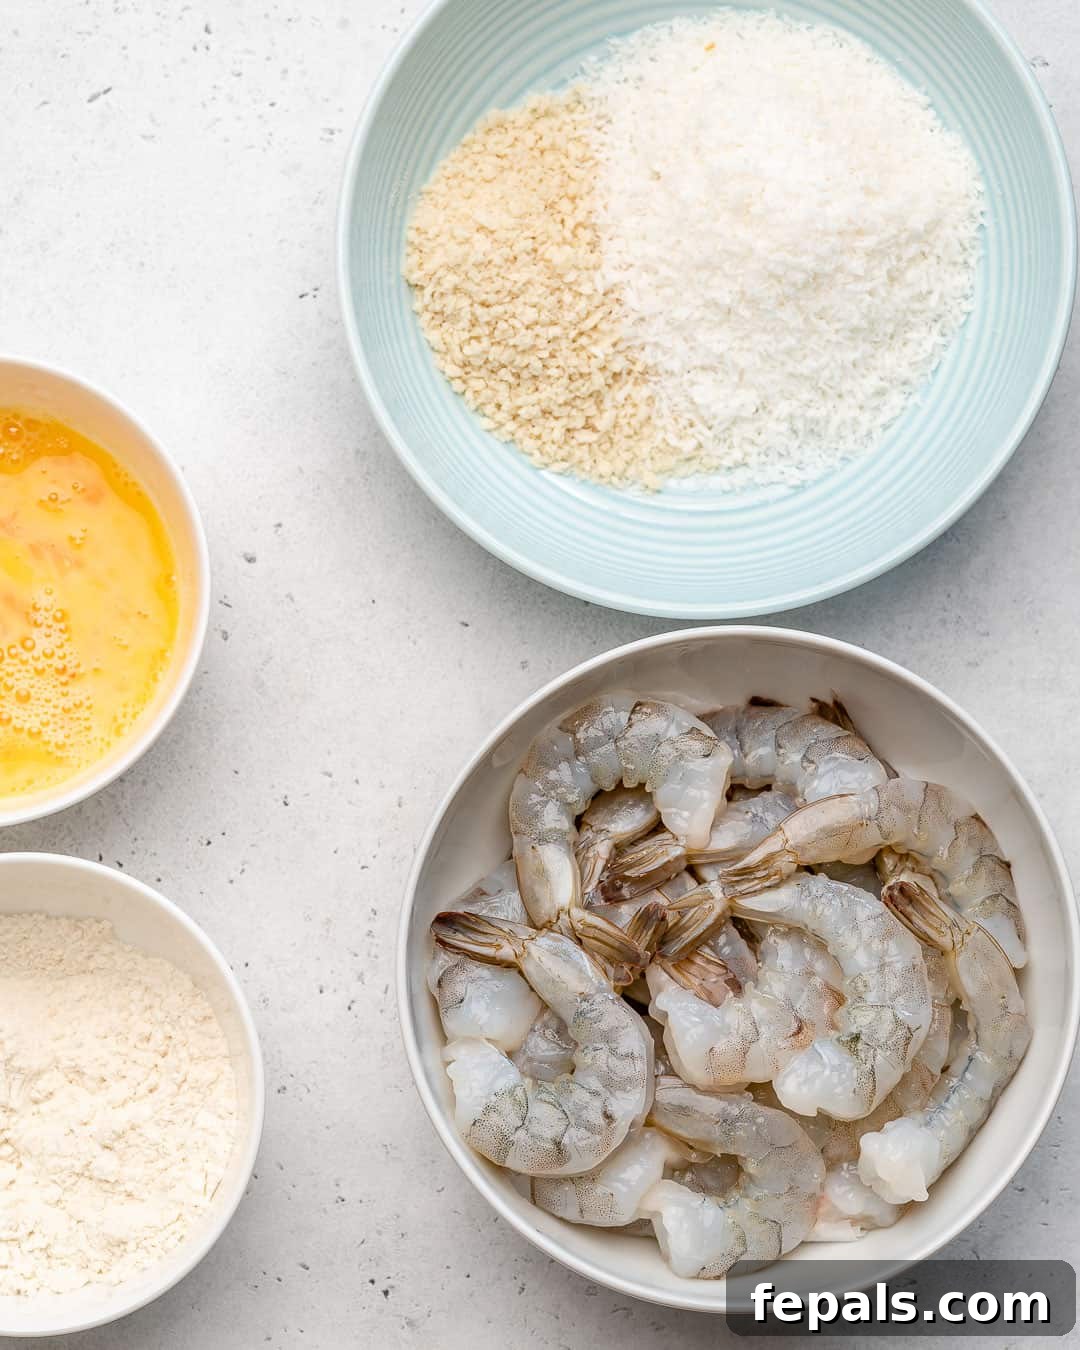
Crafting perfectly crispy and flavorful baked coconut shrimp starts with high-quality ingredients. Beyond a simple list, let’s delve into why each component is crucial and how to make the best choices for a truly outstanding dish. Full, precise measurements are listed further down below in the comprehensive recipe card.
- Large Shrimp: Opt for large shrimp (21-25 count is ideal) for a substantial bite. Whether fresh or frozen, ensure they are peeled and deveined, but always leave the tails on. The tails not only make for an attractive presentation but also provide a convenient handle for dipping and eating. If using frozen, thaw them completely and pat them thoroughly dry before breading.
- Whole Wheat Flour: This forms the initial layer of our breading, helping the egg wash adhere better. Whole wheat flour adds a subtle nutty flavor and a touch more fiber, contributing to the dish’s healthier profile. You can easily substitute this with all-purpose flour or, for a gluten-free option, use your favorite gluten-free flour blend.
- Flavorful Seasoning Blend: A simple yet effective blend of Kosher salt, garlic powder, and onion powder infuses the flour with savory notes. These pantry staples are essential for building a robust flavor foundation that complements the sweetness of the coconut and shrimp.
- Large Eggs: Beaten eggs act as the “glue” that binds the flour to the crispy coconut and panko coating. Using large eggs ensures enough liquid to fully coat the shrimp, creating a strong adhesive layer for the final dredge.
- Sweetened Shredded Coconut: This is, of course, the star! Sweetened shredded coconut brings that signature tropical flavor and a wonderful texture to the crust. Its natural sugars caramelize slightly during baking, enhancing the golden color and adding a touch of richness. While sweetened is recommended for that classic taste, unsweetened shredded coconut can also be used if you prefer less sweetness or are watching your sugar intake. Avoid coconut flakes, as shredded coconut adheres better and creates a more even crust.
- Panko Breadcrumbs: The secret to an extra-crispy coating! Panko breadcrumbs are coarser and flakier than regular breadcrumbs, absorbing less oil and delivering an unparalleled crunch. They create a light, airy texture that is far superior to standard breadcrumbs when baked.
- Olive Oil Cooking Spray: A light mist of olive oil spray helps achieve that beautiful golden-brown color and irresistible crispiness without drenching the shrimp in oil. You can also use avocado oil spray or coconut oil spray for similar results.
Crafting the Perfect Sweet & Spicy Dipping Sauce
The dipping sauce is just as important as the shrimp itself, elevating the entire dish with its vibrant flavors. Here’s what you’ll need for this irresistible accompaniment:
- Sugar-Free Apricot Preserves: This provides the primary sweet and fruity base for our sauce. Apricot offers a lovely tang and depth that pairs wonderfully with shrimp. Using a sugar-free version keeps the sauce lighter, but regular apricot preserves work just as well if preferred.
- Apple Cider Vinegar: A splash of apple cider vinegar brightens the sauce, cutting through the sweetness and adding a necessary acidic balance. It also contributes a subtle fruity tang.
- Fresh Garlic: Minced fresh garlic adds a pungent, aromatic kick that grounds the sweetness and spice, creating a more complex flavor profile.
- Chili Flakes: These provide a customizable level of heat. Start with the recommended amount and adjust to your personal preference for a gentle warmth or a fiery kick.
Step-by-Step Guide: How to Make Crispy Baked Coconut Shrimp
Making these deliciously crispy baked coconut shrimp is an incredibly straightforward process, perfect for home cooks of all skill levels. Follow these clear instructions to achieve perfectly golden and flavorful results every single time:
- 1. Prepare Your Signature Dipping Sauce: In a small bowl, combine all the ingredients for the sweet chili dipping sauce: sugar-free apricot preserves, apple cider vinegar, minced garlic, and chili flakes. Whisk everything together until well combined and smooth. Cover the bowl with plastic wrap and refrigerate it while you prepare the shrimp, allowing the flavors to meld beautifully.
- 2. Prepare the Shrimp: Begin by preheating your oven to 400°F (200°C). Line a large baking tray with parchment paper to prevent sticking and ensure easy cleanup. Take your large shrimp (preferably 21-25 count), ensuring they are already peeled and deveined. It’s best to leave the tails on for both aesthetic appeal and for easy handling while breading and eating.
- 3. Set Up Breading Stations: Thoroughly wash the shrimp under cold water and then pat them completely dry with paper towels. Removing excess moisture is crucial for achieving a crispy coating. Now, set up three separate shallow bowls or plates for your breading stations:
- Flour Mixture: In the first bowl, combine the whole wheat flour, kosher salt, garlic powder, and onion powder. Mix well to ensure the seasonings are evenly distributed.
- Egg Wash: In the second bowl, whisk the large eggs vigorously with a fork until they are thoroughly beaten and slightly frothy.
- Coconut & Panko Blend: In the third shallow bowl, combine the sweetened shredded coconut and panko breadcrumbs. Mix them together thoroughly.
- 4. Dredge the Shrimp: This is where the magic happens! Take one shrimp at a time, holding it by the tail, and follow these steps:
- First, dredge the shrimp entirely in the seasoned flour mixture, ensuring it’s fully coated. Gently shake off any excess flour.
- Next, immediately dip the flour-coated shrimp into the beaten egg wash, allowing any excess egg to drip off.
- Finally, transfer the egg-dipped shrimp directly into the coconut and panko breadcrumbs mixture. Gently press the mixture onto the shrimp with your hands to ensure a thick, even, and well-adhered coating on all sides. Repeat this process for all remaining shrimp.
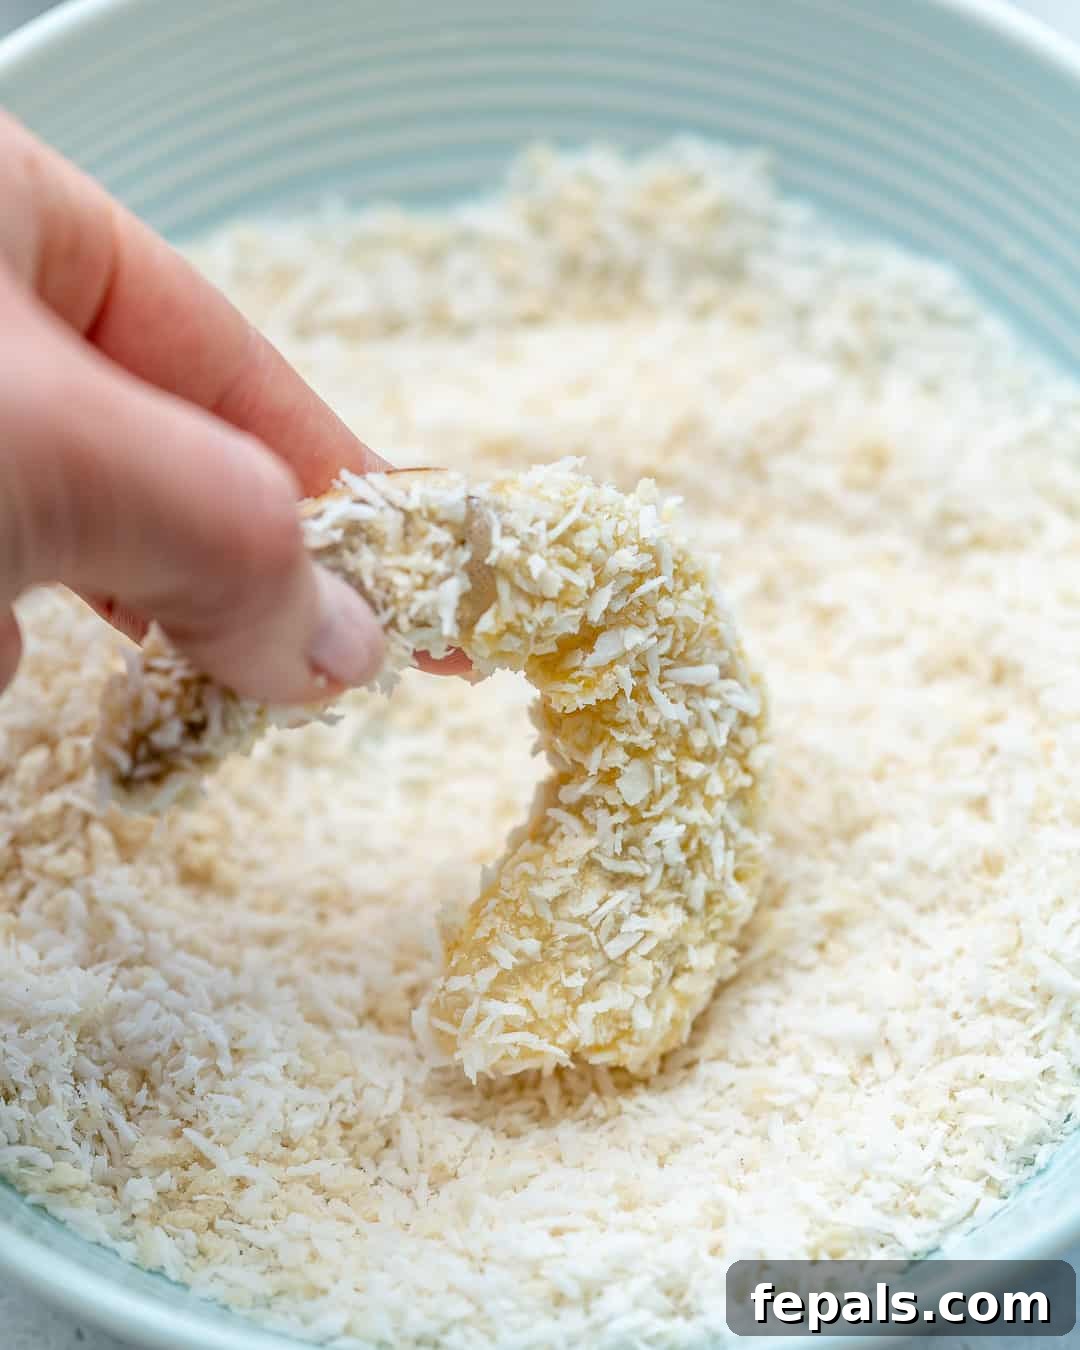
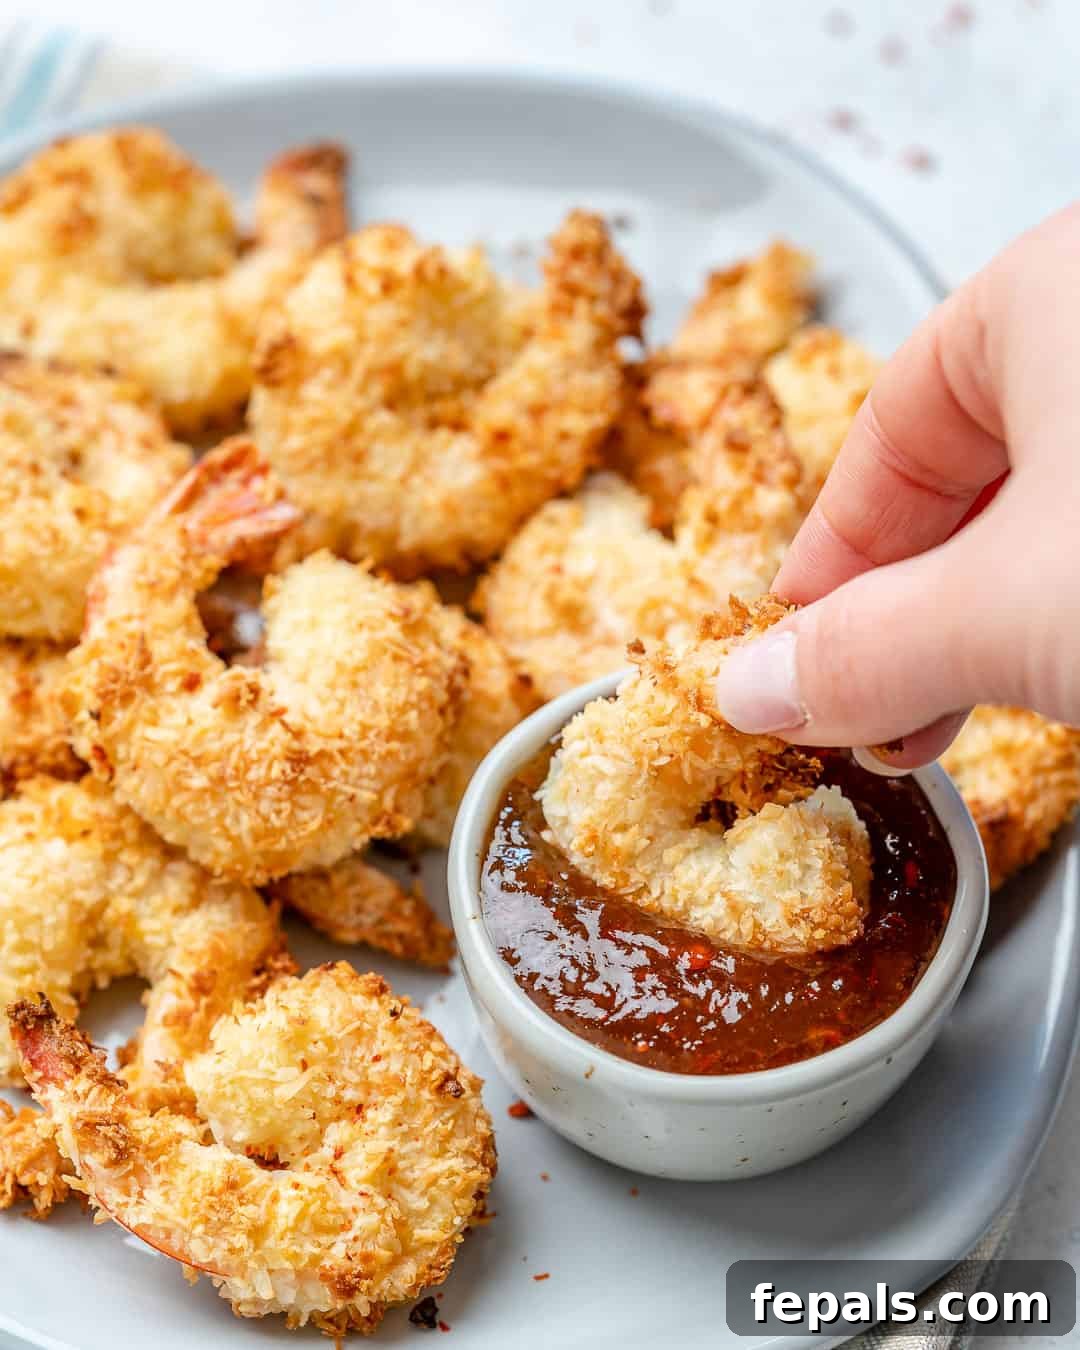
- 5. Bake to Golden Perfection: Arrange the coated shrimp in a single layer on your prepared baking tray. Make sure not to overcrowd the tray, as this can steam the shrimp instead of crisping them. Lightly spray the tops of the shrimp with olive oil cooking spray. Bake in the preheated oven for approximately 10-12 minutes, or until the shrimp turn opaque, the coating is gloriously crispy, and a beautiful light golden brown. Keep a close eye on them, as cooking times can vary slightly depending on your oven and shrimp size.
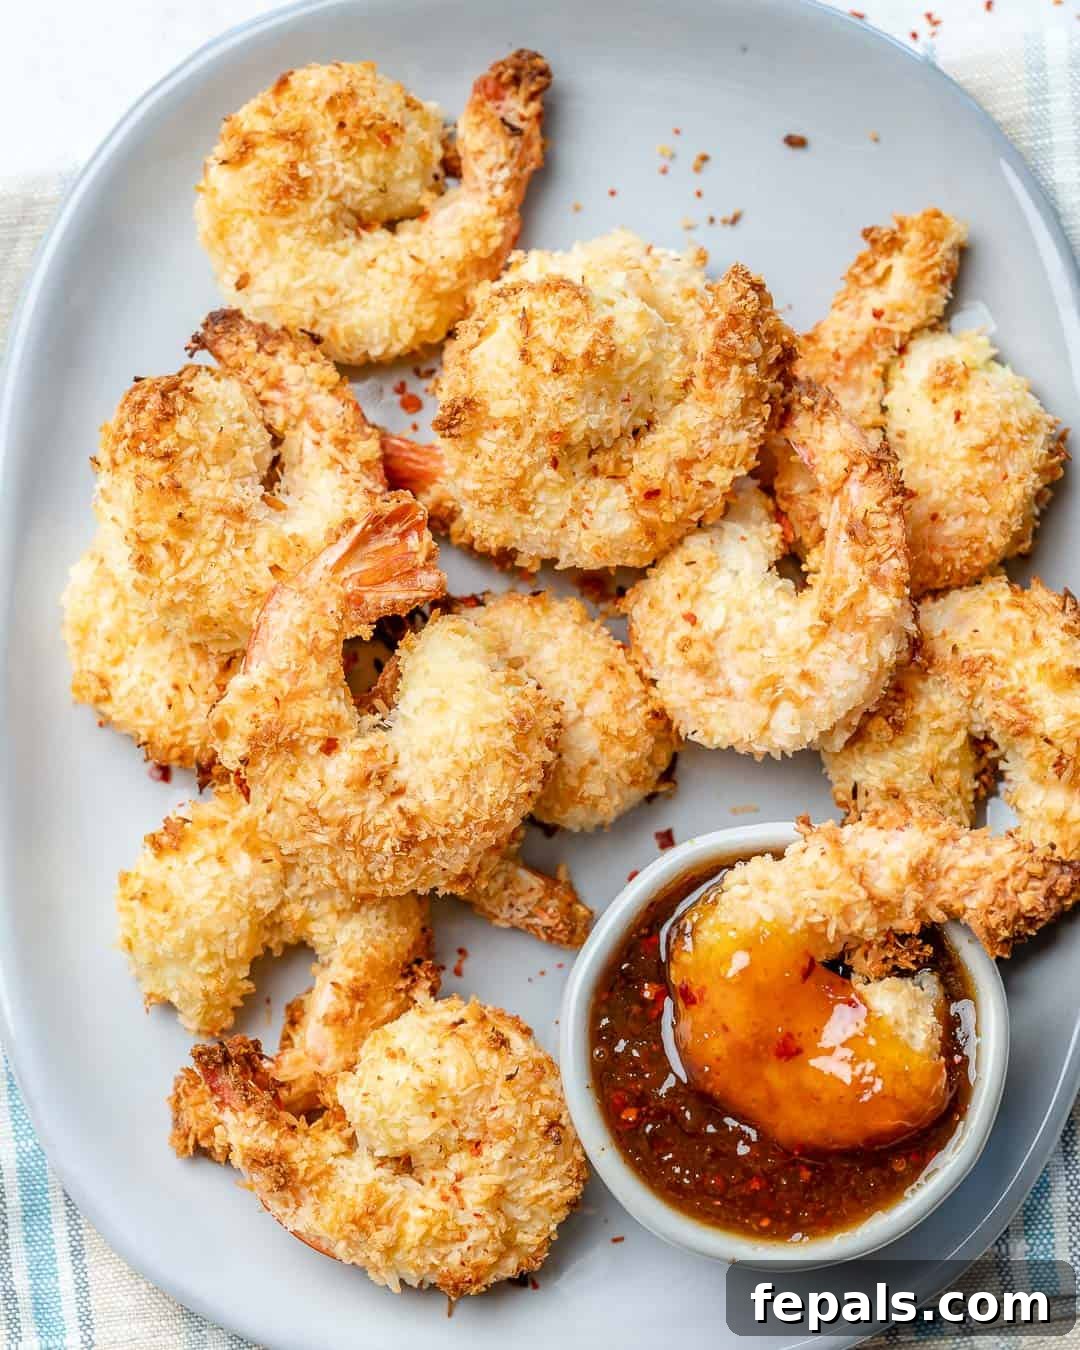
- 6. Serve Immediately: Once baked, remove the crispy coconut shrimp from the oven. Serve them piping hot with the chilled sweet chili dipping sauce you prepared earlier. A few fresh lime wedges on the side add a burst of citrus that perfectly complements the rich flavors. Enjoy your homemade, healthy, and incredibly delicious baked coconut shrimp!
Achieve Perfection: Air Frying Coconut Shrimp for Extra Crispiness
For those seeking an even faster and remarkably crisp result, the air fryer is your best friend! Air frying these coconut shrimp not only slashes cooking time but also intensifies their crunch. Here’s how you can adapt this irresistible recipe for your air fryer:
- 1. Preheat Your Air Fryer: Begin by preheating your air fryer to 400°F (200°C). For easier cleanup and to prevent sticking, you can line the basket tray with a piece of parchment paper designed for air fryers, or simply spray the basket generously with cooking spray.
- 2. Prepare Sauce & Shrimp: While the air fryer preheats, prepare your sweet chili dipping sauce as outlined in the baking instructions (whisking all ingredients in a small bowl, then refrigerating). Next, peel and devein your shrimp, ensuring the tails are left on. Thoroughly pat the shrimp dry to remove all excess moisture – this is key for maximum crispiness in the air fryer.
- 3. Set Up Breading Stations: Just like with the baking method, set up your three breading stations: one bowl for seasoned flour, one for beaten egg, and one for the coconut and panko breadcrumb mixture. Dredge each shrimp through the flour, then the egg, and finally coat generously in the coconut-panko blend, gently pressing to ensure it adheres well.
- 4. Air Fry in Batches: Place the breaded shrimp in a single layer in your air fryer basket. It’s crucial not to overcrowd the basket, as this restricts airflow and will prevent the shrimp from becoming truly crispy. Lightly spray the tops of the shrimp with olive oil cooking spray.
- 5. Cook Until Golden: Air fry the shrimp for about 3-4 minutes. Open the basket, gently flip the shrimp over to the other side, and lightly spray again. Continue to cook for another 3-4 minutes, or until the shrimp are golden brown, beautifully crispy, and cooked through. Depending on the size of your air fryer and shrimp, you may need to work in 2-3 batches to achieve the best results.
- 6. Serve Promptly: Remove the perfectly crispy air-fried coconut shrimp from the basket and serve immediately with your chilled sweet chili dipping sauce and lime wedges. Enjoy the extra crunch!
Expert Tips for Flawless Baked Coconut Shrimp Every Time
Achieving the perfect crispy, juicy coconut shrimp is simple with a few insider tips and tricks. These suggestions will help you elevate your dish and troubleshoot common issues, ensuring a fantastic outcome every time you prepare this recipe:
- Enhance Your Sweet Chili Dipping Sauce: For an additional layer of tropical sweetness and tang, consider stirring in some crushed pineapples or pineapple preserves into your sweet chili sauce. A small dash of fresh lime juice can also brighten the flavors beautifully.
- Customize Your Spice Level: The amount of chili flakes in the dipping sauce can be easily adjusted to suit your palate. If you prefer a milder sauce, start with half the recommended amount. For those who love heat, feel free to add a little extra. A pinch of red pepper flakes in the flour mixture can also add a subtle kick to the shrimp itself.
- Going Coconut-Free? No Problem!: If you or your guests aren’t fans of coconut, or if you have an allergy, you can easily omit it from the recipe. Simply add an extra 1/2 cup of panko breadcrumbs to the breading mixture instead of the coconut. The shrimp will still be wonderfully crispy and delicious, offering a satisfying crunch.
- Flour Options for Every Diet: The initial flour dredge is versatile. While whole wheat flour is recommended for its added nutrition and subtle flavor, feel free to use any all-purpose flour. For a gluten-free version, a 1:1 gluten-free flour blend works perfectly and won’t compromise the texture or taste.
- Choosing the Right Coconut: Always opt for shredded coconut over large flakes. Shredded coconut adheres much better to the shrimp, creating a more uniform and consistent crust. You can use either sweetened or unsweetened shredded coconut, depending on your desired level of sweetness.
- Panko for Premium Crispness: Panko breadcrumbs are truly essential for achieving that signature light and airy crispiness. Their unique texture absorbs less moisture and cooks up much crunchier than regular breadcrumbs. If you need a gluten-free alternative, almond flour can be used, but be aware that the texture will be denser and less airy.
- Prep Ahead for Convenience: To save time, you can prepare the dipping sauce up to 2-3 days in advance and store it in the refrigerator. The shrimp can also be peeled and deveined ahead of time and kept covered in the fridge for up to 24 hours. However, it’s best to bread the shrimp just before baking or air frying to ensure the freshest, crispiest coating.
- Don’t Overcrowd the Pan/Basket: Whether baking or air frying, ensure the shrimp are placed in a single layer with some space between them. Overcrowding leads to steaming rather than crisping, resulting in soggy shrimp. Cook in batches if necessary.
Frequently Asked Questions About Coconut Shrimp
Coconut shrimp typically consists of raw, fresh shrimp that are coated in a flavorful breading. This coating usually includes a base of flour, an egg wash for adhesion, and a generous mix of shredded coconut and panko breadcrumbs. The shrimp are then cooked until crispy and golden, often by baking, air frying, or deep-frying.
While the tail of shrimp is technically edible and some people do choose to eat it, it’s generally recommended to remove it before consuming. In recipes like coconut shrimp, the tail is often left on during preparation for two main reasons: it provides a convenient “handle” for dipping and eating, and it enhances the visual appeal of the dish. You can easily pinch off the tail before taking a bite.
The most classic and popular accompaniment for coconut shrimp is a sweet and spicy dipping sauce. Our recipe features a delicious homemade version made with sugar-free apricot preserves, apple cider vinegar, fresh garlic, and chili flakes. Other popular options include mango chutney, a pineapple salsa, or a creamy spicy mayo, all of which complement the sweet coconut flavor beautifully.
For the freshest and crispiest results, it’s best to bread and cook the coconut shrimp just before serving. However, you can prep some components in advance. The dipping sauce can be made 2-3 days ahead and stored in the refrigerator. The shrimp can be peeled and deveined up to 24 hours prior and kept chilled. If you cook them fully, reheating them in the oven or air fryer is best to regain crispness.
Several factors contribute to ultimate crispiness. First, ensure your shrimp are thoroughly patted dry before breading. Second, use Panko breadcrumbs, as they provide a superior crunch compared to regular breadcrumbs. Third, don’t overcrowd your baking sheet or air fryer basket; this allows hot air to circulate properly and crisp up the coating. Finally, a light spray of olive oil on the coated shrimp before cooking aids in achieving a golden, crispy finish.
Delightful Pairings: What to Serve with Baked Coconut Shrimp
Baked coconut shrimp are incredibly versatile and can be paired with a wide array of sides to create a complete and satisfying meal. Whether you’re aiming for a light appetizer spread or a hearty main course, here are some fantastic suggestions to complement their sweet and savory flavors:
- Fresh, Vibrant Salads: Complement the tropical notes of the shrimp with a refreshing salad. Try a Mango Black Bean Salad for a burst of sweetness and protein, or a light Avocado Cucumber Tomato Salad for a cool and creamy contrast. A simple green salad with a citrus vinaigrette also works wonderfully.
- Hearty Potato Sides: For a more substantial meal, serve your coconut shrimp alongside comforting potato dishes. Hasselback Potatoes offer a beautiful presentation and crispy texture, while Baked Sweet Potato Fries add a touch of natural sweetness and a healthy carb option.
- Healthy Vegetable Accompaniments: Boost your meal’s nutritional value with flavorful vegetables. Roasted vegetables like Roasted Garlic Cauliflower bring a savory depth, and Cauliflower Mash is a creamy, low-carb alternative to mashed potatoes. A vibrant Zucchini Corn Salad adds color and fresh texture.
- Tropical Rice Dishes: Enhance the island vibe with a side of light and fluffy rice. Jasmine rice or basmati rice are excellent neutral canvases. For an extra touch of flavor, consider serving with a simple coconut rice, made by cooking rice with coconut milk.
- Fruit Salsas: A fresh and zesty fruit salsa, such as pineapple or mango salsa, offers a bright and tangy counterpoint to the richness of the coconut shrimp. The vibrant acidity and sweetness cleanse the palate beautifully.
Storing and Reheating Your Baked Coconut Shrimp
While these baked coconut shrimp are best enjoyed fresh and hot, you can certainly store leftovers and reheat them. Here’s how to ensure they remain as delicious as possible:
- Storing Leftovers: If you happen to have any leftovers, allow them to cool completely before transferring them to an airtight container. Store the container in the refrigerator for up to 3 days. For longer storage, you can freeze the cooked shrimp for up to 3 months in a freezer-safe bag or container. Ensure they are arranged in a single layer before freezing to prevent them from sticking together.
- Reheating for Crispiness: To best preserve the crispy texture, avoid reheating coconut shrimp in the microwave if possible.
- Oven Reheating: Preheat your oven to 350°F (175°C). Place the shrimp on a baking sheet and reheat for 8-10 minutes, or until warmed through and re-crisped.
- Air Fryer Reheating: For the ultimate crispness, preheat your air fryer to 375°F (190°C). Place the shrimp in a single layer in the basket and air fry for 3-5 minutes, shaking the basket halfway through, until hot and crispy again.
More Irresistible Shrimp Recipes to Try
If you’re a true shrimp enthusiast and enjoyed these baked coconut shrimp, you’re in for a treat! Shrimp is incredibly versatile, quick-cooking, and packed with flavor, making it a fantastic choice for healthy and delicious meals. Explore these other fantastic shrimp-centric recipes that are perfect for any occasion:
- Easy Shrimp Fajitas: A vibrant and flavorful one-pan meal, perfect for a quick weeknight dinner.
- Cajun Shrimp and Sausage Skillet: A hearty and spicy skillet dish that’s bursting with Creole-inspired flavors.
- Shrimp Stuffed Avocado Recipe: A light, refreshing, and protein-packed appetizer or lunch, combining creamy avocado with seasoned shrimp.
- Shrimp Ceviche: A zesty and refreshing no-cook dish, perfect for warm weather and showcasing fresh seafood.
- Creamy Tuscan Shrimp: Succulent shrimp in a rich, sun-dried tomato and spinach cream sauce, ideal for pasta or crusty bread.
- Shrimp Scampi Zoodles: A healthy and flavorful twist on classic shrimp scampi, served over zucchini noodles for a low-carb option.
- Garlic Shrimp Spaghetti: A simple yet elegant pasta dish featuring tender shrimp tossed with garlic, herbs, and spaghetti.
- Healthy Shrimp Scampi: A lighter version of the beloved classic, full of vibrant garlic and lemon flavors.
- Honey Walnut Shrimp: Sweet and savory glazed shrimp with candied walnuts, a popular takeout favorite made healthier at home.
- Kung Pao Shrimp Recipe: A spicy and aromatic Chinese-inspired dish with tender shrimp, peanuts, and vegetables.
Sign up for our newsletter to receive exclusive recipes and your free ebook directly to your inbox!
If you try this Baked Coconut Shrimp recipe and love it as much as we do, please leave some feedback in the comment section below, and don’t forget to rate it! Your support helps us continue to share delicious and healthy recipes with our community.
FINALLY, follow us on FACEBOOK | INSTAGRAM | PINTEREST for all of our latest blog posts, recipe inspirations, and healthy living tips.
Crispy Baked Coconut Shrimp
Print Recipe
Video
Equipment
-
small bowl
-
Sheet Pan
Ingredients
Ingredients for sweet chili sauce:
Instructions
-
Whisk all the chili sauce ingredients in a small bowl (¼ Cup Sugar-free apricot preserves, 1 tablespoon Apple cider vinegar, 1 minced Garlic Clove, and 1 teaspoon Chili Flakes ). Cover with plastic wrap and refrigerate until ready to use.
-
Preheat the oven to 400F (200°C) and line a large baking tray with parchment paper. Peel and devein the Large Shrimp (21-25 count), with tails left on.
-
Wash thoroughly and pat the excess moisture with a paper towel. Now set up three dipping stations: in a mixing bowl, whisk 2 Large Eggs until frothy.
-
On a large plate, combine ¼ Cup Whole Wheat flour, ½ teaspoon Garlic Powder, ¼ teaspoon Onion Powder, and ½ teaspoon Kosher Salt; mix well and set aside.
-
In another shallow bowl, place 1½ Cups Sweetened Shredded Coconut and ½ Cup Panko Bread Crumbs, mix well, and set aside. Dredge each shrimp into the flour, shaking off any excess.
-
Next, holding the shrimp by the tail, dunk the shrimps into the beaten egg and then immediately into the coconut and bread crumbs mixture, gently pat with your hands to coat well.
-
Place the coated shrimp in a single layer on the prepared baking tray. Lightly spray the tops of the shrimp with Olive oil cooking spray and bake for about 10-12 minutes or until crispy and lightly golden.
-
Serve the crispy shrimp immediately with the sweet chili sauce and fresh lime wedges.
Notes
- For an extra layer of sweetness and tang in your dipping sauce, consider adding some crushed pineapple or pineapple preserves.
- Enhance the seasoning mix with a pinch of smoked paprika for a deeper flavor profile.
- Adjust the amount of chili flakes in the sauce to match your preferred level of heat.
- If coconut isn’t your preference, simply omit it and add an additional 1/2 cup of panko breadcrumbs to the coating mixture. The shrimp will still be deliciously crispy!
- Mango chutney also makes an excellent dipping companion for these baked coconut shrimp.
- Any type of flour can be used for the first dredge – oat flour, all-purpose flour, or gluten-free flour blends all work well.
- You can use either sweetened or unsweetened shredded coconut. For best texture, we recommend shredded coconut over large flakes.
- Panko breadcrumbs are highly recommended for their superior crispiness, but almond flour can be used as a gluten-free alternative, though the texture will be slightly different.
Nutrition
Nutrition information is automatically calculated, so should only be used as an approximation.