
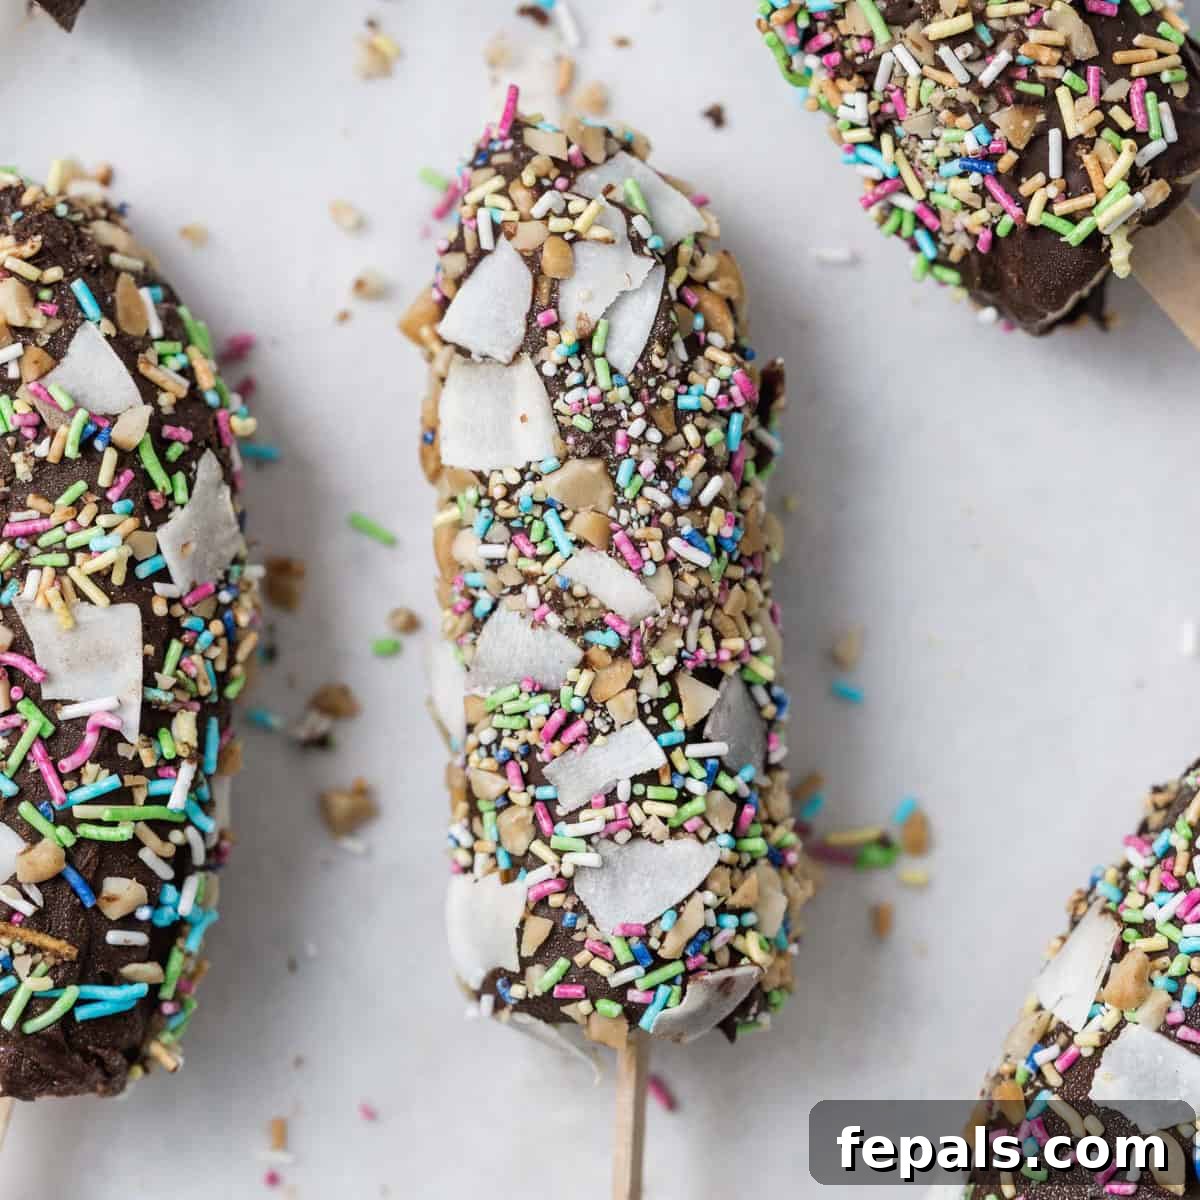
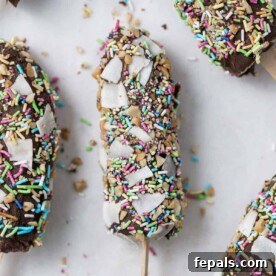
Are you searching for the ultimate delightful and healthy treat that brings back sweet childhood memories? Look no further than these incredible Chocolate-Covered Banana Pops! These frozen delights are a perfect fusion of nature’s candy – sweet, ripe bananas – enveloped in a rich, decadent layer of chocolate. They are not just a snack; they’re an experience, a simple pleasure that transports you back to simpler times with every cool, creamy, and irresistibly chocolatey bite.
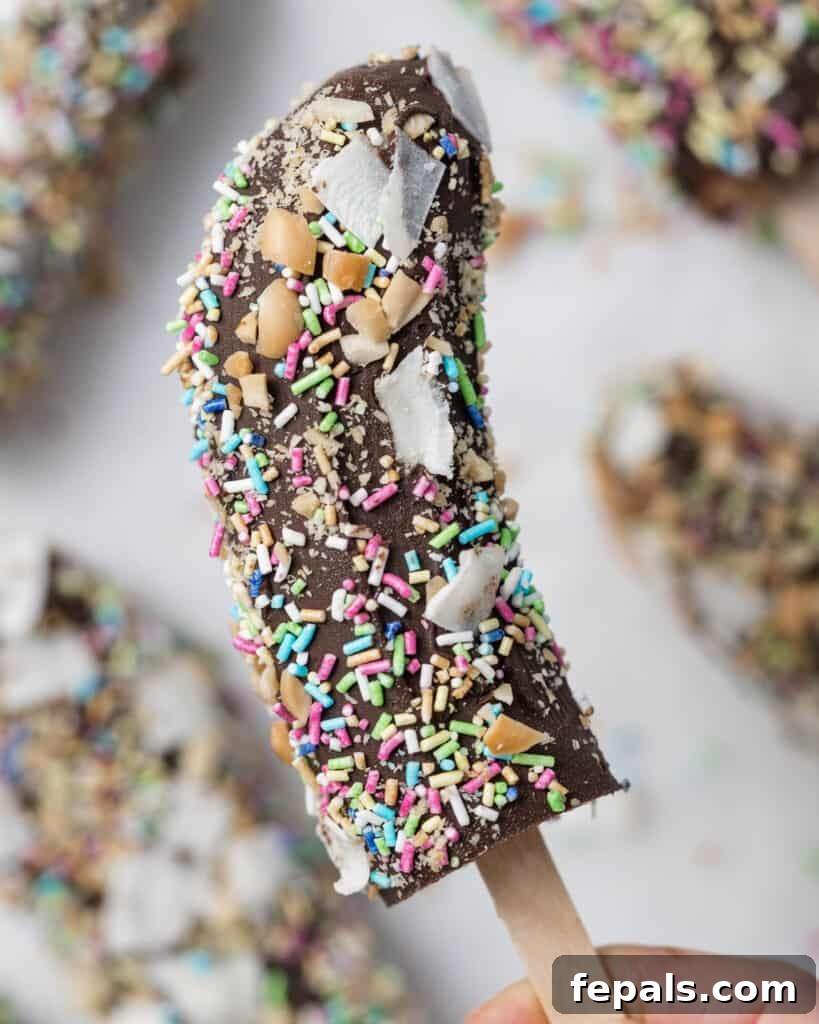
Banana pops stand out as the ideal warm-weather indulgence or a delightful party treat that captivates both children and adults. Picture a scorching summer day, and you’re craving something refreshing, satisfying, and utterly delicious – that’s where these come in! They’re cool to the touch, wonderfully creamy on the inside, and boast an unmatchable chocolatey exterior, making them the quintessential treat for any occasion. From backyard barbecues to festive gatherings, or simply as an everyday snack, these easy-to-make frozen bananas coated in chocolate are guaranteed to spread smiles and satisfy sweet cravings without the guilt.
What truly makes these chocolate-covered bananas a standout is their sheer simplicity. You don’t need a culinary degree or a pantry full of exotic ingredients. Just a few wholesome components – ripe bananas, your preferred chocolate chips, and a sprinkle of your favorite toppings – are all it takes. A quick dip into melted chocolate, a momentary sprinkle of fun additions, and a brief freeze transform these everyday fruits into handheld, frozen masterpieces. It’s a nostalgic journey in every bite, promising to make everyone, regardless of age, feel like a kid again.
Beyond their delightful taste and ease of preparation, these treats offer fantastic dietary benefits. They are naturally gluten-free and can be easily made dairy-free by opting for dairy-free chocolate chips, ensuring that virtually everyone can enjoy this scrumptious snack. If you’re a fan of the classic fruit and chocolate combination, be sure to explore other mouth-watering recipes like our Greek Yogurt Fruit Dip, a light and creamy accompaniment to fresh fruits, and our Healthy Chocolate Bark, perfect for a quick, healthy chocolate fix!
Why You Will Love This Easy & Healthy Chocolate Banana Pop Recipe
These **Chocolate-Covered Banana Pops** aren’t just a dessert; they’re a versatile, crowd-pleasing snack packed with reasons to love them:
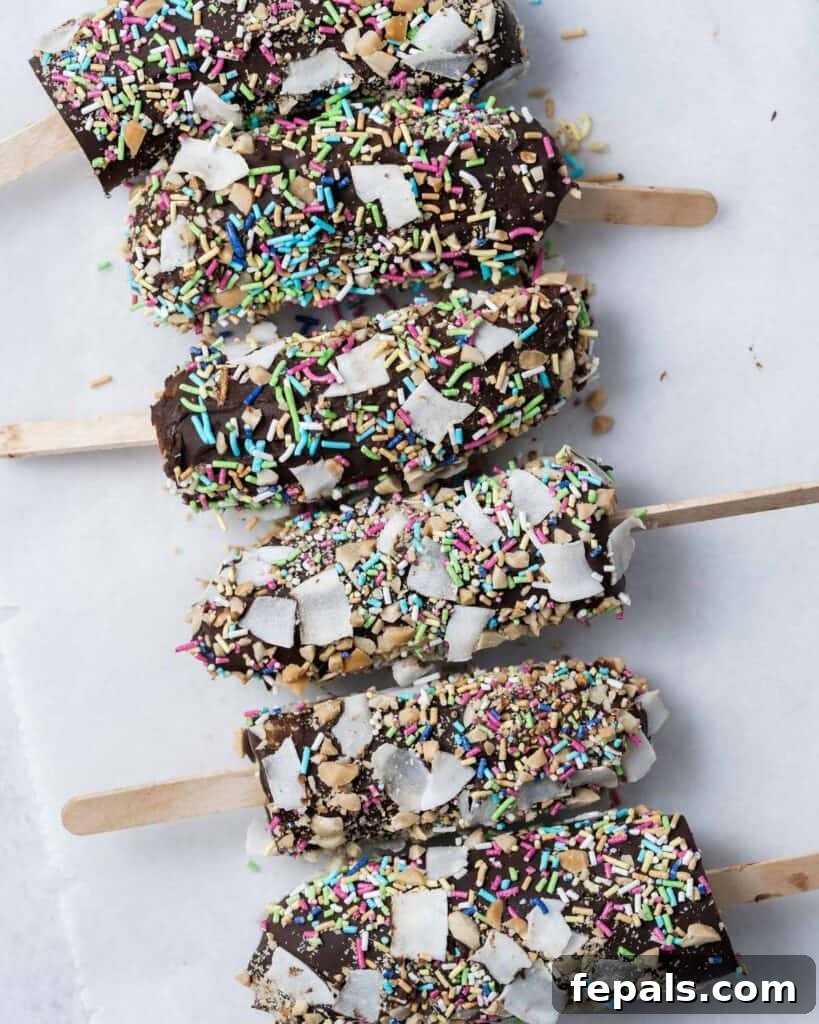
- Explosion of Flavor: Each pop delivers an incredible taste experience. The natural sweetness of perfectly ripe bananas harmonizes beautifully with the rich, indulgent coating of dark, milk, or semi-sweet chocolate. This delightful base is then elevated by your choice of crunchy, nutty, or sweet toppings like chopped nuts, shredded coconut, or colorful sprinkles, creating a symphony of textures and tastes in every bite.
- Effortlessly Quick and Simple: Forget complicated baking projects! This recipe is designed for ease and convenience. With a minimal ingredient list and very little active preparation time, you can whip up a batch of these delightful frozen banana treats in a flash. They are the perfect solution for a last-minute dessert, a quick after-school snack, or a refreshing cool-down on a hot day.
- Perfect for Any Gathering: Whether you’re hosting a lively kids’ birthday party, enjoying a casual summer barbecue with friends, or simply need an elegant yet fun dessert for a dinner party, these chocolate-coated bananas are universally adored. Their nostalgic charm and playful appearance make them an instant hit, always bringing smiles and creating memorable moments.
- Infinitely Customizable Fun: While incredibly delicious on their own, banana pops are a blank canvas for culinary creativity! This recipe invites you to experiment with a vast array of toppings and mix-ins. Stick with timeless classics like finely chopped peanuts or toasted almonds, or get adventurous with crushed Oreos, pretzels for a salty-sweet twist, vibrant shredded coconut, mini chocolate chips, or even a sophisticated drizzle of caramel or peanut butter for an extra layer of flavor.
- A Truly Allergy-Friendly Treat: One of the best aspects of these chocolate banana pops is their inclusive nature. Naturally gluten-free, and easily made dairy-free by selecting appropriate chocolate chips, they ensure that guests with common dietary restrictions don’t have to miss out on the fun and deliciousness. This makes them a thoughtful and accommodating choice for any event.
- Wholesome and Refreshing: Unlike many sugary processed treats, these banana pops offer a healthier alternative. Bananas provide essential vitamins and minerals, while the dark chocolate adds antioxidants. They’re a refreshing way to satisfy your sweet tooth without feeling overly indulgent.
Essential Ingredients for Your Delicious Chocolate Banana Pops
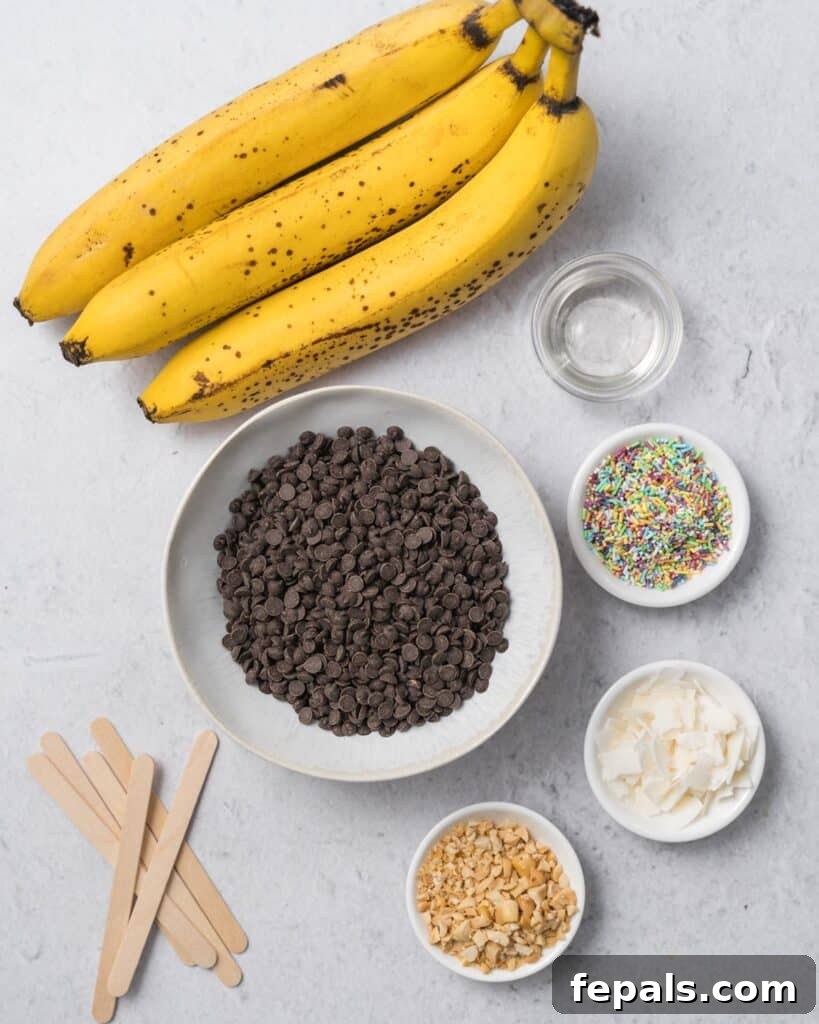
Crafting these irresistible chocolate-covered banana pops is incredibly straightforward, requiring only a handful of readily available ingredients. Here’s a detailed look at what you’ll need to create these frozen delights:
- Bananas: The undisputed star of this delightful show! For the best results, choose ripe bananas that are still firm. They should have a few brown speckles, indicating optimal sweetness, but should not be overly soft or mushy. Firm bananas are crucial as they will hold their shape better when frozen and are much easier to coat evenly with chocolate. Aim for a medium size to create perfectly portioned pops.
- Chocolate Chips: You simply cannot have decadent chocolate-coated banana pops without the chocolate! The choice of chocolate is entirely yours. High-quality dark chocolate chips will offer a rich, slightly bitter contrast to the sweet banana, while semi-sweet chocolate chips provide a classic, balanced flavor. If you prefer a sweeter treat, milk chocolate chips can be used. For those seeking a healthier or sugar-conscious option, sugar-free chocolate chips work wonderfully. To make these truly dairy-free, ensure you select a brand of chocolate chips specifically labeled as dairy-free.
- Coconut Oil: This ingredient is key to achieving a silky-smooth, dippable chocolate coating that hardens beautifully. Just a small amount of coconut oil, when melted with the chocolate chips, helps thin out the chocolate to the perfect consistency, making it easy to coat the frozen bananas evenly. It also aids in creating that satisfying snap when you bite into the hardened chocolate shell. Refined coconut oil has a neutral flavor, while unrefined (virgin) coconut oil will impart a subtle coconut aroma and taste, which can be a delicious addition.
- Toppings (Optional but Highly Recommended): This is where you can truly let your creativity shine and customize your banana pops! The possibilities are virtually endless.
- Chopped Nuts: Almonds, peanuts, walnuts, or pecans add a fantastic crunch and nutty flavor.
- Shredded Coconut: Toasted or untoasted, coconut flakes bring a tropical touch and lovely texture.
- Sprinkles: A festive and fun choice, especially appealing to kids (and adults who are kids at heart!).
- Crushed Cookies: Oreos, graham crackers, or shortbread cookies provide a delightful crumbly texture.
- Mini Candies: M&M’s, mini chocolate chips, or crushed toffee bits for extra sweetness and crunch.
- Drizzles: After the main chocolate sets, a drizzle of caramel sauce, peanut butter, white chocolate, or even a contrasting dark chocolate drizzle can add an elegant touch and extra flavor.
- Popsicle Sticks: These are essential for practicality! They transform the banana halves into convenient, handheld frozen treats, making them mess-free and easy to dip, coat, and enjoy without getting chocolate all over your hands. Standard wooden popsicle sticks work perfectly.
Gathering these simple ingredients is the first step towards creating a batch of these delectable frozen banana pops that are sure to be a hit!
Crafting Your Own Homemade Chocolate-Covered Banana Pops: A Step-by-Step Guide
Making these delightful chocolate-covered banana pops is a fun and simple process that yields deliciously refreshing results. Follow these easy steps to create your perfect batch:
Step 1: Prepare the Bananas for Freezing
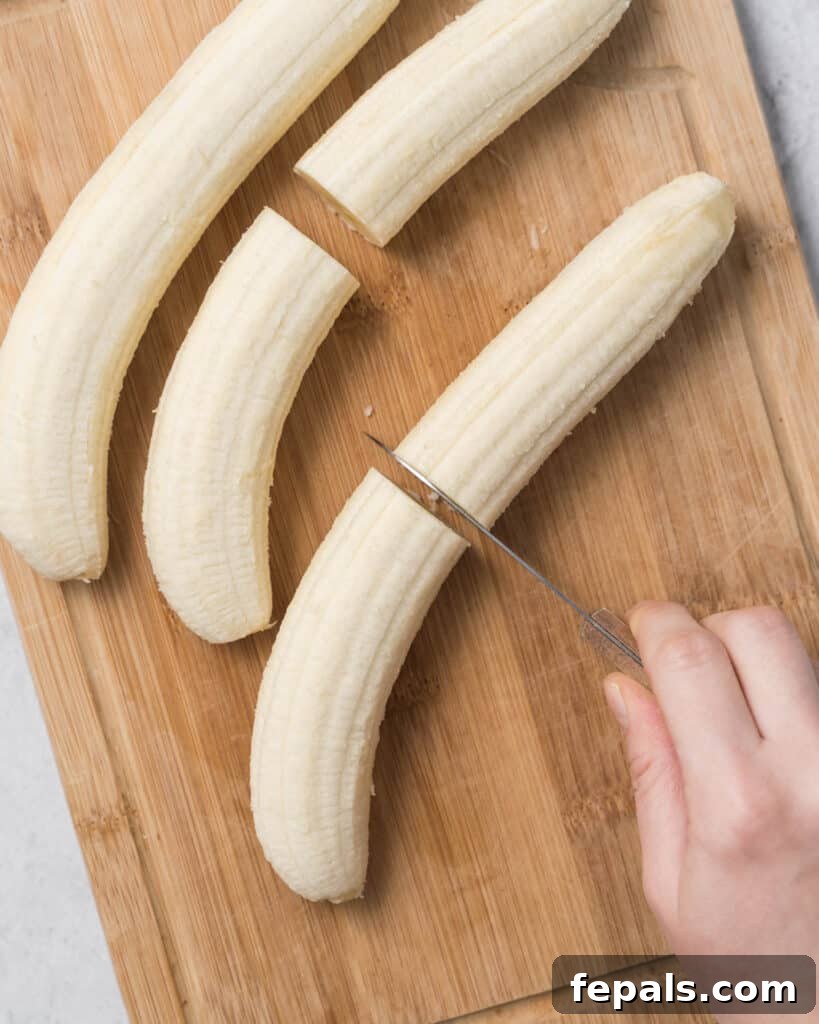
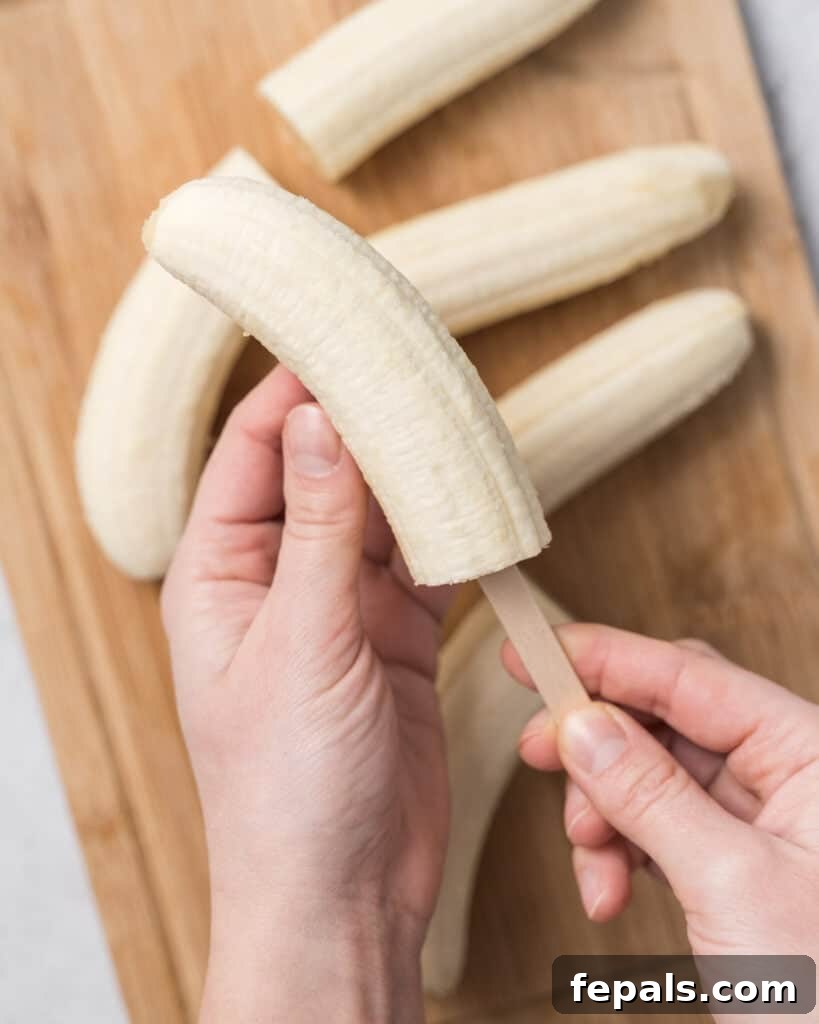
Begin by carefully peeling 3 ripe but still firm bananas. Lay each peeled banana on a clean cutting board and cut it exactly in half crosswise. This will yield 6 equal, manageable pieces. Now, take a popsicle stick and gently insert it into the flat, cut end of each banana half. Push the stick about halfway into the banana to ensure it’s secure enough to hold the weight of the banana during dipping. This step creates the “pop” handle for your treats.
Step 2: Pre-Freeze the Banana Pops
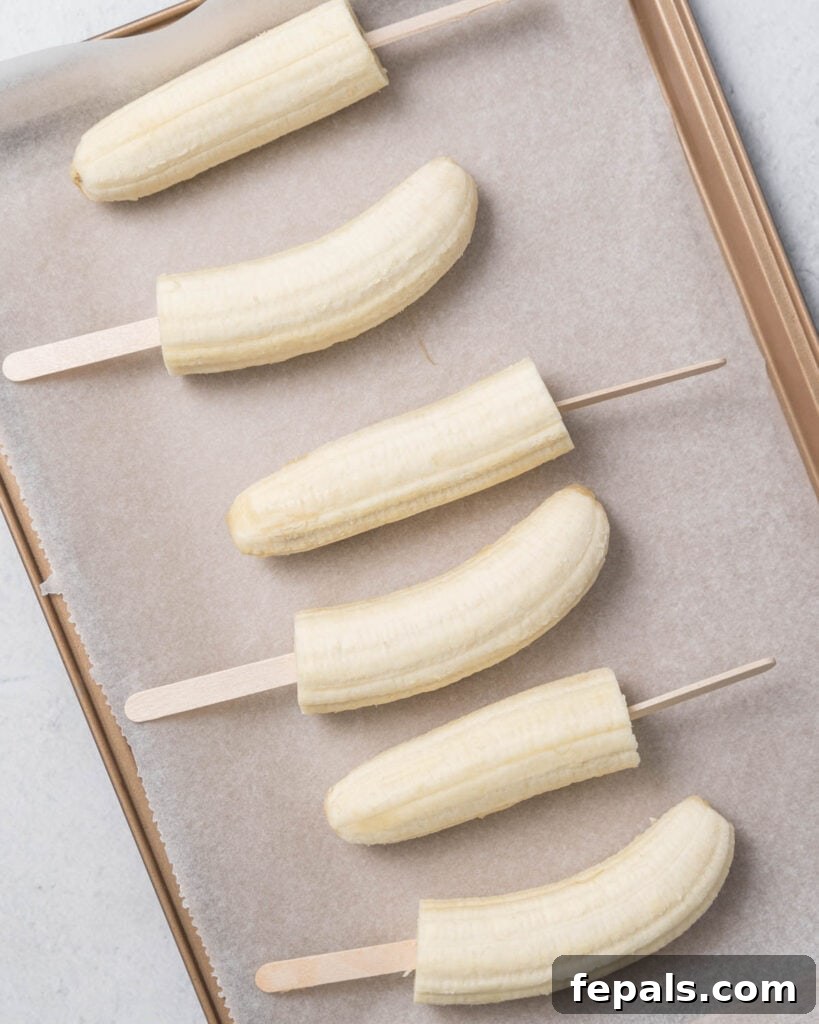
Line a sturdy baking sheet with parchment paper or wax paper. This non-stick surface is crucial to prevent the bananas from sticking to the tray once frozen. Arrange your prepared banana pops in a single layer on the lined baking sheet, ensuring none of them are touching. Place the entire baking sheet into the freezer and let them freeze for a minimum of 1 hour, or until they are very firm. This initial freeze is vital, as it prevents the banana from softening too much when dipped into the warm chocolate and ensures the chocolate sets quickly and adheres beautifully.
Step 3: Melt the Silky Chocolate Coating
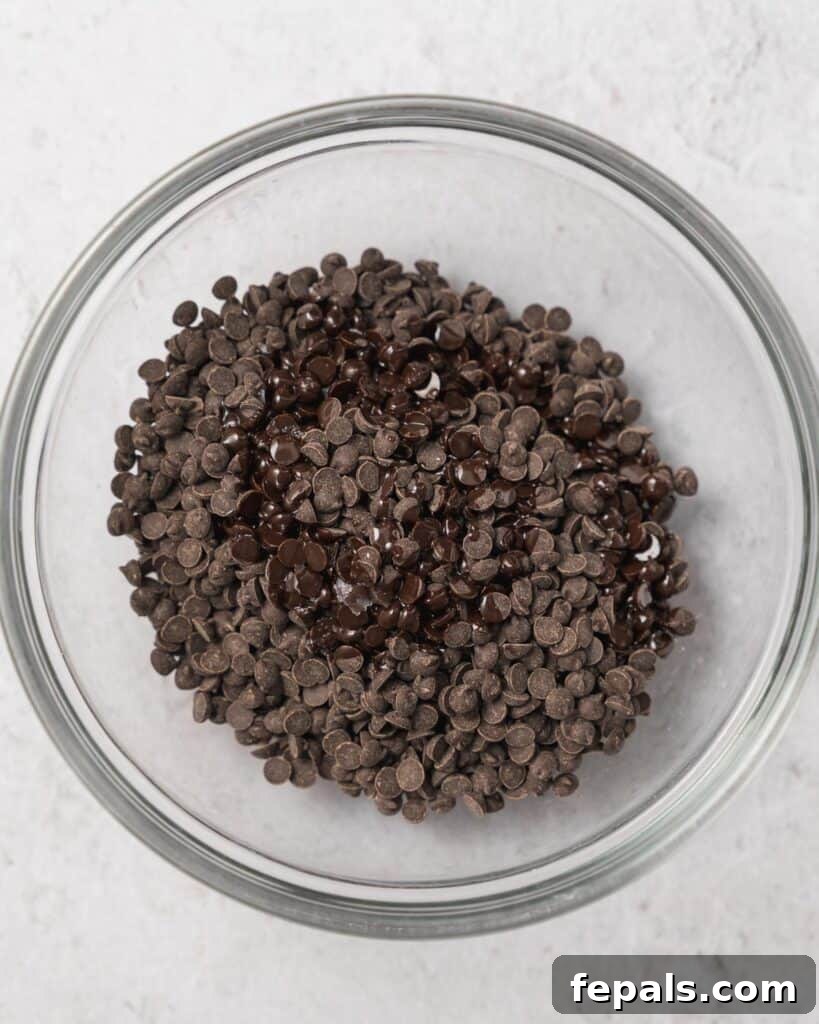
Approximately 10-15 minutes before your bananas are fully frozen (around the 45-50 minute mark), prepare your chocolate coating. In a medium, microwave-safe bowl, combine 1 cup of your chosen chocolate chips with 1 tablespoon of coconut oil. Microwave the mixture in short intervals, typically 20 seconds at a time. After each interval, stir the chocolate thoroughly with a spoon or spatula. Continue microwaving and stirring until the chocolate is completely melted, smooth, and lump-free. Be careful not to overheat the chocolate, as it can seize. If you prefer, you can also melt the chocolate using a double boiler method on the stovetop.
Step 4: Organize Your Toppings
While the chocolate is melting and still warm, get all your desired toppings ready. Place each topping (e.g., chopped nuts, shredded coconut, sprinkles, crushed cookies, mini candies) into separate, shallow bowls or plates. Having them organized and within arm’s reach is essential, as you’ll need to work quickly once the bananas are coated.
Step 5: Coat the Frozen Banana Pops
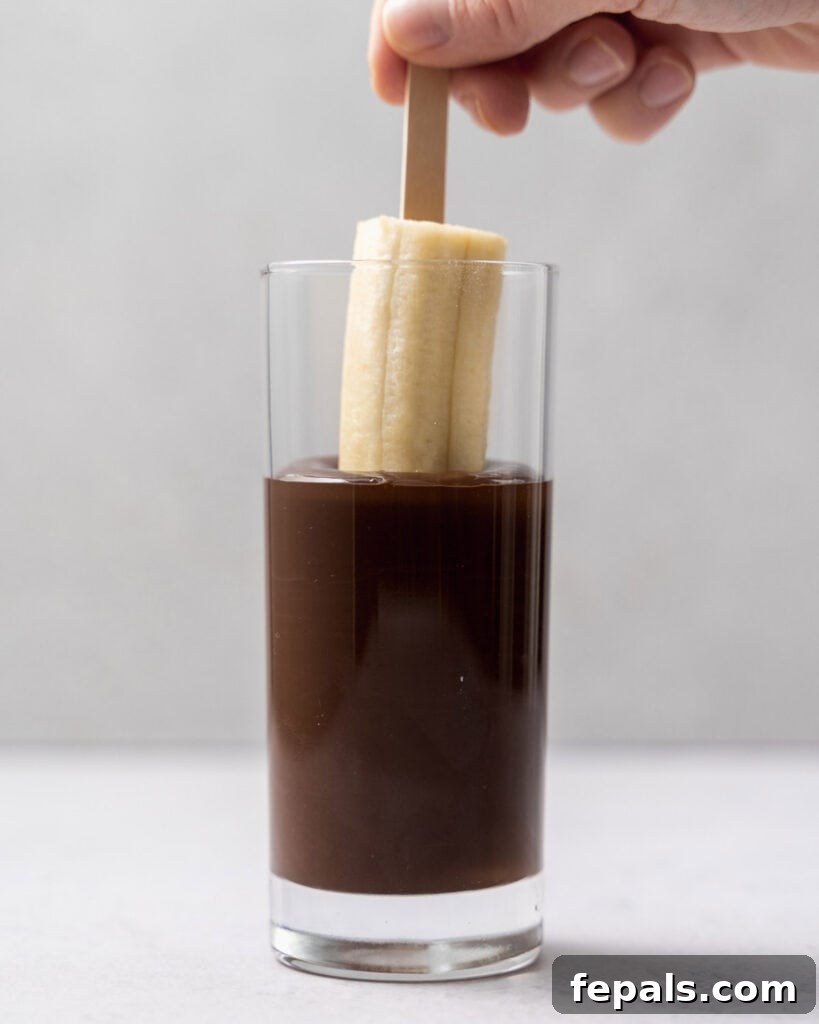
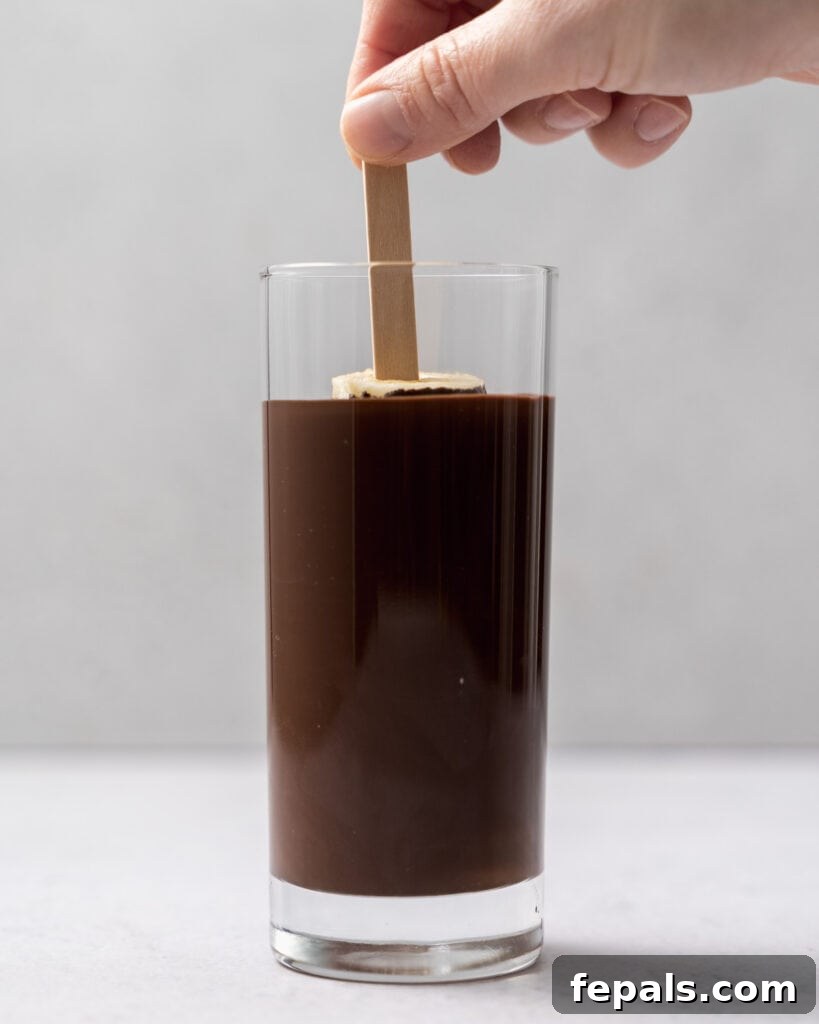
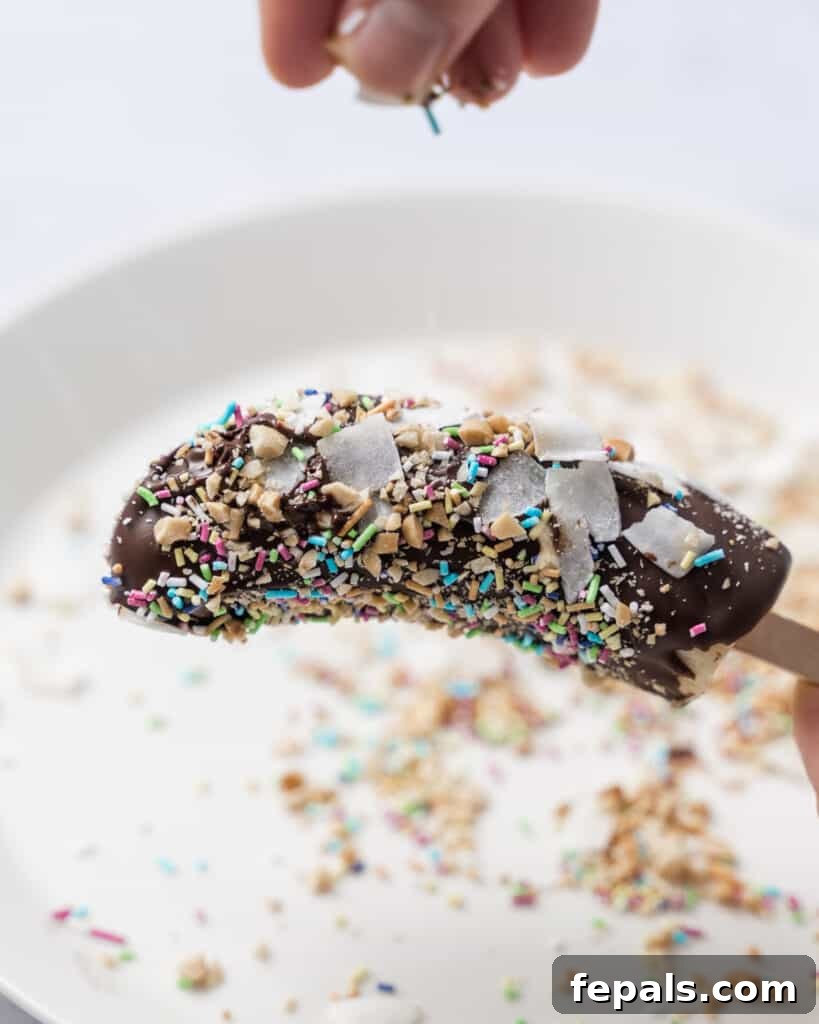
Once your bananas are rock-solid frozen and your chocolate is perfectly melted and your toppings are prepped, retrieve the frozen bananas from the freezer. Pour the melted chocolate into a tall, narrow glass or jar – this will make dipping much easier and ensure a full, even coating. Working one by one and quickly, dip each frozen banana pop entirely into the melted chocolate. Gently rotate and roll the banana to ensure every surface is coated. Lift the banana pop out of the chocolate and allow any excess chocolate to drip back into the glass. A gentle tap against the rim of the glass can help remove drips. Immediately, while the chocolate is still wet, sprinkle or roll the chocolate-coated banana in your chosen toppings. The cold banana will cause the chocolate to set almost instantly, adhering the toppings firmly.
Step 6: Final Freeze for Setting
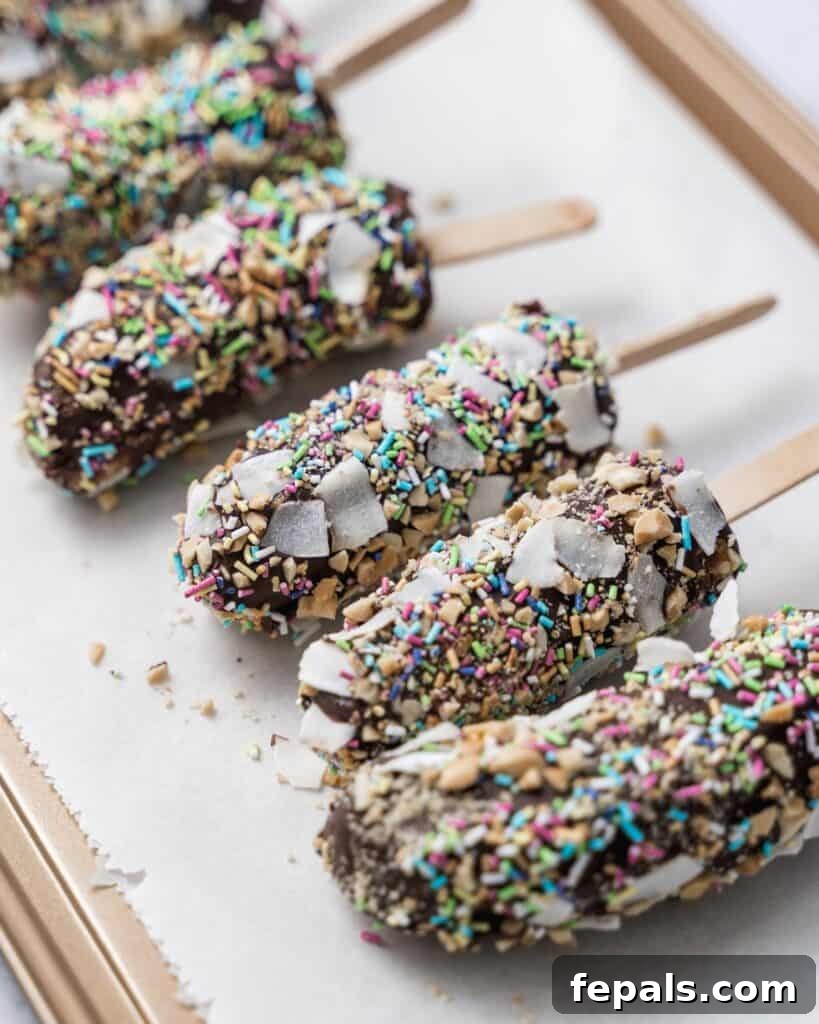
As each banana pop is coated and topped, return it to the parchment-lined baking sheet. Once all of your banana pops are beautifully adorned, place the baking sheet back into the freezer. Allow them to freeze for an additional 20-30 minutes. This final freezing period ensures that the chocolate coating is completely set and firm, and the banana inside is perfectly chilled and ready for enjoyment.
Step 7: Indulge and Enjoy!
Once the chocolate has fully hardened and the banana pops are thoroughly chilled, they are ready to be savored! For the absolute best texture and a slightly softer chocolate bite, allow them to sit at room temperature for about 5 minutes before you take that glorious first bite. This subtle tempering makes for a more pleasant eating experience. Get ready to enjoy a refreshing, healthy, and incredibly satisfying treat!
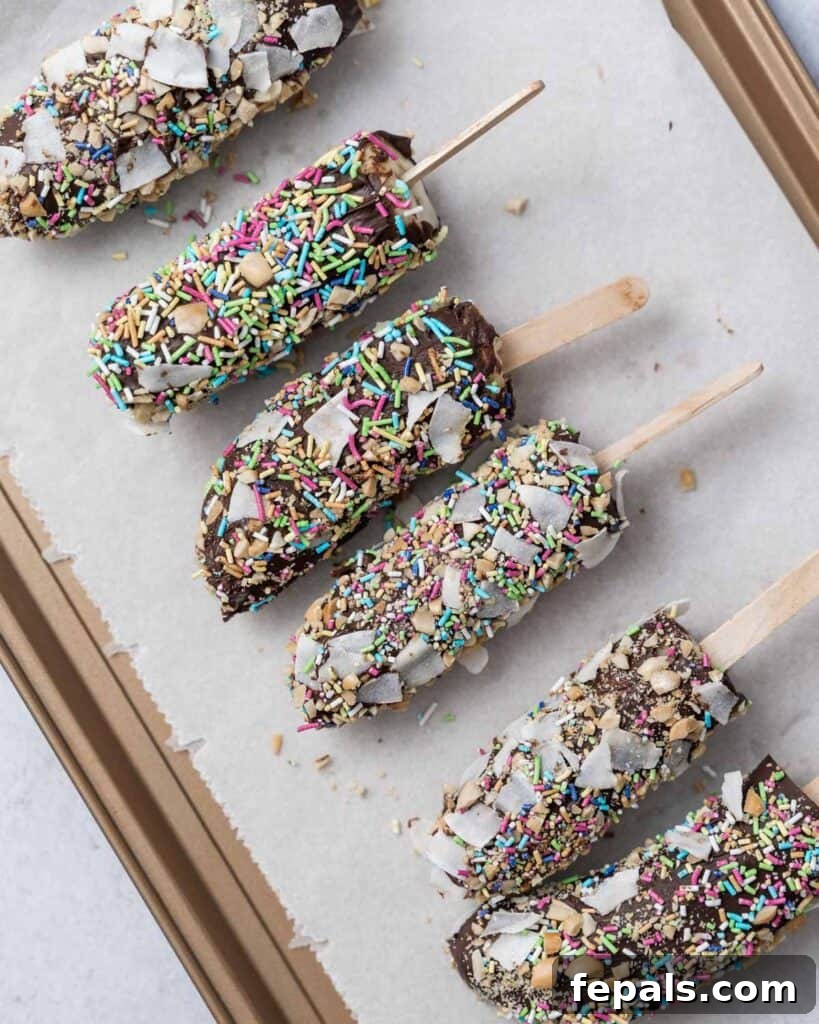
Expert Tips for Perfect Chocolate-Covered Banana Pops Every Time
Achieving perfectly coated, delightful chocolate-covered banana pops is easy with a few insider tricks. Follow these expert tips to ensure your homemade frozen treats are a resounding success:
- Speed is Key When Coating: Once your bananas are thoroughly frozen and your chocolate is melted to perfection, the clock starts ticking! Work as quickly and efficiently as possible when dipping and coating the banana pops. The cold temperature of the banana will cause the chocolate to begin setting rapidly. If you move too slowly, the chocolate in your dipping vessel can cool down and thicken, making it difficult to achieve a smooth, even coating.
- Utilize a Tall, Narrow Glass for Dipping: Instead of a wide, shallow bowl, pour your melted chocolate coating into a tall, relatively narrow glass or jar. This clever trick allows you to fully submerge the entire banana pop with minimal chocolate, ensuring a comprehensive and even coating without wasting any precious chocolate.
- Tap Off Excess Chocolate for a Clean Finish: After dipping each banana pop into the melted chocolate, gently tap the stick against the edge of your dipping glass. Then, gently rotate the pop to allow any excess chocolate to drip off. This prevents unsightly pools of chocolate at the base of your pops and ensures a smooth, professional-looking coating.
- Pre-Arrange Your Toppings: Preparation is paramount! Before you even start dipping, have all your chosen toppings (chopped nuts, sprinkles, shredded coconut, crushed cookies, etc.) laid out in separate, shallow dishes right next to your dipping station. As soon as a banana pop is coated in chocolate, you’ll need to immediately sprinkle or roll it in the toppings before the chocolate has a chance to set.
- Parchment Paper is Your Best Friend for Easy Release: Always line your baking sheet with parchment paper or wax paper before placing the banana pops on it to freeze. This non-stick surface is crucial. It prevents the chocolate-coated pops from sticking firmly to the tray as they set and freeze, making them effortless to remove without damage.
- Allow Them to Temper Briefly Before Serving: While these treats are meant to be enjoyed frozen, a quick tempering at room temperature can significantly enhance their texture. Let the frozen banana pops sit out for about 5 minutes before you take a bite. This short resting period allows the chocolate coating to soften ever so slightly, creating a more pleasant, less brittle crunch, and a creamier banana experience.
- Choose the Right Bananas: The ripeness of your bananas truly matters. Opt for ripe bananas that still have a firm texture, perhaps with a few brown spots, but not overly mushy. Overripe bananas can become too soft and watery when frozen, affecting the overall texture.
- Experiment with Chocolate Types: Don’t limit yourself to one type of chocolate! Try dark chocolate for a more sophisticated, less sweet profile, milk chocolate for classic sweetness, or even white chocolate for a different flavor and visual appeal. You can also swirl different chocolates together for a marbled effect.
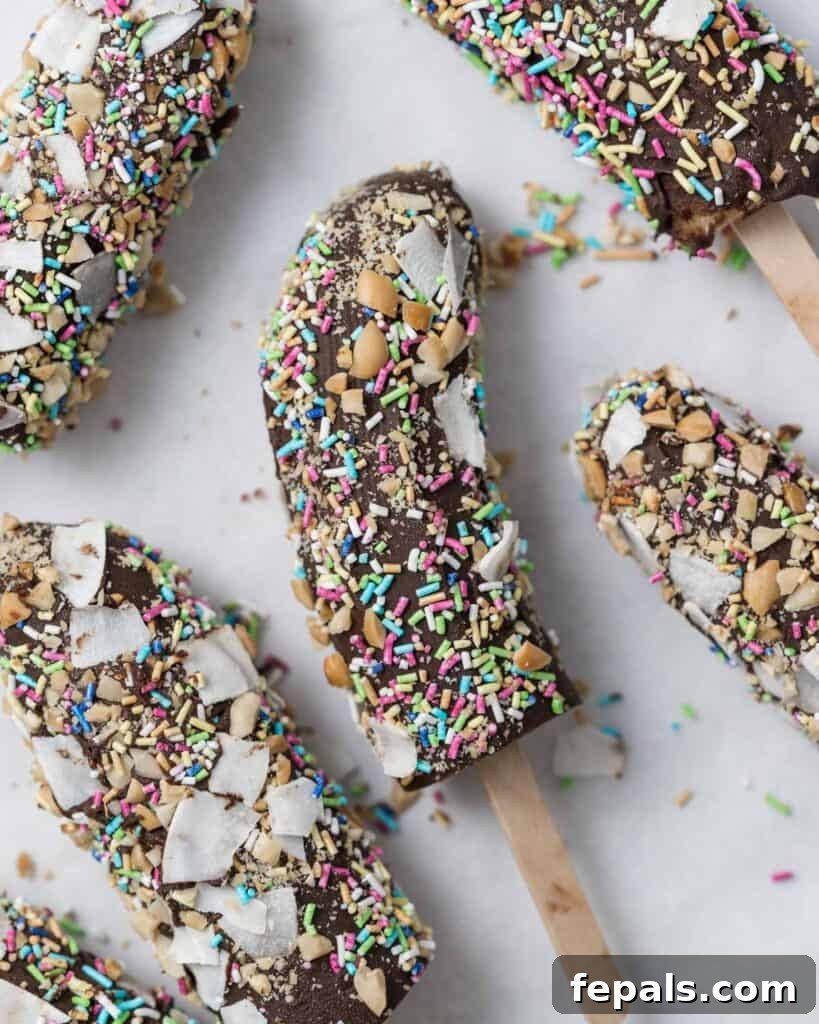
Frequently Asked Questions About Chocolate-Covered Banana Pops
Absolutely! While chocolate chips are incredibly convenient for their uniform melting, you’re certainly not limited to them. You can use virtually any type of chocolate for coating these banana pops. Excellent alternatives include chopped baking chocolate bars, chocolate melting wafers (which are designed for smooth coating), or even your favorite chocolate bars broken into pieces. The key is to ensure the chocolate melts smoothly. If using baking chocolate or chocolate bars, you might need to slightly adjust the amount of coconut oil – a little more if it’s too thick, or a tiny bit less if it seems too thin – to achieve that perfect dippable consistency. Experiment to find your favorite!
Elevating the visual appeal of your banana pops is simple and fun! For a truly “fancy” look, consider drizzling them with a contrasting layer of melted chocolate after the first coating has set – imagine dark chocolate pops with a white chocolate drizzle, or vice versa. Caramel sauce or even a swirl of nut butter can also add an elegant touch. Beyond drizzles, think about sophisticated toppings: finely crushed pistachios or hazelnuts, edible glitter, mini edible pearls, sea salt flakes (for a salty-sweet combo), or even a delicate dusting of cocoa powder. Arranging them artfully on a platter can also make them feel more special.
If your frozen banana tastes bitter, it’s almost certainly because the banana itself was underripe when you froze it. Underripe bananas contain more starch and less sugar, which can result in a somewhat starchy or even subtly bitter taste once frozen. To avoid this, always ensure your bananas are perfectly ripe, but still firm, before preparing them for freezing. They should have a few brown spots on their skin, indicating optimal sweetness, but not be overly soft or green.
Yes, absolutely! These are fantastic make-ahead treats. You can freeze the bare banana halves on sticks for up to two weeks before coating them. Once fully coated and set, the finished banana pops can also be stored in an airtight freezer-safe container or bag for up to two weeks. Layer them with parchment paper to prevent sticking. This makes them a convenient option for parties or for having healthy snacks on hand.
If your chocolate isn’t melting smoothly, it might be overheating (which can cause it to seize) or it might just need a little more help. Ensure you’re melting it in short bursts and stirring frequently. If it becomes too thick for dipping, add a tiny bit more coconut oil (1/2 teaspoon at a time) and stir until it reaches the desired smooth, flowing consistency. Don’t add water, as even a drop can cause chocolate to seize and become lumpy.
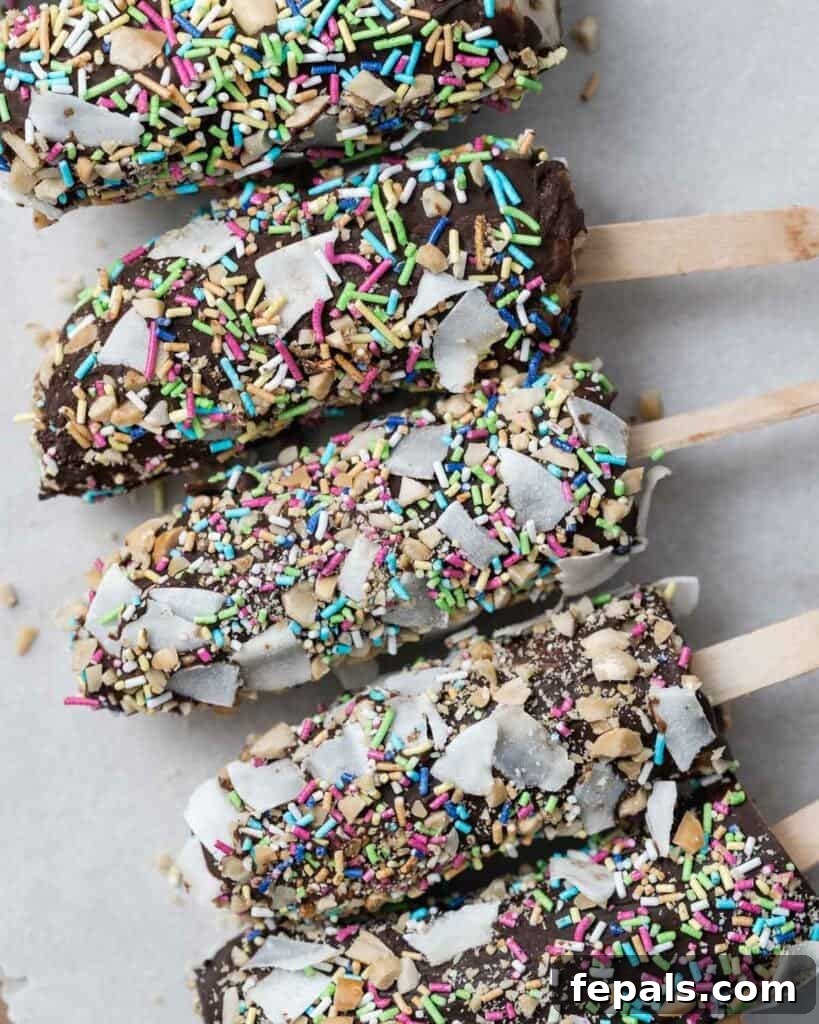
Storing Your Delicious Chocolate-Covered Banana Pops
While these frozen chocolate banana treats are undeniably at their best when enjoyed fresh, their convenience means you can certainly prepare them in advance. Proper storage is key to maintaining their delightful texture and flavor. Here are comprehensive tips for storing your homemade banana pops effectively:
- Refrigerating (Not Recommended for Uncoated Pops): It’s important to understand that the chocolate coating will become soft and messy if left at room temperature or simply refrigerated for extended periods. For the best texture and to prevent a sticky situation, always freeze your banana pops once coated. Uncoated banana halves, however, should only be frozen, not refrigerated, if you’re preparing them for later coating.
- Freezing Uncoated Banana Halves (Advance Prep): If your plan is to make these banana pops in stages or prepare a large batch of banana bases, you can absolutely pre-freeze the uncoated banana halves. After inserting the popsicle sticks, arrange the bare banana halves on a parchment-lined baking sheet in a single layer. Freeze them until they are completely solid, which usually takes about 1 hour. Once solid, transfer these naked banana pops to an airtight freezer-safe bag or container. This method allows you to store them for up to 2 weeks before you’re ready to dip them in chocolate and add toppings. This is a fantastic way to streamline your dessert preparation!
- Freezing After Coating (Finished Product Storage): Once your banana pops are fully coated in chocolate and your chosen toppings have been applied and set, they are ready for long-term storage. Place the assembled chocolate-covered banana pops back onto a parchment-lined baking sheet for a final freeze to ensure the chocolate is rock-hard. Then, carefully transfer them to an airtight freezer-safe container or a heavy-duty ziplock bag. To prevent them from sticking together or damaging the chocolate coating, it’s best to lay them flat in a single layer. If you need to stack them, place a piece of parchment paper between each layer. Stored correctly, these delightful treats will maintain their quality and flavor for up to 2 weeks in the freezer. Remember, always keep them in an airtight container to prevent freezer burn and absorption of freezer odors.
- Serving from Frozen: When you’re ready to enjoy a frozen banana pop from storage, simply remove it from the freezer. For the best eating experience, allow it to temper at room temperature for approximately 5 minutes before biting in. This slight thaw softens the chocolate coating just enough to give it a perfect snap and ensures the banana inside isn’t too hard to enjoy.
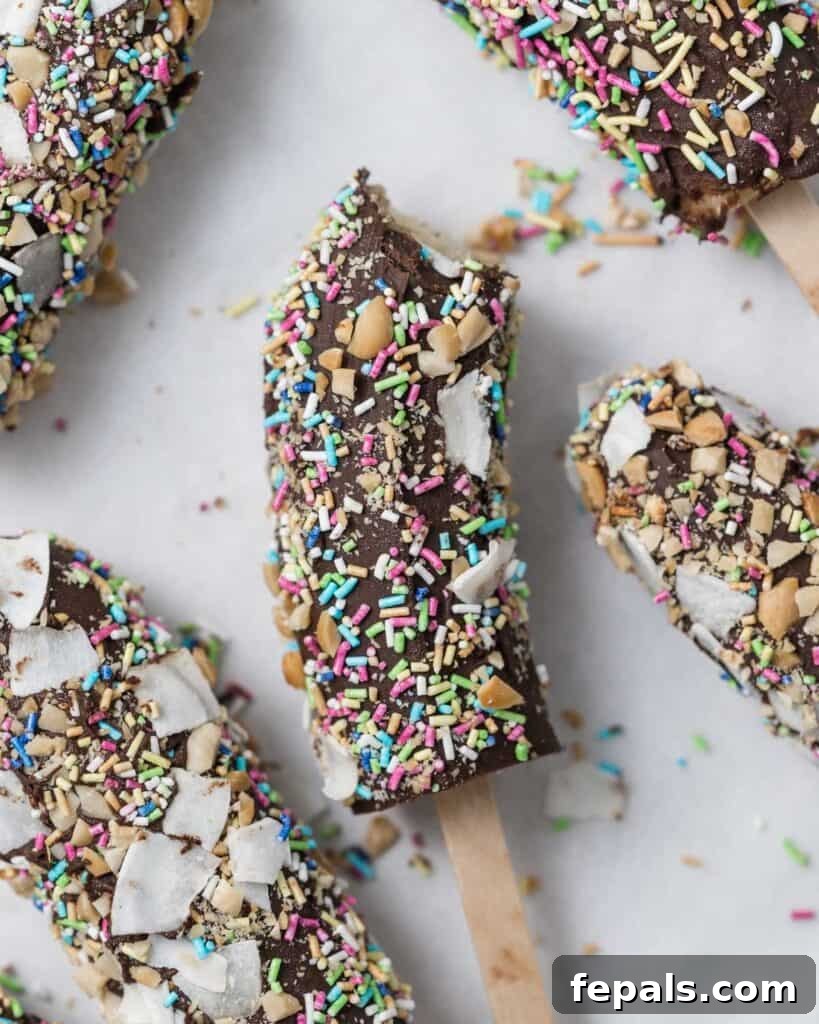
More Healthy Chocolate Recipes to Indulge In
If you’ve fallen in love with the combination of healthy ingredients and decadent chocolate, here are more recipes from our collection that you’re sure to adore:
- Chocolate Waffles: Start your day with a delightful chocolatey twist.
- Chocolate Zucchini Muffins: A clever way to sneak in veggies with a rich chocolate flavor.
- Almond Flour Chocolate Cookies: Gluten-free cookies that are wonderfully chewy and chocolatey.
- Hot Chocolate Oatmeal Bowl: A cozy, comforting breakfast that tastes like a dessert.
- Chocolate Keto Brownies: Indulge in rich, fudgy brownies without breaking your keto diet.
- Keto Chocolate Chip Cookies: Classic chocolate chip cookies, made healthy and keto-friendly.
- Chocolate Chip Pumpkin Muffins: A seasonal favorite, made healthier with added chocolate chips.
We absolutely love hearing from you! If you try this recipe for Chocolate-Covered Banana Pops or any other recipe from our site and enjoy it, please take a moment to leave us some feedback in the comment section below. Don’t forget to give it a rating – your reviews help others discover these amazing treats! We would be thrilled if you shared these delightful recipes with your friends and family, spreading the joy of healthy and delicious eating.
Finally, we invite you to use our special hashtag #healthyfitnessmeals on INSTAGRAM for a fantastic chance to be featured on our page! Stay connected and inspired by FOLLOWING Healthy Fitness Meals on FACEBOOK | INSTAGRAM | PINTEREST | TWITTER to catch all of our very latest blog posts, exciting new recipes, and wellness tips.
Chocolate Covered Banana Pops
Ingredients
- 3 ripe bananas, firm not soft
- 1 cup dark chocolate chips, (semisweet chocolate chips or sugar-free works)
- 1 Tablespoon coconut oil
- 2 tbsp coconut flakes
- 2 tbsp chopped roasted peanuts
- 2 tbsp sprinkles
- 6 Popsicle sticks
Instructions
- Peel the bananas and cut them in half right in the middle.
- Carefully insert a popsicle stick into each of the banana halves. Place them over a sheet pan that’s lined up with wax paper.
- Next, place the sheet pan with the bananas in the freezer and freeze for an hour.
- Right before the one-hour mark, start melting the chocolate.
- To melt the chocolate, in a medium microwave-safe bowl, add the chocolate chips along with the coconut oil. Give it a quick toss.
- Microwave the chocolate chips in 20-second increments, until the chocolate is melted through and smooth.
- Pour the melted chocolate into a tall/thin glass cup and grab the frozen bananas from the freezer.
- Take each banana pop and carefully dip them one by one into the melted chocolate until they are fully coated. Remove from the chocolate and allow the excess melted chocolate to drip off the bananas back into the cup. (Work at a fast pace)
- Quickly sprinkle your toppings on each banana pop at this point before placing them back on the sheet pan.
- Place the sheet pan with the banana pops back in the freezer for another 20-30 minutes for the chocolate to set and the bananas to remain solid before serving. Enjoy!
Notes
- Work Quickly When Coating: Once the bananas are frozen and the chocolate is melted, work quickly to coat the banana pops. The chocolate can start to set and thicken if it cools too much.
- Use a Tall Glass for Dipping: Pour the melted chocolate coating into a tall glass or jar. This will make it easier to fully submerge the banana pops for an even coating.
- Tap Off Excess Chocolate: After dipping each banana pop in the chocolate, gently tap and roll it to allow any excess coating to drip off before adding toppings. This prevents pools of chocolate.
- Have Toppings Ready: Prepare your chosen toppings like chopped nuts, sprinkles, etc., and have them nearby. You’ll want to coat the banana pops right after dipping them in the chocolate before they set.
- Use Parchment for Easy Release: Line your baking sheet with parchment or wax paper. This will prevent the chocolate-coated pops from sticking as they set in the freezer.
- Allow to Temper Before Serving: For the perfect texture, let the frozen banana pops sit at room temperature for 5 minutes before eating. This softens the chocolate coating slightly.
Nutrition
Calories: 256kcal | Carbohydrates: 36g | Protein: 2g | Fat: 14g | Saturated Fat: 9g | Polyunsaturated Fat: 1g | Monounsaturated Fat: 1g | Sodium: 16mg | Potassium: 246mg | Fiber: 4g | Sugar: 10g | Vitamin A: 38IU | Vitamin C: 5mg | Calcium: 7mg | Iron: 2mg
Nutrition information is automatically calculated, so should only be used as an approximation.
Additional Info
Tried this recipe?
Mention @healthyfitnessmeals or tag #healthyfitnessmeals!