
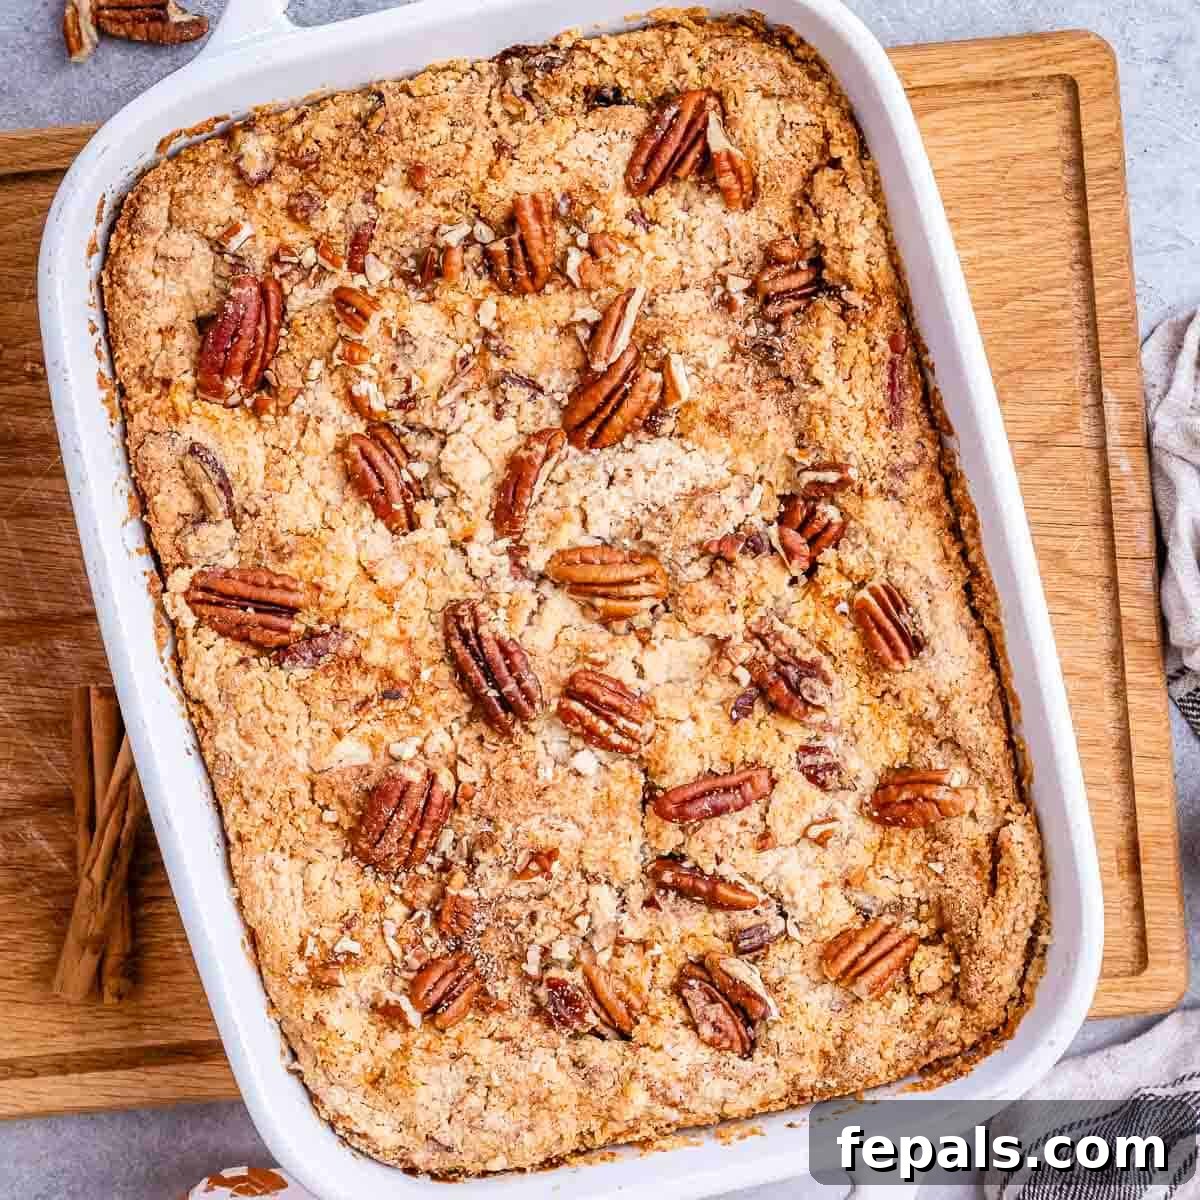
Easy Gluten-Free Pumpkin Dump Cake: Your Perfect Fall Dessert
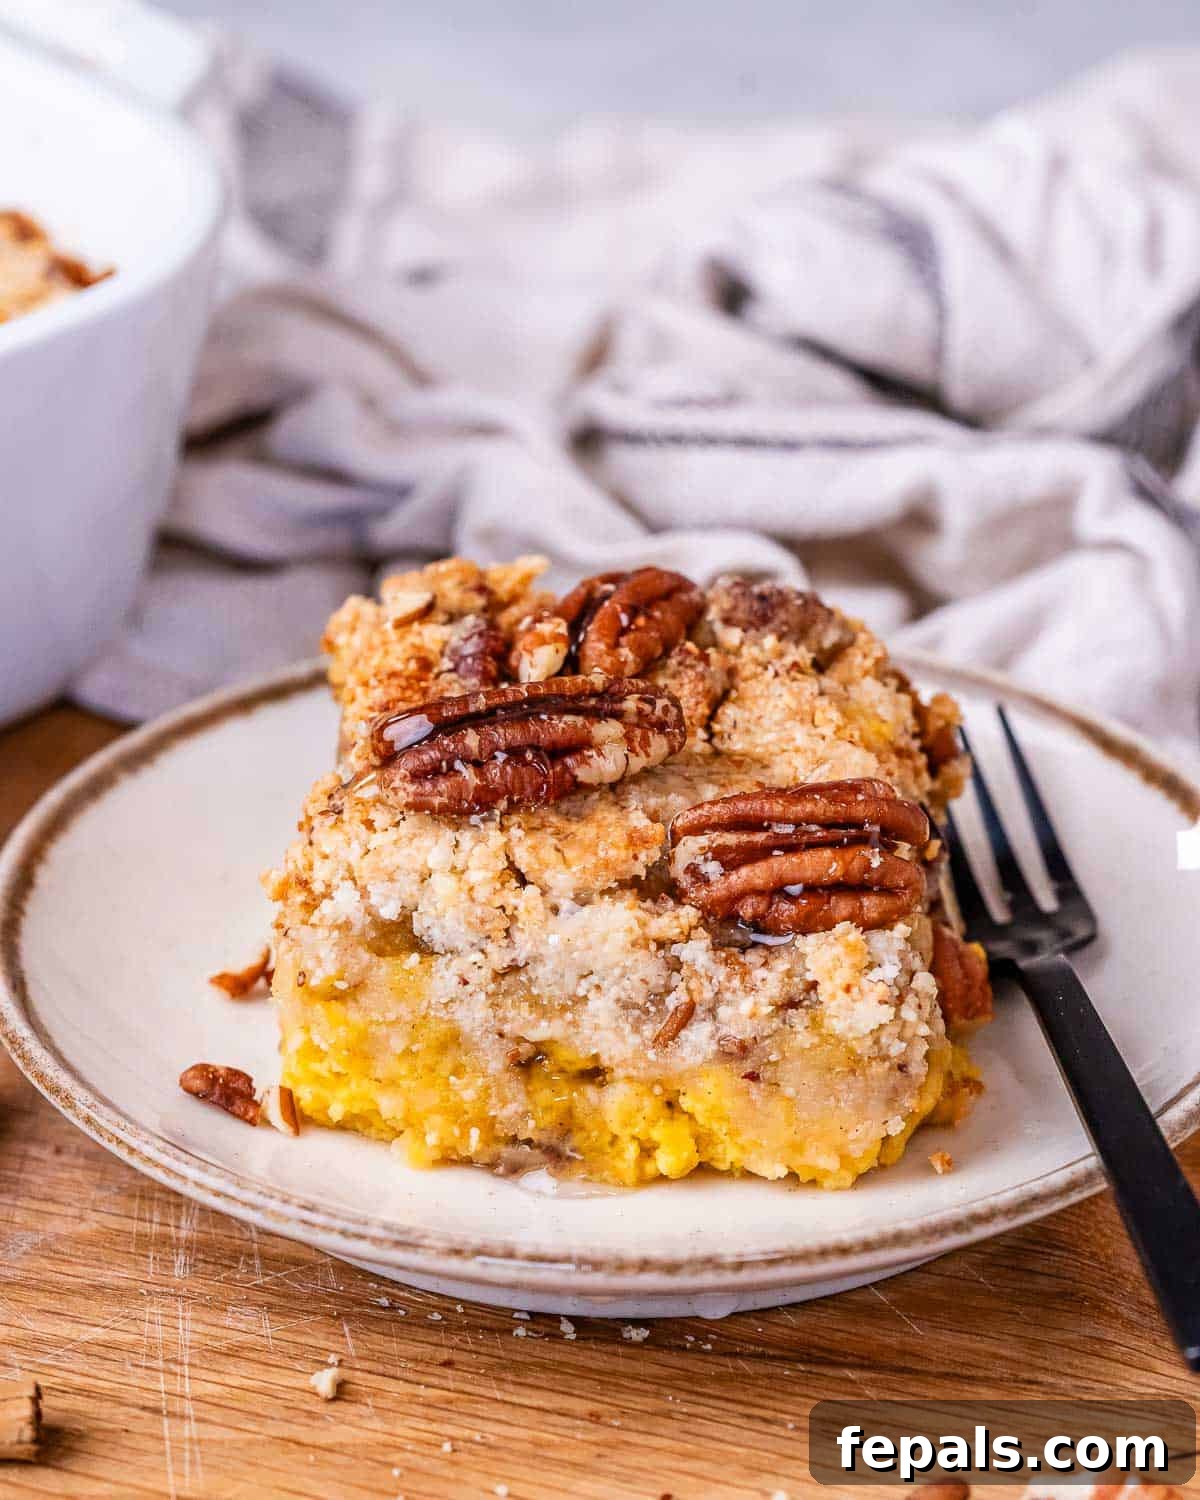
Embrace the cozy flavors of autumn with this incredibly simple and utterly delicious Gluten-Free Pumpkin Dump Cake. Imagine all the warm, inviting taste of classic pumpkin pie, but without any of the hassle of making a crust from scratch. This no-fuss recipe layers a rich, custardy pumpkin filling – infused with cream cheese and warming spices – beneath a delightful, streusel-like gluten-free cake topping, studded with crunchy pecans and drizzled with melted butter for a golden, irresistible crust. The result is a heavenly dessert featuring a creamy, spiced pumpkin interior perfectly complemented by a crisp, sweet, and nutty topping that’s guaranteed to be a crowd-pleaser.
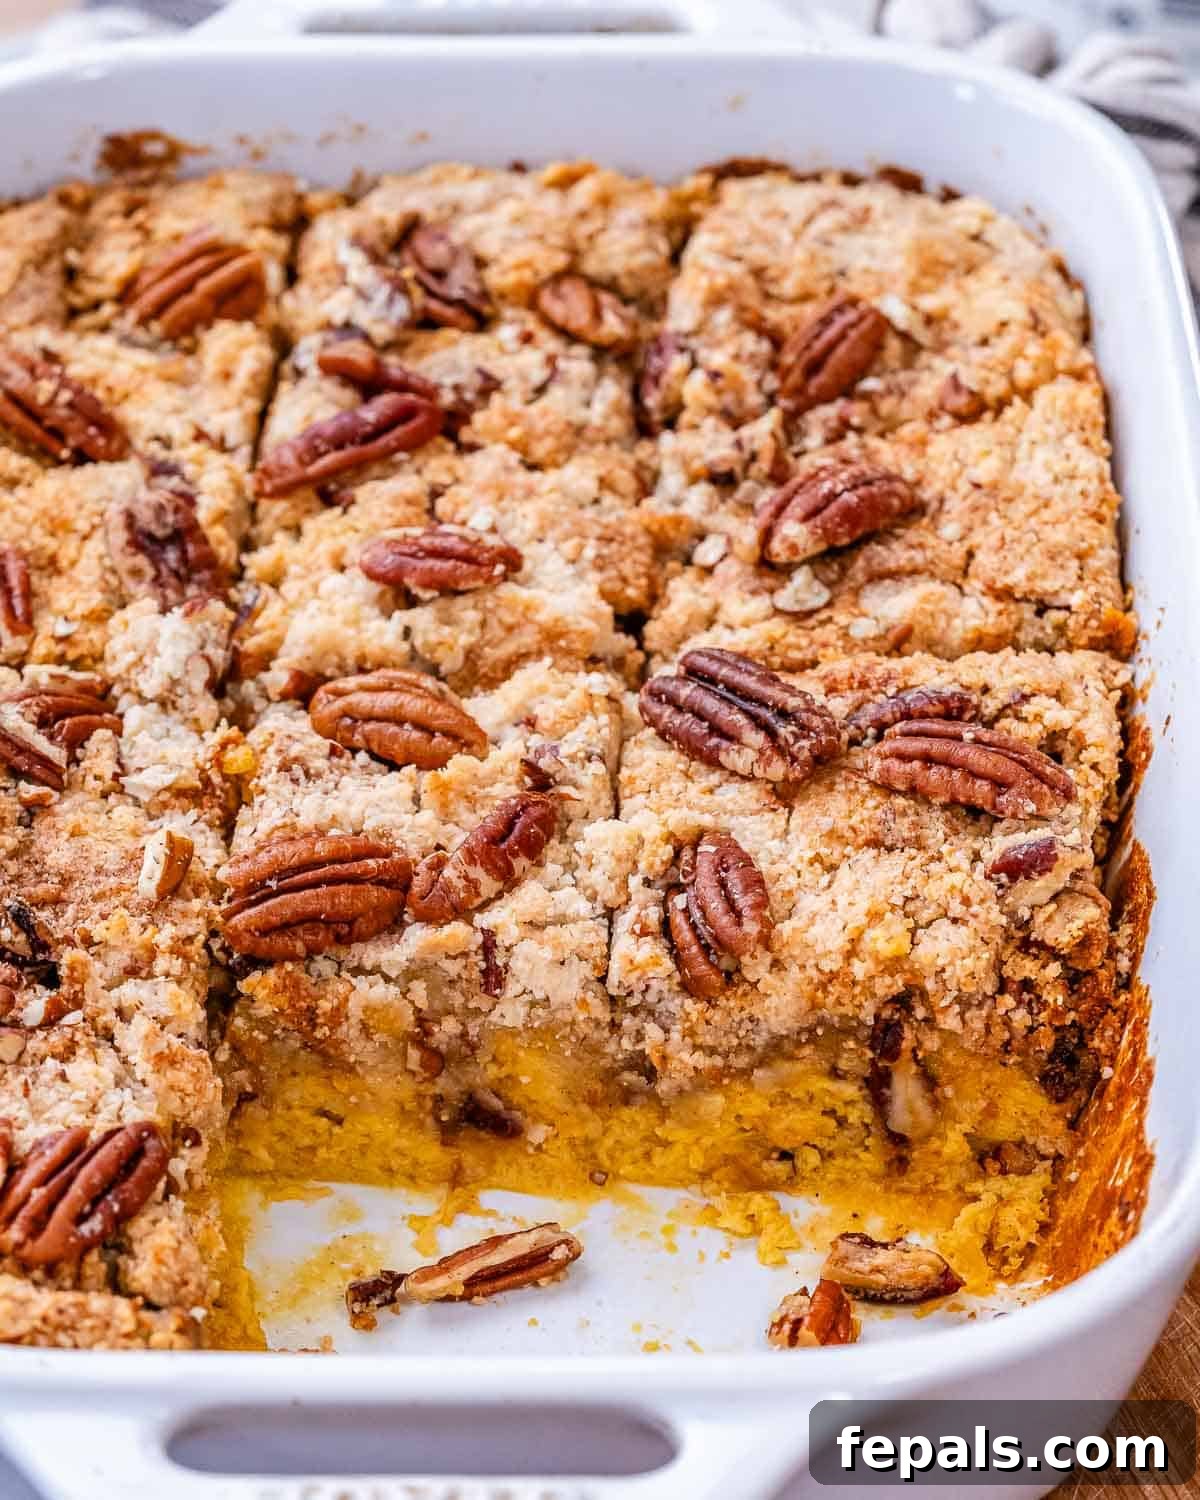
If you’re new to the world of dump cakes, prepare to be amazed by their sheer simplicity and unique appeal. They’re called “dump cakes” because you literally “dump” all the ingredients into a baking dish, layer them, and bake – no fancy mixing, no intricate steps. This pumpkin version is particularly perfect for fall gatherings, holiday feasts like Thanksgiving, or any time you crave that iconic pumpkin flavor without committing to a full-blown pie. It’s like a wonderful hybrid of a pumpkin pie, a coffee cake, and a crisp, offering the best of all worlds in one easy-to-make dish.
For those who love to bake pies from scratch, you might also enjoy our Healthy Pumpkin Pie recipe or these delightful Healthy Pecan Pie Bars. But if time is of the essence, or you’re simply looking for a stress-free dessert option that still delivers on flavor and texture, this gluten-free pumpkin dump cake is an absolute must-try.
Why You’ll Love This Easy Pumpkin Dessert
This Gluten-Free Pumpkin Dump Cake isn’t just easy; it’s a game-changer for your fall baking repertoire. Here’s why it’s destined to become a staple:
- Effortless Preparation: The “dump” method truly means minimal prep work. No elaborate crust making, no complicated mixing techniques. Just combine, layer, and bake.
- Irresistible Flavor: It captures the essence of pumpkin pie with warm spices, creamy pumpkin puree, and a hint of tang from cream cheese and Greek yogurt, creating a perfectly balanced flavor profile.
- Delightful Texture Contrast: Enjoy the best of both worlds with a silky-smooth, custardy pumpkin base and a crisp, golden-brown, streusel-like topping that offers a satisfying crunch.
- Gluten-Free Friendly: Using a homemade blend of almond and gluten-free flours ensures everyone can enjoy this delicious treat without compromise. It’s a fantastic option for those with dietary sensitivities.
- Perfect for Holidays: Whether it’s a family dinner, a potluck, or Thanksgiving, this dump cake is an impressive yet approachable dessert that feeds a crowd and is much less intimidating than a traditional pie.
- Customizable: Easily adapt the recipe with various nuts, chocolate chips, or even a different type of squash for a personalized twist.
Recipe Overview
This recipe is designed for ease, making it perfect for even novice bakers.
- Skill Level: Beginner
- Prep Time: 10 minutes
- Cook Time: 1 hour
- Total Time: 1 hour 10 minutes
- Servings: 12 servings
Ingredients Needed for Your Pumpkin Dump Cake
Gathering your ingredients is the first step to creating this delectable gluten-free pumpkin dump cake. You’ll find the full quantities in the recipe card at the bottom of this article. Here’s a closer look at what makes this recipe so special:
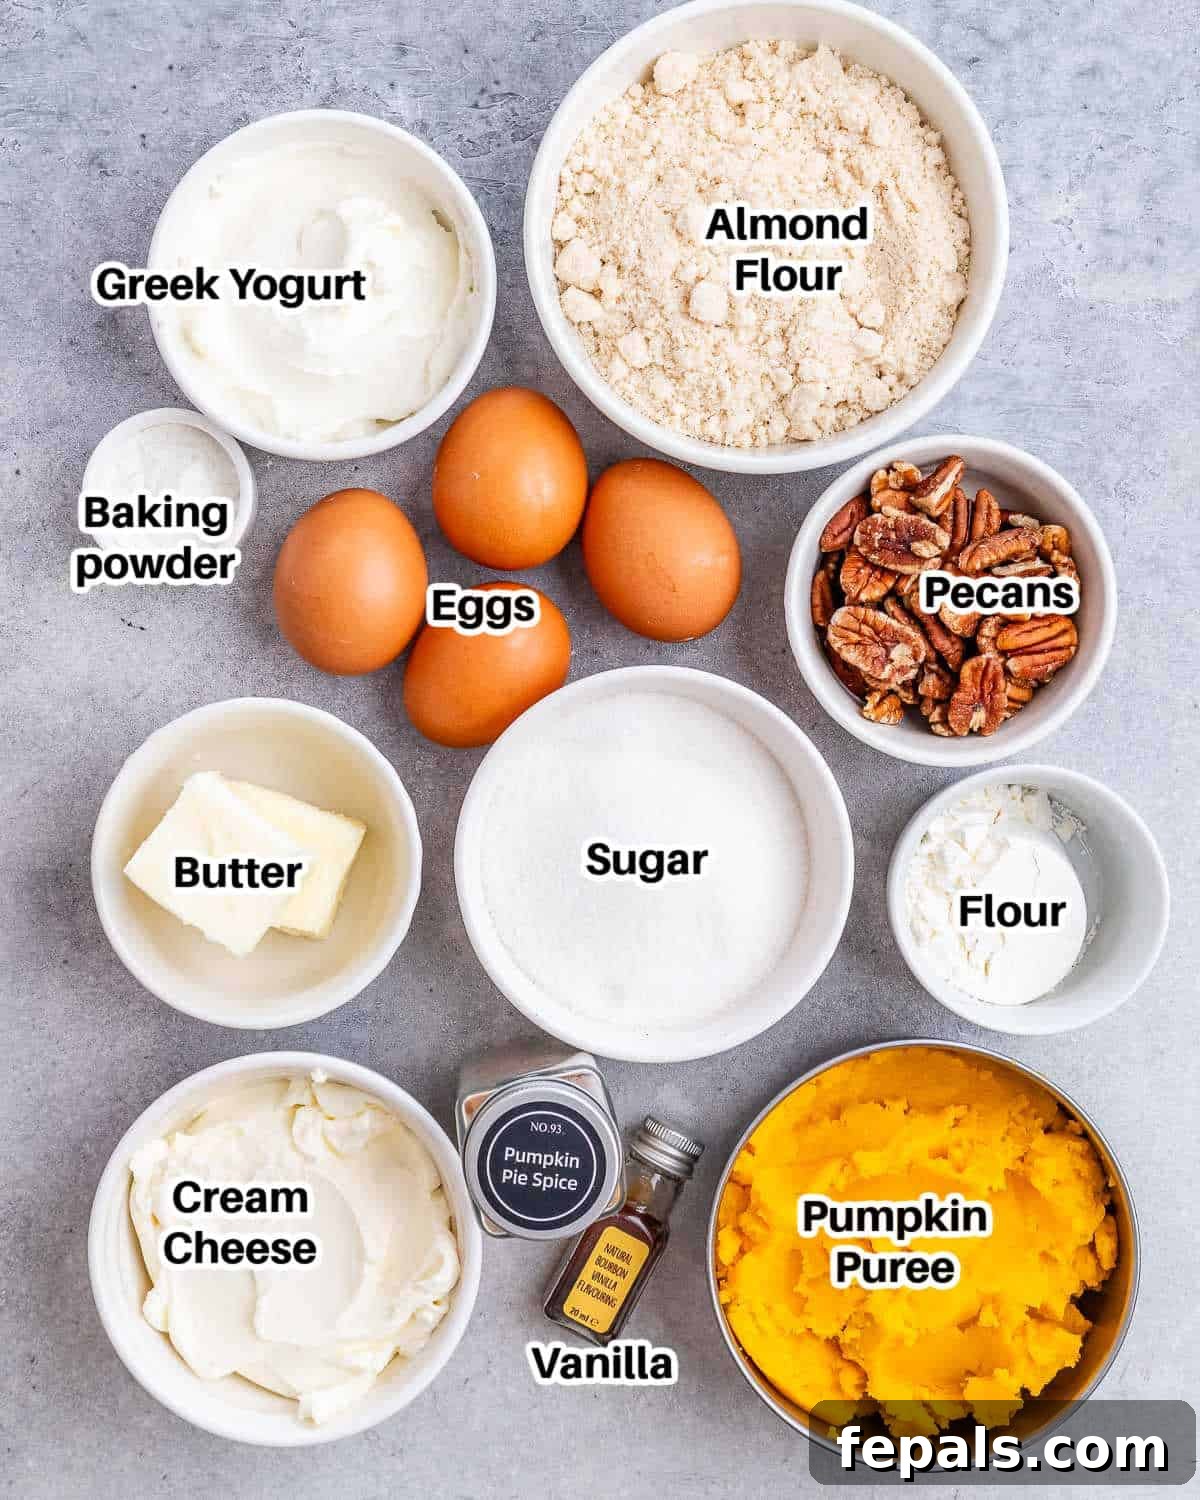
For the Creamy Pumpkin Filling:
- Pumpkin Puree: Opt for canned 100% pure pumpkin puree, not pumpkin pie filling. The latter contains added sugar and spices, which would alter the recipe’s balance. Pure pumpkin provides a consistent texture and allows you to control the sweetness and spice level.
- Cream Cheese: Full-fat cream cheese is recommended for the best results. It lends a luxurious richness and creates that soft, custardy texture in the pumpkin base. Low-fat or reduced-fat cream cheese may result in a gummier consistency. Ensure it’s softened to room temperature for smooth mixing.
- Greek Yogurt: This is a secret weapon for moisture and a subtle tang that beautifully complements the sweetness of the pumpkin. It adds depth of flavor and helps achieve a perfectly smooth filling. Regular yogurt can make the batter too thin, so stick with Greek yogurt for its thicker consistency.
- Eggs: Eggs are essential binders, helping the filling set and giving it structure. In a gluten-free cake, where gluten’s binding properties are absent, eggs play an even more crucial role in ensuring the cake holds together beautifully.
- White Sugar: Provides the perfect level of sweetness for the pumpkin filling. You can experiment with coconut sugar or light brown sugar if you prefer a slightly different caramel-like note, adjusting quantities to taste.
- Pumpkin Pie Spice: The heart of fall flavor! This blend typically includes cinnamon, nutmeg, ginger, cloves, and allspice. It infuses the pumpkin layer with aromatic warmth. If you don’t have it on hand, you can easily make your own (see tips below).
- Vanilla Extract: A splash of vanilla enhances all the other flavors, adding a comforting depth to the pumpkin filling.
For the Crispy Gluten-Free Cake Mix Topping:
- Melted Butter or Coconut Oil: This is key to achieving that signature crispy, streusel-like crust. Drizzling the melted fat over the dry ingredients moistens them just enough to caramelize and become golden brown as they bake. Butter adds a rich flavor, while coconut oil offers a dairy-free alternative.
- Almond Flour: Blanched almond flour is preferred here. It creates a finer, lighter crumb for the topping. Avoid almond meal, which can be coarser and make the topping overly crumbly.
- Gluten-Free Flour Blend: There are many excellent pre-mixed gluten-free flour blends available in grocery stores. Choose your favorite baking-specific blend. These blends are formulated to mimic the properties of wheat flour and will give your topping the best texture.
- Baking Powder: A leavening agent that helps the topping rise slightly, contributing to its lighter, crisper texture.
- Chopped Pecans: Nuts add a wonderful crunch and a buttery, earthy flavor that contrasts beautifully with the smooth pumpkin interior. Pecans are traditional for fall desserts, but chopped walnuts would also be a delicious substitute.
How to Make This Easy Gluten-Free Pumpkin Dump Cake
Get ready for one of the easiest, most rewarding baking experiences. This recipe is designed to be straightforward, yielding maximum flavor with minimal effort.
First, preheat your oven to 350°F (175°C) and lightly grease a 9×13-inch baking dish. This ensures your dump cake bakes evenly and releases easily.
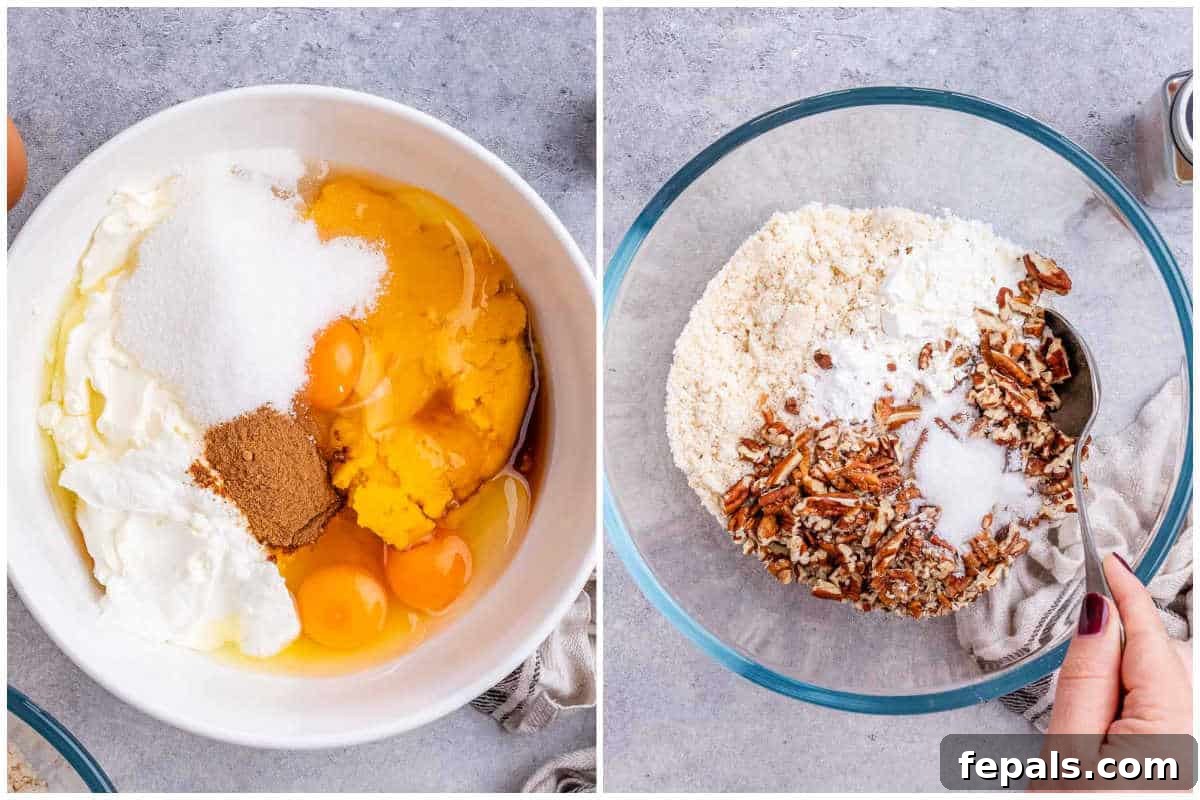
Step-by-Step Instructions:
-
Prepare the Pumpkin Filling: In a large mixing bowl, combine the pumpkin puree, softened cream cheese, Greek yogurt, eggs, white sugar, pumpkin pie spice, and vanilla extract. Use an electric mixer to whisk these ingredients together until the mixture is completely smooth and free of lumps. This creates a wonderfully creamy and flavorful base for your dump cake. Once smooth, pour this luscious pumpkin mixture evenly into your prepared 9×13-inch baking dish.
Expert Tip: If you don’t have an electric mixer, start by vigorously whisking the softened cream cheese and sugar together until light and fluffy. This prevents lumps. Then, gradually whisk in the remaining wet ingredients until well combined.
-
Create the Gluten-Free Cake Mix Topping: In a separate medium bowl, combine the dry ingredients for your topping: almond flour, gluten-free flour blend, white sugar, baking powder, and chopped pecans. Use a whisk to thoroughly mix these dry ingredients together. This step is important for breaking up any potential clumps in the flours and ensuring the pecans are evenly distributed throughout the topping.
Expert Tip: Sifting your flours before combining them can help achieve an even lighter and more uniform topping, though it’s not strictly necessary for this forgiving recipe.
-
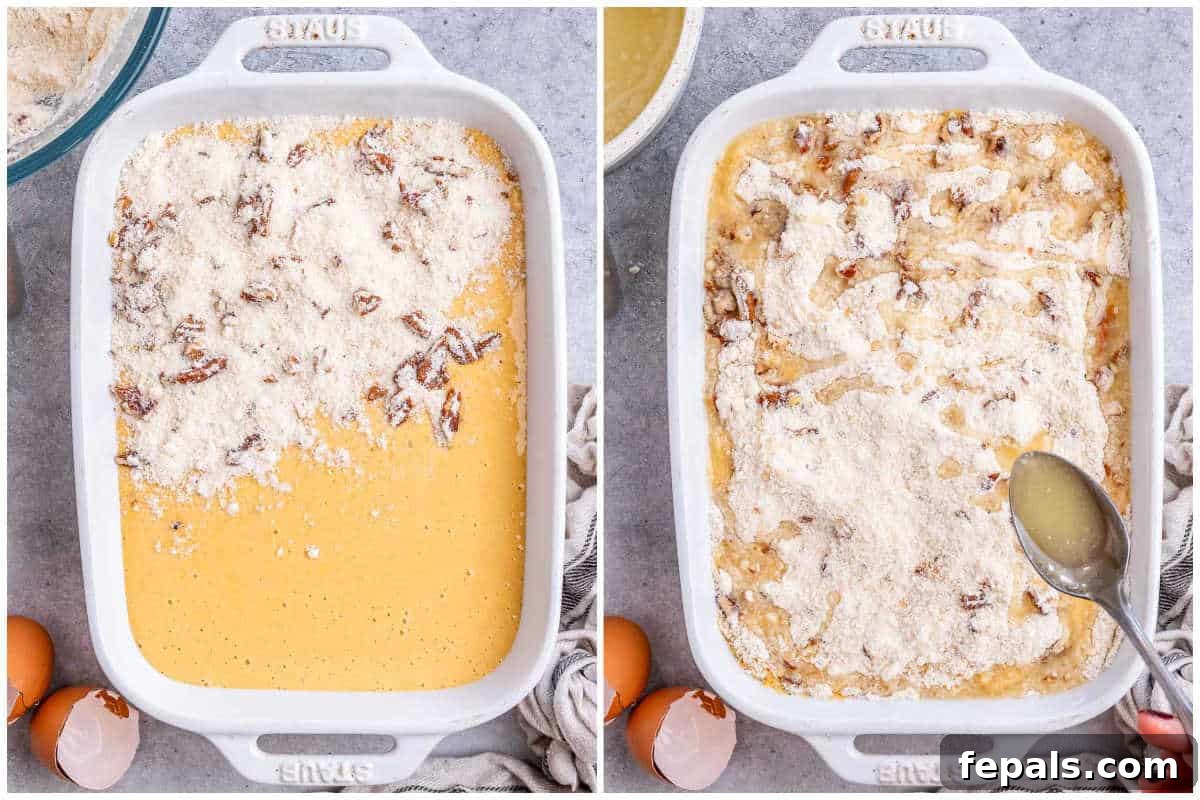
Layer the Cake Mix: Carefully and evenly sprinkle the prepared dry cake mix topping over the pumpkin filling in the baking dish. It’s crucial to distribute it as uniformly as possible to ensure every bite has that perfect balance of creamy pumpkin and crispy topping.
Expert Tip: Avoid pressing the dry mix into the pumpkin layer. A light, even sprinkle is all you need for the magic to happen during baking.
-
Drizzle with Butter: Take your melted butter or coconut oil and drizzle it evenly over the entire surface of the dry cake mix layer. This moistens the dry ingredients, allowing them to transform into that glorious, golden-brown, streusel-like crust as the cake bakes.

Expert Tip: Ensure the melted butter or oil covers as much of the dry mix as possible. This is what creates the beautiful crispy texture.
-
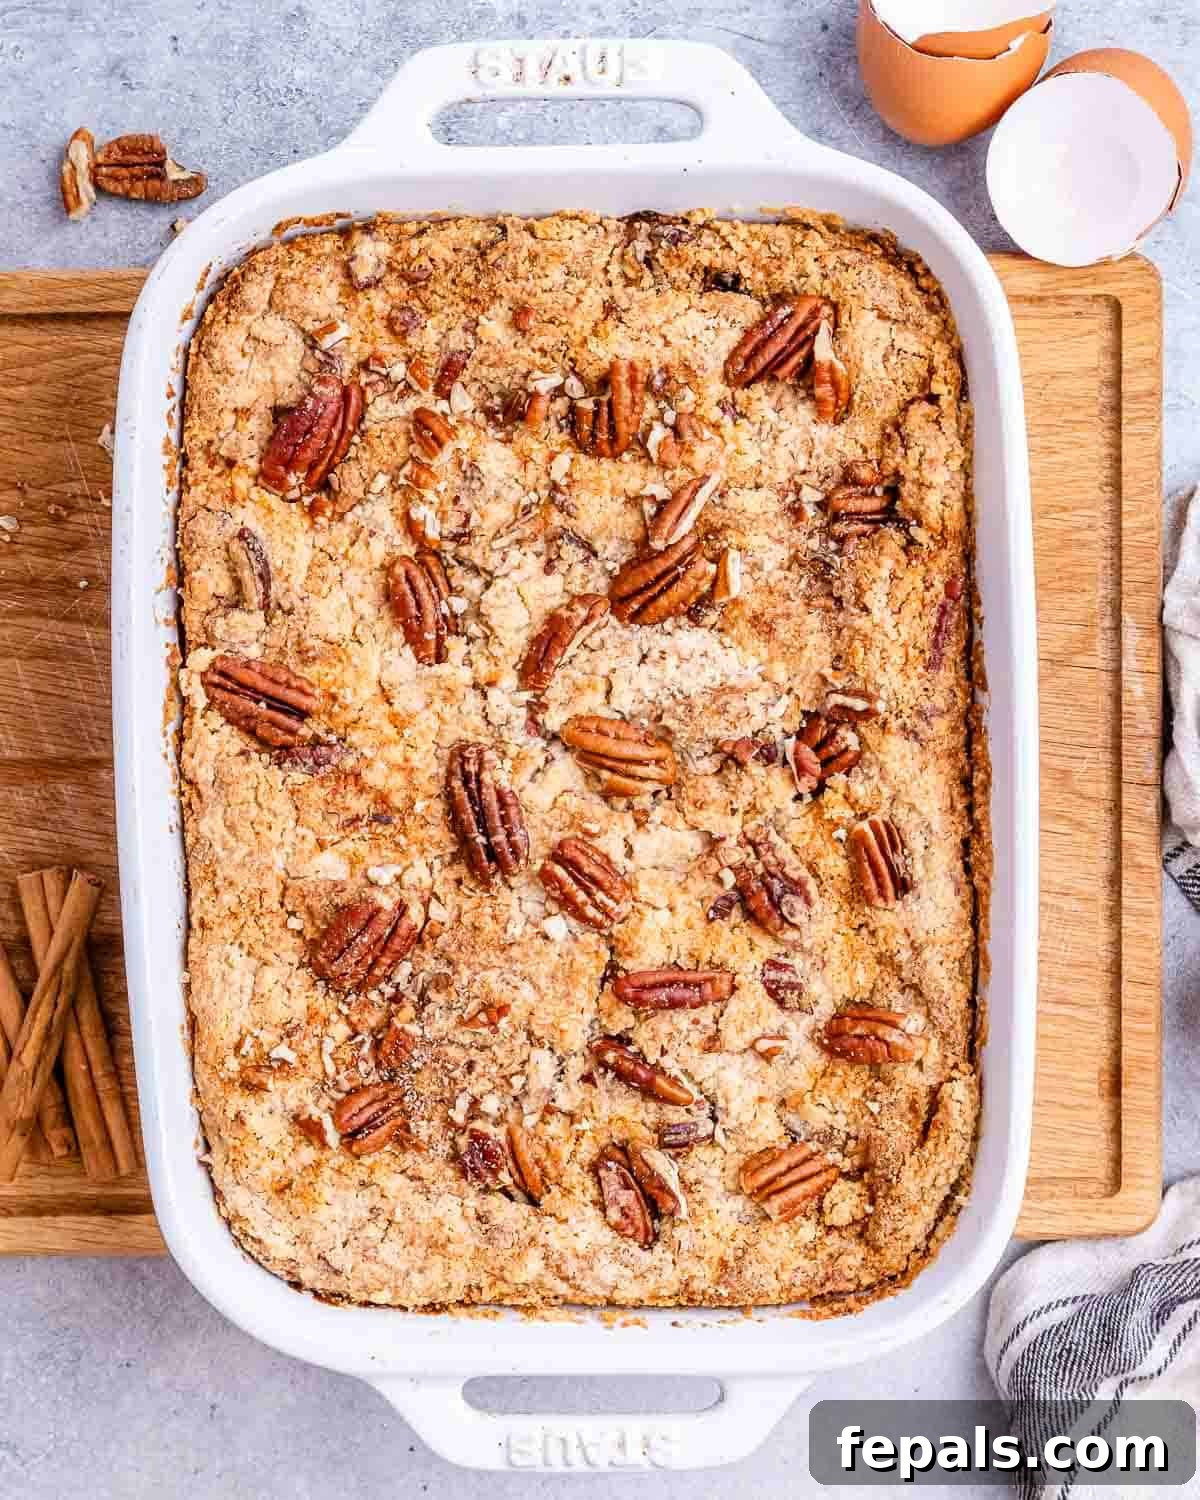
Bake to Perfection: Place the baking dish in your preheated oven and bake for 55-65 minutes. The dump cake is ready when the topping is nicely browned and appears crispy, and the center of the pumpkin filling is set and no longer wobbly when you gently shake the pan.
Expert Tip: Unlike traditional cakes, the toothpick test isn’t reliable here due to the custardy filling. Rely on the visual cues of a golden-brown topping and a firm center.
-
Cool and Serve: Once baked, remove the pumpkin dump cake from the oven and let it cool completely on a wire rack before cutting into slices and serving. This cooling time is essential for the filling to fully set, ensuring clean, perfect slices every time. If you prefer to serve it warm, you can gently reheat individual servings after it has cooled and set.
Expert Tips for the Perfect Pumpkin Dump Cake
While dump cakes are inherently easy, a few simple tips can elevate your dessert from good to absolutely amazing:
- Room Temperature Ingredients: For the pumpkin filling, ensure your cream cheese and eggs are at room temperature. This helps them incorporate smoothly with the other ingredients, preventing lumps and creating a uniformly creamy texture.
- Don’t Skimp on the Butter Drizzle: The melted butter or coconut oil is what transforms the dry cake mix into a delightful, crispy topping. Be generous and ensure it covers as much of the surface as possible for maximum crunch.
- Even Spreading is Key: Take your time to spread both the pumpkin filling and the dry cake mix evenly across the baking dish. This ensures consistent baking and a balanced texture in every bite.
- Making Your Own Pumpkin Pie Spice: If you’re out of store-bought pumpkin pie spice, you can easily create your own blend. For 2 teaspoons, combine 1 teaspoon ground cinnamon, 1/2 teaspoon ground ginger, 1/4 teaspoon ground nutmeg, 1/8 teaspoon ground cloves, and 1/8 teaspoon ground allspice.
- Choosing the Right Pan: A 9×13-inch baking dish is ideal for this recipe, ensuring the correct thickness of both layers for optimal baking.
- Serving Suggestions: This pumpkin dump cake is fantastic on its own, but it’s even better served warm with a scoop of vanilla ice cream, a dollop of fresh whipped cream, or a drizzle of caramel sauce. A sprinkle of extra cinnamon or chopped pecans also makes for a beautiful garnish.
Delicious Variations to Try
While the classic gluten-free pumpkin dump cake is incredible, don’t hesitate to experiment with these fun variations to suit your taste or occasion:
- Sweet Potato Dump Cake: For a delightful twist, simply swap the 15 ounces of pumpkin puree for an equal amount of mashed sweet potato. The texture will be similar, and the flavor will offer a slightly different earthy sweetness.
- Chocolate Chip Pumpkin Dump Cake: Who can resist chocolate? Sprinkle about 1/2 cup of semisweet or dark chocolate chips over the dump cake immediately after you remove it from the oven. The residual heat will melt them slightly, creating gooey pockets of chocolate bliss.
- Apple-Cranberry Dump Cake: Replace the pumpkin puree with apple pie filling (or homemade spiced apples) and add a handful of fresh or frozen cranberries to the topping mix for a tart and sweet fall treat.
- Nutty Crunch Topping: Experiment with different types of chopped nuts in the topping, such as walnuts, hazelnuts, or a mix. You could also toast the nuts lightly before adding them for enhanced flavor.
- Cream Cheese Swirl: For an extra layer of decadence, before sprinkling the cake mix, dollop a few spoonfuls of plain, softened cream cheese over the pumpkin filling and swirl it gently with a knife.
Common Questions About Pumpkin Dump Cake
Here are answers to some frequently asked questions about making and enjoying this easy gluten-free pumpkin dump cake:
The most common mistake is not distributing the dry cake mix and the melted butter evenly. It’s crucial to sprinkle the dry mix uniformly over the wet ingredients, and then drizzle the butter as broadly as possible. This ensures that the topping gets perfectly crisp and golden-brown, rather than having dry, powdery spots.
Allow any leftovers to cool completely to room temperature. Then, transfer them to an airtight container and store in the refrigerator for up to 3 days. This helps maintain its freshness and prevents it from drying out.
Yes, absolutely! You can substitute white sugar with an equal amount of light brown sugar or even coconut sugar. Brown sugar will impart a deeper, more molasses-like flavor and a slightly richer color to your dump cake, which can be a delicious variation.
This dump cake is an excellent make-ahead dessert. Bake it as instructed and let it cool completely. Cover the baking dish tightly with plastic wrap and chill it in the refrigerator for up to 3 days. You can serve it cold directly from the fridge, at room temperature, or reheat it gently before serving (see reheating instructions below).
Yes, this cake freezes well. Once fully cooled, cut it into individual slices or portion it into an airtight, freezer-safe container. It can be stored in the freezer for up to 3 months. When you’re ready to enjoy it, thaw overnight in the refrigerator before reheating.
For individual slices, you can reheat them in the microwave for 30-60 seconds, or until warmed through. To reheat the entire cake (or a large portion), cover it loosely with foil and warm it in an oven preheated to 350°F (175°C) for 15-20 minutes, or until heated through. Be careful not to overcook, as this can dry out the topping.
More Delicious Fall and Gluten-Free Recipes You May Also Like
If you loved this easy pumpkin dump cake, be sure to explore more recipes that celebrate the flavors of fall or cater to a gluten-free lifestyle. Here are some of our favorites:
- Healthy Pumpkin Oatmeal
- Pumpkin Pound Cake
- Birthday Cake Cookies (Gluten-Free)
- Pumpkin Baked Oatmeal
- Easy Pumpkin Cake
- Healthy Pumpkin Bread
- Pumpkin Chocolate Brownies
- Dubai Chocolate Strawberry Cup (Gluten-Free)
- Creamy Pumpkin Risotto
Get Your Free Healthy Recipe EBook!
Don’t miss out on even more delicious, family-friendly recipes! Grab our exclusive free eBook featuring 20 of our top healthy dinner recipes, all ready in 30 minutes or less. Simply enter your name and email below to download your copy instantly.
Thank you for stopping by and exploring this fantastic gluten-free pumpkin dump cake recipe! We hope you and your loved ones enjoy every delicious bite. For more wholesome recipes and kitchen inspiration, remember to subscribe to our newsletter for free. You’ll receive recipes like this delivered directly to your inbox, ensuring you never miss a new favorite.
FOLLOW me on FACEBOOK | INSTAGRAM | PINTEREST | TWITTER for all of my latest blog posts and recipes.
Pumpkin Dump Cake (Gluten-Free) Recipe
A delightfully easy, no-fuss pumpkin dump cake recipe featuring a homemade gluten-free cake mix and a crunchy pecan topping. All the rich, creamy flavor of pumpkin pie made simple!
Recipe Details:
- By: Rena
- Servings: 12 servings
- Prep Time: 10 minutes
- Cook Time: 1 hour
- Total Time: 1 hour 10 minutes
- Course: Dessert
- Cuisine: American
Ingredients
Pumpkin Filling:
- 15 ounces pumpkin puree (one can, 100% pure pumpkin)
- 8 ounces cream cheese, softened
- 1/2 cup Greek yogurt
- 4 large eggs
- 1 cup white sugar
- 2 teaspoons pumpkin pie spice
- 1 tablespoon vanilla extract
- 5 tablespoons melted butter or coconut oil (for drizzling)
Homemade Gluten-Free Cake Mix Topping:
- 1 1/2 cup almond flour (blanched)
- 1/4 cup gluten-free all-purpose flour blend
- 1/2 cup white sugar
- 1 1/2 teaspoons baking powder
- 1 cup chopped pecans
Instructions
- Preheat the oven to 350℉ (175°C) and generously grease a 9×13-inch baking dish.
- In a large bowl, combine the pumpkin puree, softened cream cheese, Greek yogurt, eggs, 1 cup white sugar, pumpkin pie spice, and vanilla extract. Whisk vigorously with an electric mixer until the mixture is completely smooth and creamy. Pour this mixture into the prepared baking dish, spreading it evenly.
- In a separate mixing bowl, prepare the homemade cake mix topping. Combine the almond flour, gluten-free flour blend, 1/2 cup white sugar, baking powder, and chopped pecans. Whisk well to ensure all ingredients are thoroughly combined and no lumps remain.
- Carefully sprinkle the dry cake mix evenly over the pumpkin filling in the baking dish. Do not press down.
- Evenly drizzle the 5 tablespoons of melted butter or coconut oil over the entire surface of the dry ingredients. Ensure maximum coverage for a crispy topping.
- Bake for 55-65 minutes, or until the topping is beautifully golden brown and crispy, and the center of the pumpkin filling is set (it should not wobble when the pan is gently shaken).
- Remove from the oven and allow the cake to cool completely on a wire rack before slicing and serving. This allows the filling to firm up, making for cleaner cuts.
Recipe Notes
Tips for Success:
- Cooling is Crucial: Allow the cake to cool completely for at least 2-3 hours so it fully sets. This is essential for clean, perfect slices. You can reheat individual slices afterward if you wish to serve it warm with ice cream or whipped cream.
- Pure Pumpkin Only: Double-check that you are using 100% pure canned pumpkin puree, not pumpkin pie filling, which contains added sugar and spices.
- Homemade Spice Blend: If you don’t have pumpkin pie spice, mix 1 tsp ground cinnamon, 1/2 tsp ground ginger, 1/4 tsp ground nutmeg, 1/8 tsp ground cloves, and 1/8 tsp ground allspice.
- Doneness Test: The traditional ‘toothpick test’ won’t work perfectly for this custardy cake. Instead, gently shake the pan; the cake is done when the filling no longer jiggles in the center.
Variations:
- Sweet Potato Dump Cake: Replace the pumpkin puree with 15 ounces of mashed sweet potato for a delightful alternative.
- Chocolate Chip Pumpkin Dump Cake: For a chocolatey twist, sprinkle 1/2 cup of semisweet or dark chocolate chips over the dump cake immediately after removing it from the oven.
Storage and Make-Ahead:
- Make Ahead: Bake the cake according to the instructions and let it cool completely. Cover the baking dish tightly with plastic wrap and refrigerate for up to 3 days. Serve chilled, at room temperature, or reheat as desired.
- Refrigerate: Store any leftover dump cake in an airtight container in the fridge for up to 3 days.
- Freeze: Once completely cooled, leftovers can be stored in an airtight freezer-safe container for up to 3 months. Thaw overnight in the refrigerator before serving or reheating.
- Reheat: Individual slices can be warmed in a microwave-safe bowl in the microwave. Alternatively, uncover and reheat the whole cake in its baking dish in the oven at 350℉ (175°C) for 15-20 minutes, until thoroughly warmed.
Nutrition Information
(Approximate values per serving, based on 12 servings)
- Calories: 378 kcal
- Carbohydrates: 36g
- Protein: 9g
- Fat: 24g
- Saturated Fat: 8g
- Polyunsaturated Fat: 2g
- Monounsaturated Fat: 5g
- Trans Fat: 0.01g
- Cholesterol: 65mg
- Sodium: 148mg
- Potassium: 182mg
- Fiber: 4g
- Sugar: 29g
- Vitamin A: 5710 IU
- Vitamin C: 2mg
- Calcium: 126mg
- Iron: 2mg
Nutrition information is automatically calculated and should only be used as an approximation. Actual values may vary based on specific ingredients and preparation methods.
Tried this delightful recipe? We’d love to see your creations and hear your feedback! Mention @healthyfitnessmeals or tag #healthyfitnessmeals on Instagram!