
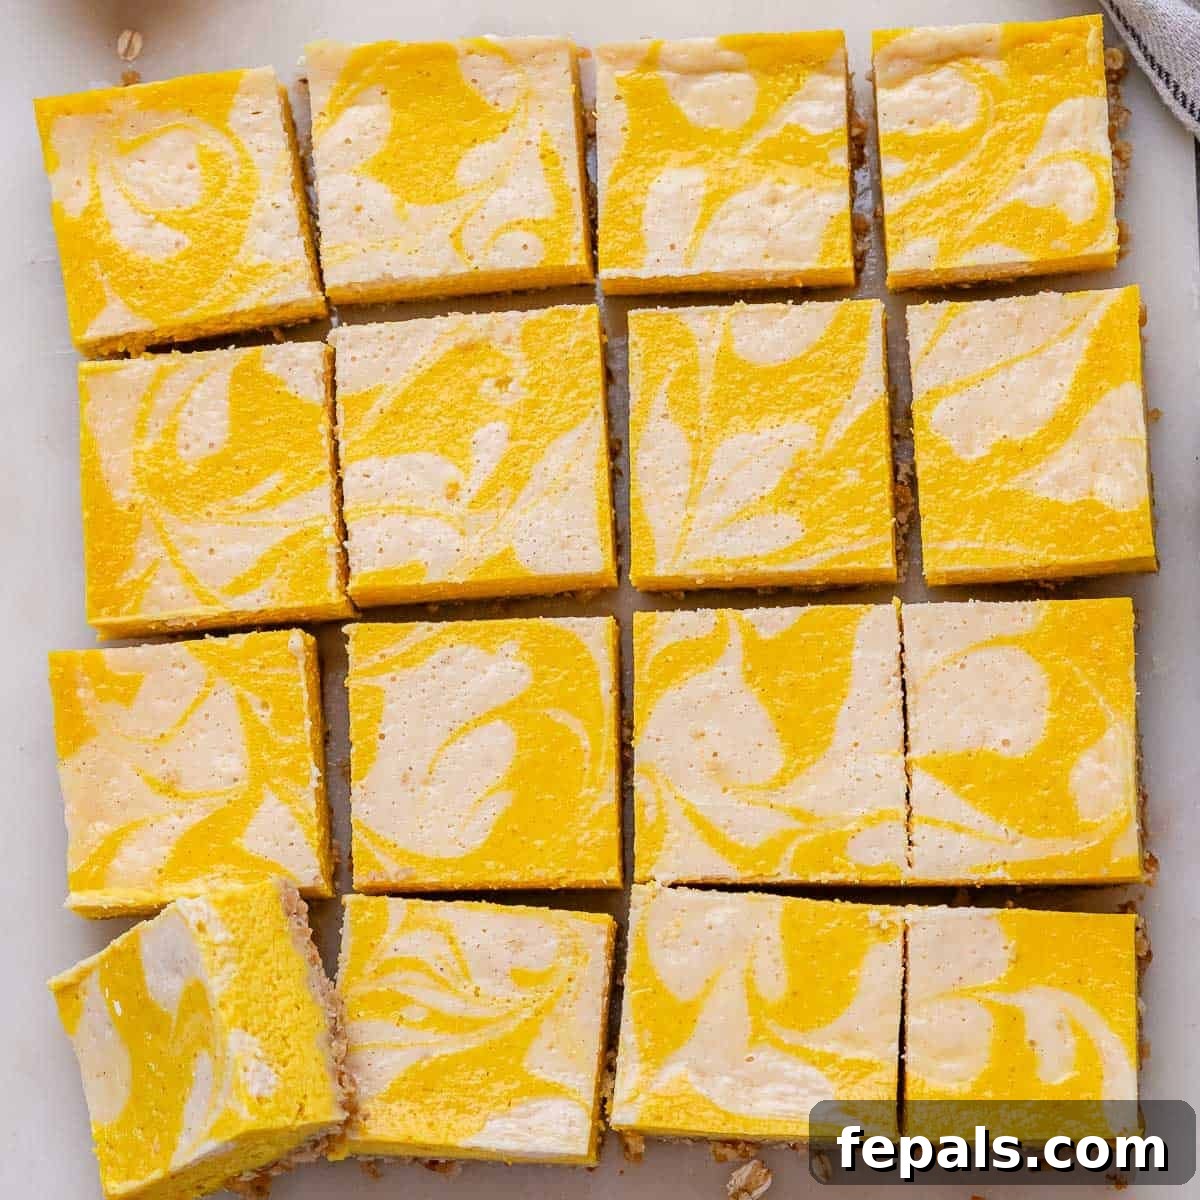
Pumpkin Cheesecake Bars are the quintessential fall dessert, capturing the very essence of the season in every creamy, spiced bite. They deliver all the rich, comforting flavors of a classic pumpkin cheesecake but in a wonderfully portable, easy-to-share bar form. Perfect for autumn gatherings, holiday tables, or simply enjoying a cozy evening at home, these bars are not only delightful to eat but also surprisingly simple to prepare. With their vibrant pumpkin hue, irresistibly smooth texture, and a crunchy, nutty crust, they offer a harmonious blend of flavors and textures that truly embody the spirit of fall. The best part? These bars often taste even better the day after they’re made, allowing the flavors to meld beautifully and develop greater depth.
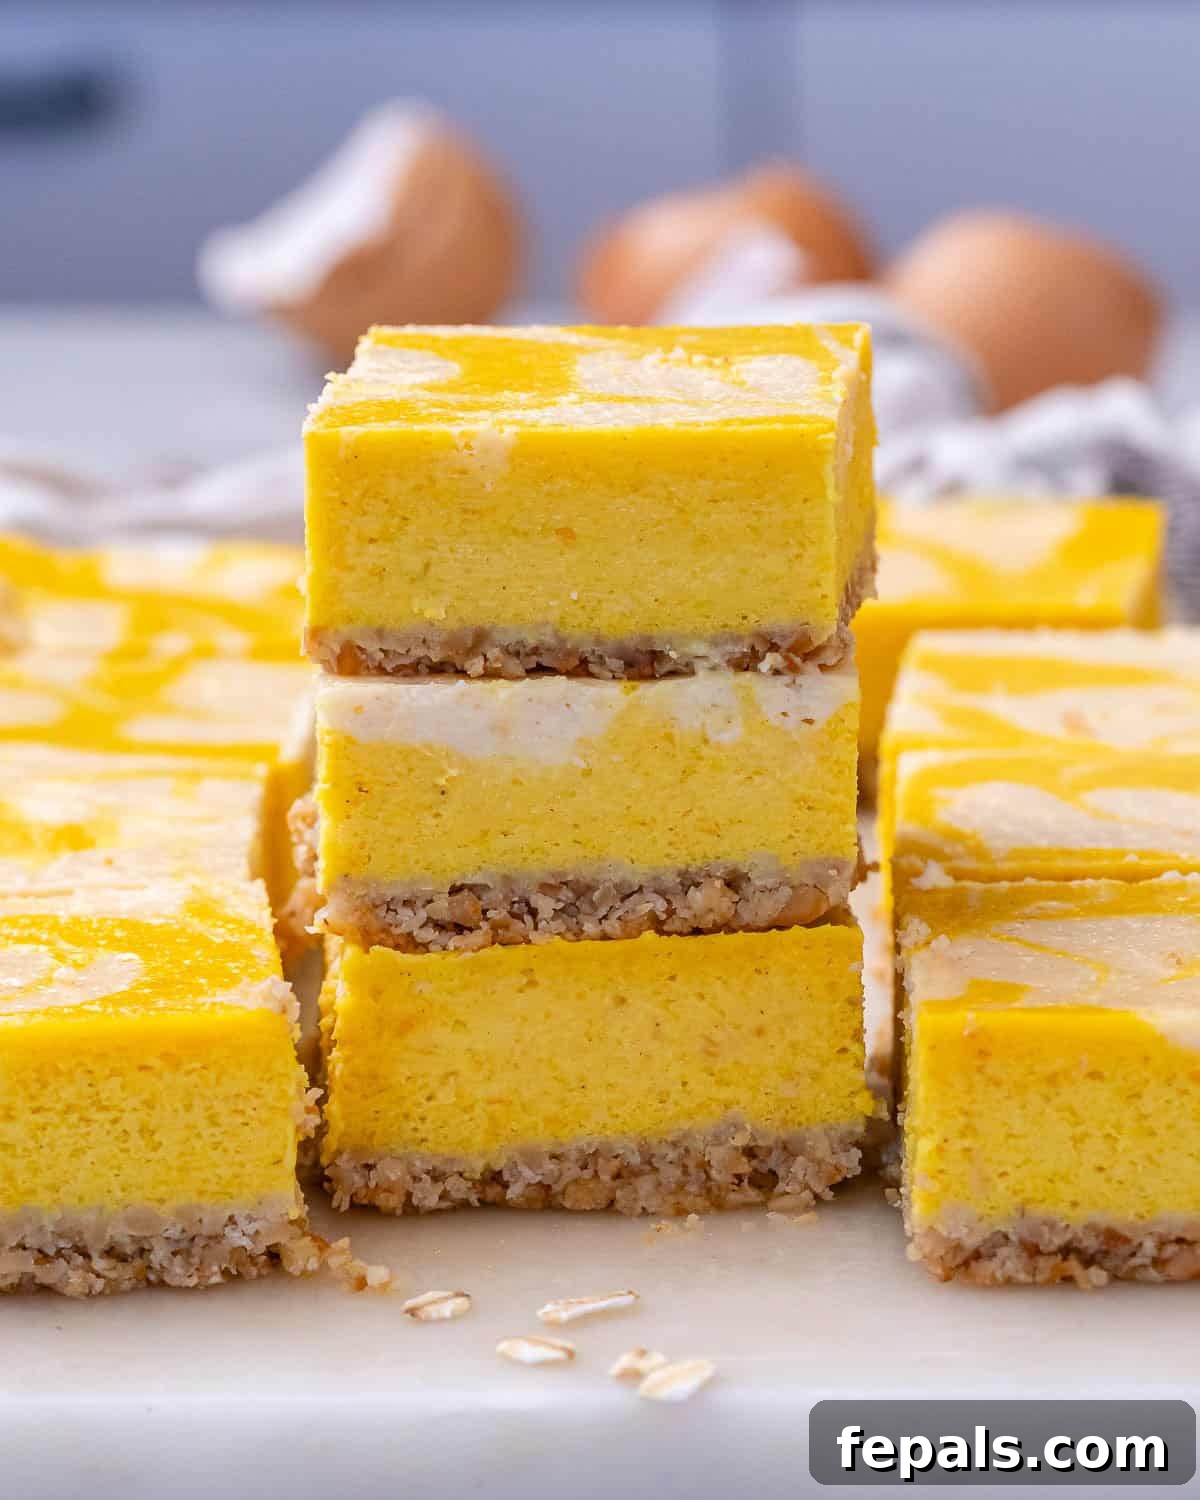
As autumn leaves begin to fall and the air grows crisp, there’s an undeniable call for pumpkin-spiced treats. Among the myriad of seasonal desserts, these Pumpkin Cheesecake Bars stand out as a beloved favorite. They bring together the luxurious, velvety texture of cheesecake with the warm, inviting spices of pumpkin pie, creating a dessert that feels both familiar and special. Unlike a full cheesecake, which can sometimes be intimidating to cut and serve, these bars are incredibly convenient. Their sturdy, yet tender, oat and cashew crust provides a fantastic nutty crunch that complements the creamy filling, making each bite an experience in contrasting textures. Plus, for those seeking gluten-free options, this recipe is a fantastic choice, ensuring everyone can indulge in its autumnal charm. Should cashews not be available, feel free to substitute with almonds, pecans, or even walnuts—each offers its unique nutty note that works wonderfully with the pumpkin.
If you find yourself captivated by the delightful flavors of pumpkin this season, be sure to explore more of our cherished recipes. You might fall in love with our Healthy Pumpkin Muffins, perfect for a wholesome breakfast or snack, or perhaps our indulgent Chocolate Chip Pumpkin Bar Recipe for another easy-to-make treat.
Recipe Overview
⭐
⏱️
🔥
Essential Ingredients for Perfect Pumpkin Cheesecake Bars
Crafting these delectable Pumpkin Cheesecake Bars requires a careful selection of fresh, high-quality ingredients. While the full, precise measurements are detailed in the comprehensive recipe card below, this convenient shopping list will help you gather everything you need to embark on your baking adventure. Each component plays a crucial role in building the incredible flavor and texture profile of these irresistible bars, from the crunchy base to the smooth, spiced filling.
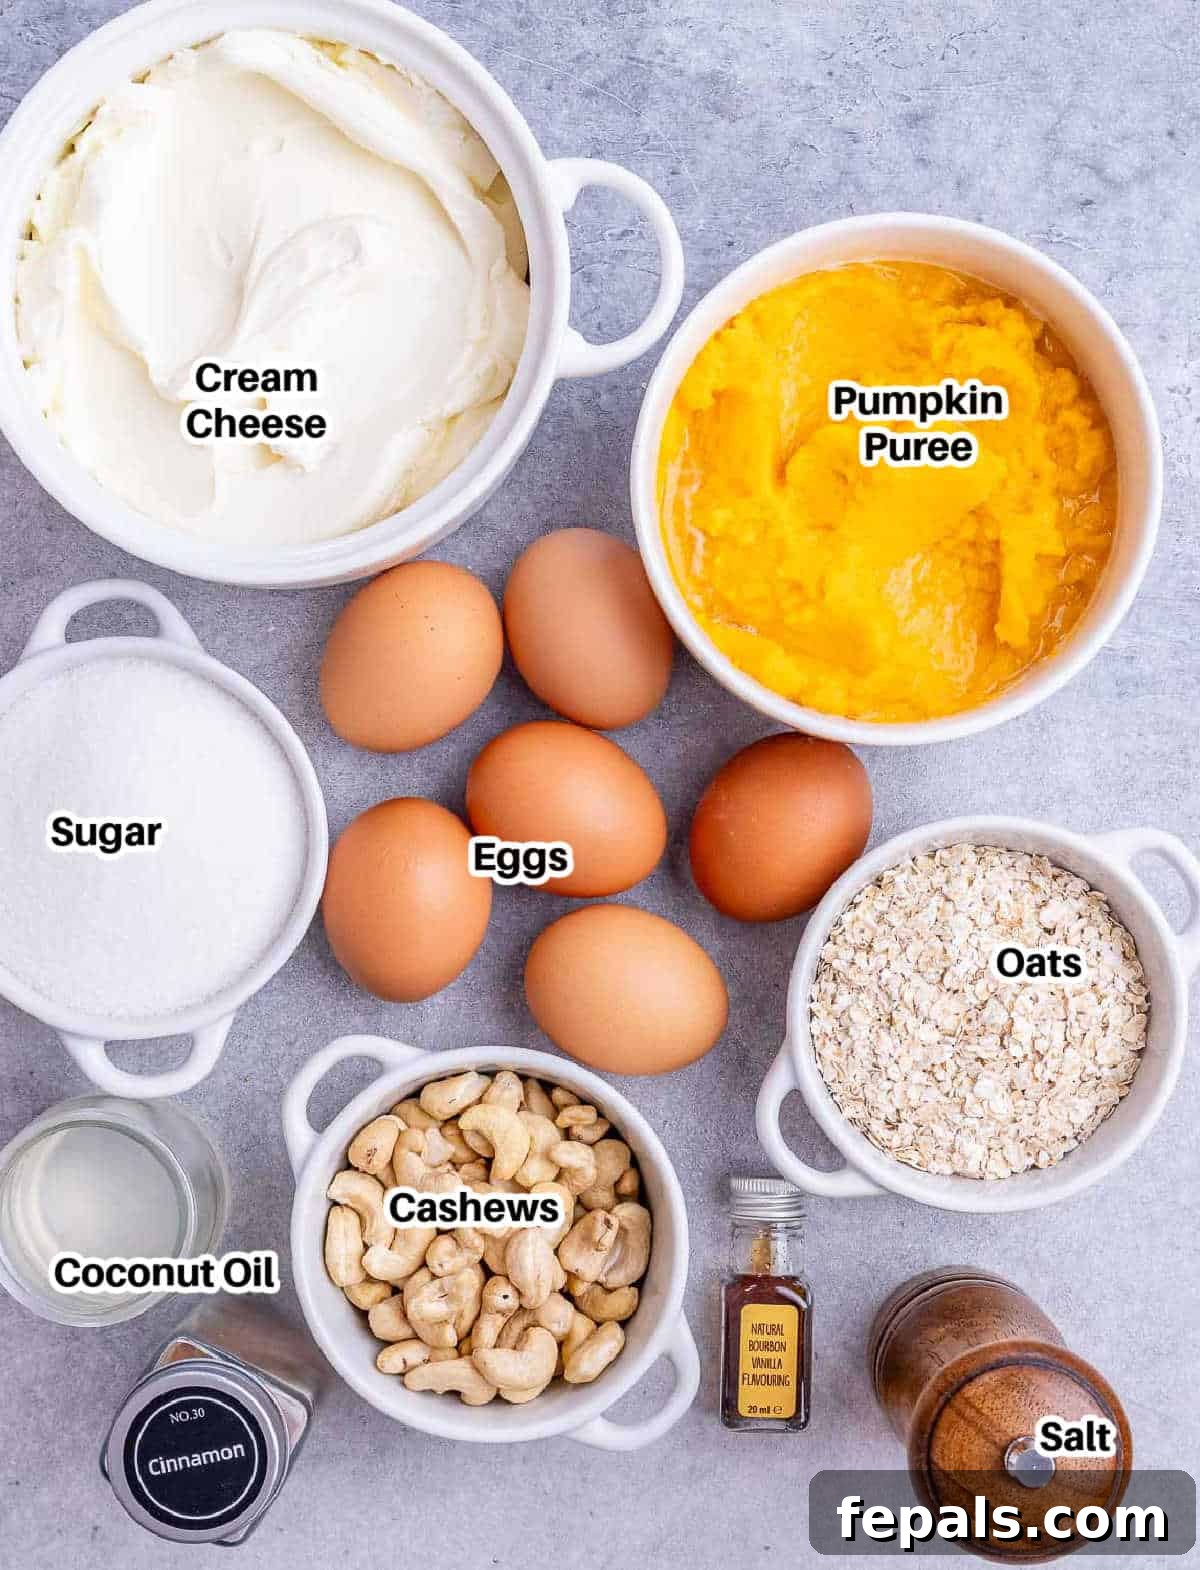
- Rolled oats: These are the backbone of our unique, gluten-free crust. When processed, they contribute a wonderful lightness and a subtle, toasted flavor that pairs beautifully with the creamy pumpkin filling. For those managing gluten sensitivity, always ensure the packaging explicitly states ‘gluten-free’ to prevent any cross-contamination.
- Raw cashews: These nuts are key to giving the crust its rich, buttery depth and an incredibly satisfying crunch. Their mild flavor blends seamlessly, but you have the flexibility to swap them with almonds or pecans if you prefer a slightly different nutty profile, or even walnuts for a more robust taste.
- Kosher salt: A small but mighty ingredient, salt enhances all the other flavors, balancing the sweetness in both the crust and the filling. It brings out the inherent richness of the nuts and the spices.
- Vanilla extract: This aromatic essence is indispensable. In the crust, it adds a subtle warmth, and in the cheesecake filling, it deepens the overall flavor, making it more complex and inviting. Always opt for pure vanilla extract for the best results.
- Caster sugar: Also known as superfine sugar, it dissolves more easily than granulated sugar, ensuring a smooth texture in both the crust and the silky cheesecake filling. It provides just the right amount of sweetness without overwhelming the natural pumpkin and spice notes, making the bars perfectly balanced and never overly rich.
- Coconut oil: Melted coconut oil acts as the binder for our wholesome crust. It not only holds the oats and nuts together but also contributes a lovely tenderness and a faint, tropical aroma that is delightful. Ensure it’s fully melted before incorporating.
- Cream cheese: The star of any cheesecake! For a flawlessly smooth and lump-free filling, it is absolutely crucial that your cream cheese is softened to room temperature. This allows it to whip up effortlessly with the other ingredients, creating that signature creamy texture.
- Large eggs: These provide essential structure and richness to the cheesecake filling. Similar to cream cheese, eggs should be at room temperature. This helps them emulsify better with the cream cheese mixture, preventing a curdled texture and ensuring a uniform, creamy consistency.
- Cinnamon powder: The quintessential fall spice! Cinnamon brings that beloved cozy warmth and fragrant aroma that defines autumn desserts. It’s the perfect complement to pumpkin, creating that classic flavor profile everyone adores.
- Pumpkin puree: This is where the magic happens! Be sure to use pure pumpkin puree, typically found in a can, and not pumpkin pie mix. Pumpkin pie mix often contains added spices and sugar, which can alter the intended flavor and texture of these bars. Pure pumpkin offers the best natural flavor and ensures the desired creamy consistency.
Crafting Your Homemade Pumpkin Cheesecake Bars: A Step-by-Step Guide
Making these delightful Pumpkin Cheesecake Bars is a straightforward process, and by following these detailed steps, you’ll achieve perfect results every time. From preparing the golden crust to swirling the creamy, spiced filling, each stage is designed to be manageable and enjoyable, leading to a truly impressive dessert.
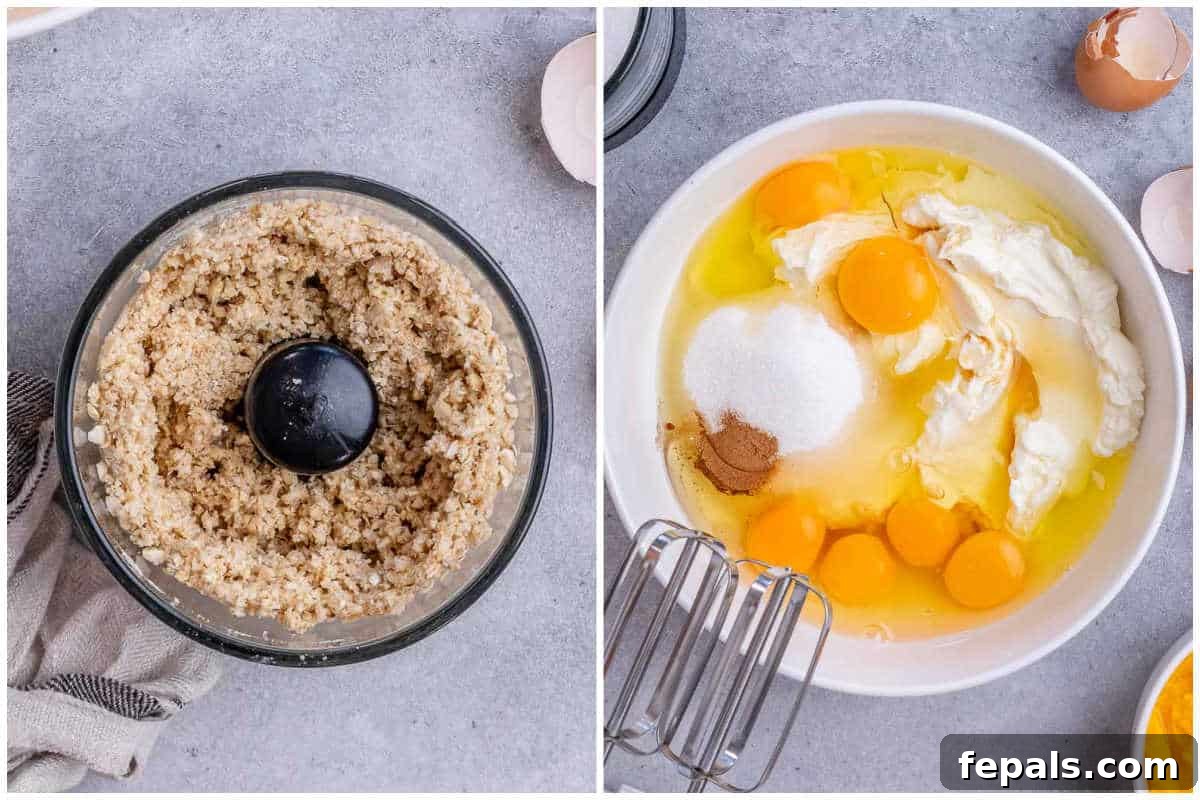
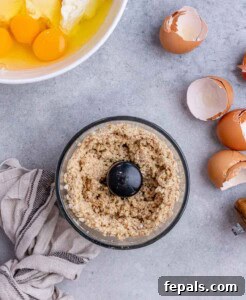
Step 1: Prepare and Bake the Nutty Oat Crust. Begin by preheating your oven to 350°F (175°C). This ensures the oven is at the correct temperature for even baking from the moment your crust goes in. Line an 8 or 9-inch square baking pan with parchment paper, allowing some overhang on the sides. This thoughtful step creates “handles” that will make it incredibly easy to lift the entire batch of bars out of the pan once cooled, ensuring clean cuts and a beautiful presentation. In the bowl of a food processor, combine the rolled oats, raw cashews, kosher salt, and the initial 2 tablespoons of caster sugar. Pulse these ingredients until they are finely ground but still retain a slight texture – you don’t want a powder, but a coarse meal. Next, add the melted coconut oil and pulse again. Continue to blend until the mixture just begins to clump together when pressed between your fingers. If the mixture feels too dry and crumbly, add an additional tablespoon of melted coconut oil and pulse once more until it reaches the desired consistency. Transfer this crust mixture into your prepared pan and press it down firmly and evenly across the bottom. A flat-bottomed glass or the back of a spoon can help create a compact, uniform layer. Bake this crust for 12 to 14 minutes, or until it turns a lovely light golden brown and smells faintly toasted. Remove the crust from the oven and set it aside to cool slightly. Crucially, reduce your oven temperature to 325°F (160°C) – this lower temperature is essential for baking the cheesecake filling gently and preventing cracks.
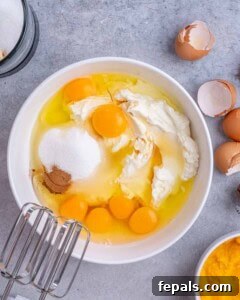
Step 2: Create the Creamy Cheesecake Base. While the crust cools, prepare your rich cheesecake filling. In a large mixing bowl, using an electric mixer, beat together the softened cream cheese, the remaining 1 cup of caster sugar, large eggs, vanilla extract, and cinnamon powder. Beat on medium speed until the mixture is perfectly smooth, creamy, and free of any lumps. Ensure all ingredients, especially the cream cheese and eggs, are at room temperature before you start; this is key to achieving that signature velvety texture. Once smooth, carefully pour about one-third of this plain cream cheese mixture into a separate, smaller bowl or a measuring jug. This portion will be used later for the beautiful marbled swirl, so set it aside for now.
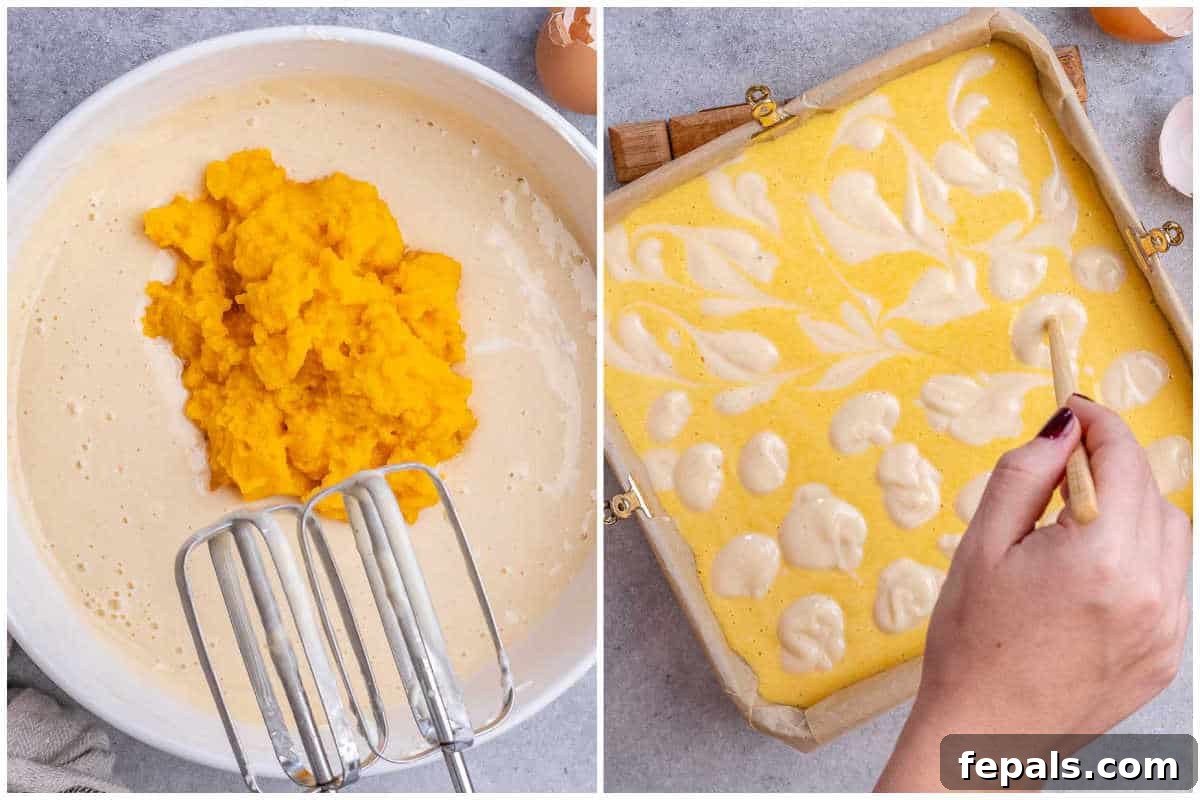
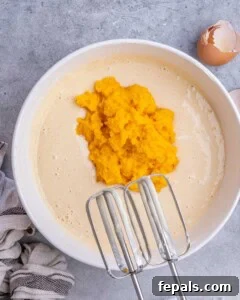
Step 3: Infuse with Pumpkin Flavor. To the remaining two-thirds of the cream cheese mixture in your large mixing bowl, add the pure pumpkin puree. Mix on low speed or by hand with a spatula until the pumpkin is thoroughly combined and the mixture is uniformly orange and smooth. Be careful not to overmix at this stage; just mix until combined to keep the filling light and airy.
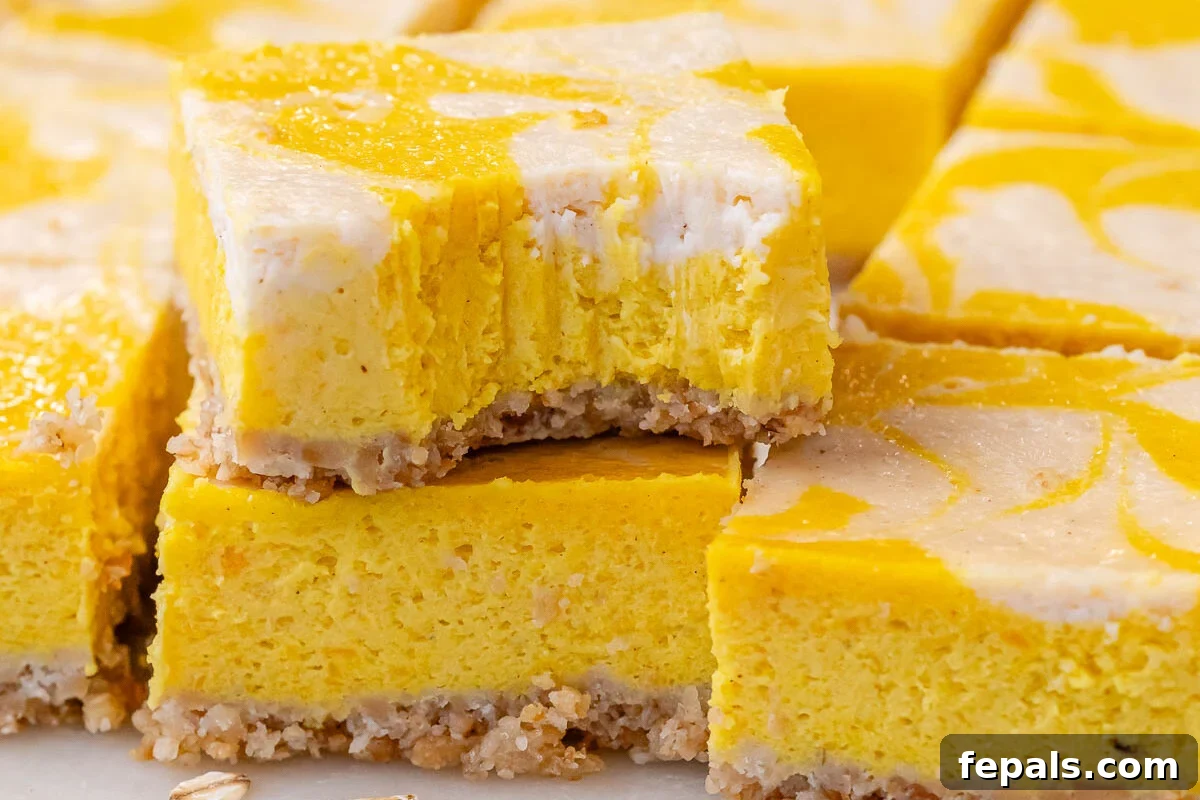
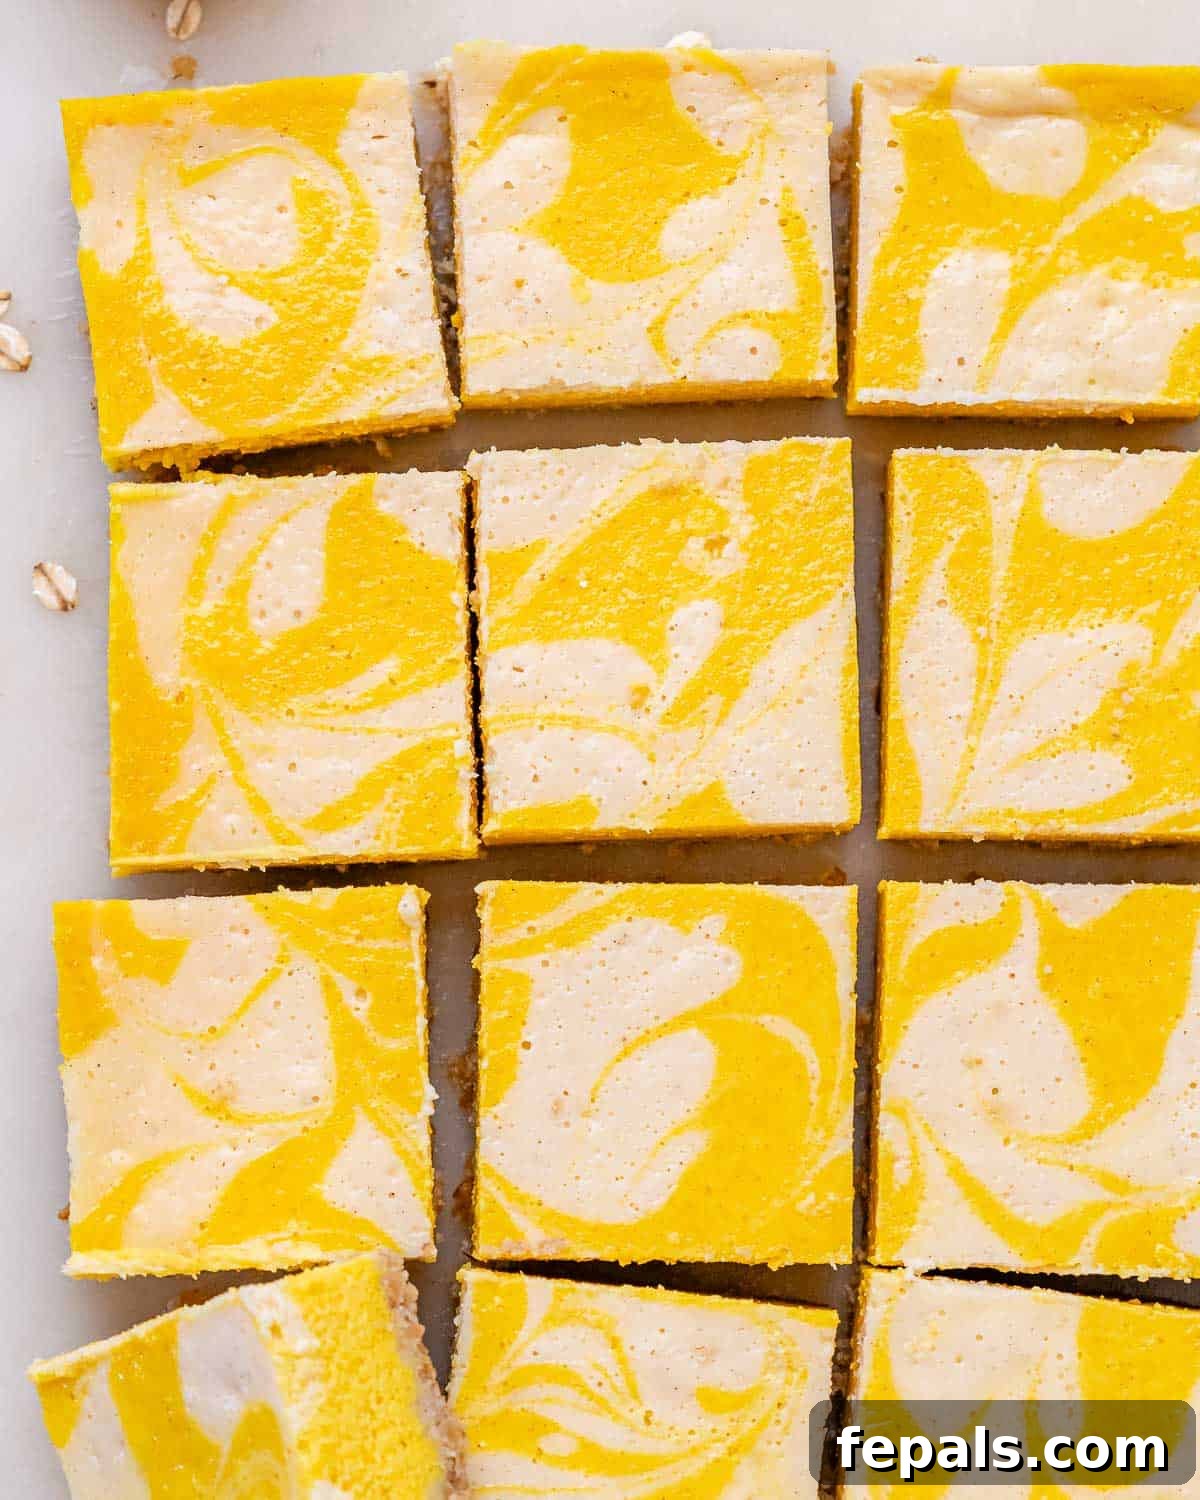
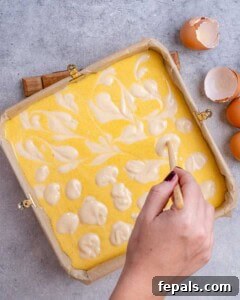
Step 4: Layer, Swirl, and Bake to Perfection. Now, it’s time to assemble your layers. Gently pour the pumpkin-spiced cheesecake layer over the pre-baked and cooled crust in your prepared pan. Spread it evenly to create a flat base for the next layer. Next, take the plain cheesecake mixture you set aside in Step 2 and dollop spoonfuls of it over the pumpkin layer. Using a knife or a skewer, gently swirl the two mixtures together. Aim for a beautiful marbled effect rather than fully combining them. This swirl not only looks elegant but also ensures a delightful interplay of plain and pumpkin flavors in every bite. Carefully transfer the pan to your preheated 325°F (160°C) oven. Bake for approximately 40 to 42 minutes. The bars are ready when the edges appear set and lightly golden, but the very center still has a slight, delicate jiggle when you gently nudge the pan. This slight jiggle is normal and indicates that the cheesecake will finish setting as it cools. Once baked, turn off the oven but do not immediately remove the cheesecake bars. Instead, crack the oven door open slightly and allow the bars to cool slowly inside the oven for about one hour. This gradual cooling process is a crucial step in preventing the cheesecake from cracking, ensuring a perfectly smooth and beautiful surface. After this slow oven cool-down, remove the pan from the oven and let it come to room temperature on a wire rack. Finally, and perhaps the most important step for perfectly sliceable bars, refrigerate the pumpkin cheesecake bars for at least 4 hours, or ideally overnight, until they are completely chilled and firm. Once fully set, use the parchment paper overhang to lift the entire slab out of the pan. Place it on a cutting board, then slice into neat, even bars. Serve chilled for the best texture and flavor.
Creative Variations & Expert Tips for Your Pumpkin Cheesecake Bars
Elevate your Pumpkin Cheesecake Bars experience with these versatile variations and helpful tips, designed to customize your dessert and ensure baking success every time.
Crust Customization: While our oat and cashew crust offers a delightful gluten-free option, don’t hesitate to experiment! If you prefer a more traditional cheesecake base, substitute the oat and cashew mix with about 2 cups of finely crushed graham crackers combined with ¼ cup of melted butter. For an extra layer of fall spice and warmth, crushed gingersnap cookies make an absolutely incredible and aromatic crust. You can also mix in a teaspoon of pumpkin pie spice into your graham cracker or gingersnap crust for an amplified seasonal flavor.
Scaling Up Your Batch: Planning for a larger crowd or simply want more delicious bars? This recipe doubles beautifully! Simply double all the ingredient quantities and bake in a 9×13-inch pan. You may need to adjust the baking time slightly, typically adding an extra 5 to 10 minutes for the crust and 10-15 minutes for the filling, so keep an eye on it for the visual cues of doneness.
Spice It Up: If your palate craves an even richer, more complex spice profile, consider adding a pinch of pre-made pumpkin pie spice blend along with the cinnamon to your cheesecake filling. This blend typically includes nutmeg, ginger, cloves, and sometimes allspice, which will give your bars an extra layer of cozy, autumnal kick. You can also add a tiny pinch of freshly grated nutmeg for an elevated aroma.
The Art of Slow Cooling: Do not be tempted to skip the crucial slow cooling step in the oven. This gradual decrease in temperature is vital for cheesecakes. Rapid temperature changes can cause the cheesecake to contract too quickly, leading to unsightly cracks on the surface. Allowing it to cool slowly ensures a beautifully smooth, crack-free finish, making your bars look as professional as they taste.
Patience for Perfect Slices: It cannot be stressed enough – chill the bars completely before attempting to slice them. Refrigerating them for at least 4 hours, or ideally overnight, allows the cheesecake filling to fully set and firm up. This patience will be rewarded with perfectly neat, clean-edged bars that hold their shape beautifully, making them much easier and more satisfying to serve.
Topping Ideas: For an extra touch of indulgence, consider a topping! A dollop of freshly whipped cream, a drizzle of homemade caramel sauce, a sprinkling of toasted chopped pecans or candied pecans, or even a dusting of cocoa powder can transform these bars into an even more decadent dessert.
Frequently Asked Questions About Pumpkin Cheesecake Bars
Here are answers to some common questions that arise when making and enjoying these delightful Pumpkin Cheesecake Bars, ensuring you have all the information for a successful baking experience.
While you can substitute with low-fat cream cheese, be aware that it will slightly alter the texture of your cheesecake bars. They may turn out a bit softer and less rich than if made with full-fat cream cheese. If you choose this option, it’s vital to use block-style low-fat cream cheese, not the whipped or spreadable kind, as the latter has too much air and moisture and will not set properly, resulting in a runny filling.
No, happily, this specific recipe is designed to deliver a wonderfully smooth and creamy texture without the need for a water bath. The key to preventing cracks and achieving that desirable consistency is the slow cooling process in the oven after baking. This method simplifies the baking process while still ensuring a beautiful, unblemished top.
Absolutely, and we highly recommend it! Pumpkin Cheesecake Bars are one of those desserts that truly benefit from being made in advance. Allowing them to chill thoroughly overnight in the refrigerator not only ensures they are fully set for clean slicing but also gives all the delicious fall flavors ample time to meld and deepen. They often taste even better the next day, making them a perfect stress-free option for entertaining or holiday meals.
Proper storage is essential to maintain their freshness and creamy texture. Once sliced, store the Pumpkin Cheesecake Bars in an airtight container. Keep them refrigerated, where they will stay fresh and perfectly delicious for up to five days. This makes them a fantastic make-ahead dessert for an entire week of enjoyment.
Yes, these bars freeze beautifully, making them an excellent option for future indulgence or meal prep. To freeze them, first slice the chilled bars into individual portions. Arrange them in a single layer on a baking sheet and freeze until they are firm. Once firm, transfer the frozen bars to an airtight freezer-safe container, placing parchment paper between layers to prevent sticking. They can be stored in the freezer for up to 2-3 months. To enjoy, simply thaw them overnight in the refrigerator, and they will retain their smooth, creamy texture and wonderful flavor.
More Irresistible Pumpkin Dessert Recipes to Savor
If you’re like us and can’t get enough of that glorious pumpkin flavor, you’re in luck! We’ve curated a collection of our most cherished pumpkin dessert recipes to keep your fall baking adventures exciting and delicious. From no-bake wonders to wholesome baked treats, there’s a pumpkin delight for every craving and occasion.
- Pumpkin Dump Cake (Gluten-Free): An incredibly easy, minimal-effort dessert that delivers maximum flavor.
- No Bake Pumpkin Cheesecake: Perfect for when you crave cheesecake but want to skip the oven time.
- Healthy Pumpkin Pie: A lighter take on the classic holiday staple, without sacrificing any of the iconic taste.
- Pumpkin Pound Cake: A dense, moist, and perfectly spiced cake that’s wonderful with a cup of coffee.
- Baked Pumpkin Donuts: A healthier alternative to fried donuts, these are soft, fluffy, and full of fall spices.
- Pumpkin Pie Chia Pudding: A nutritious and delicious breakfast or snack that tastes just like pumpkin pie.
- Chocolate Chip Pumpkin Cookies: Soft, chewy cookies featuring the beloved combination of pumpkin and chocolate.
- Pumpkin Brownies: A rich, fudgy treat with a delightful hint of pumpkin and spice.
We hope you find immense joy in baking and sharing these delightful Pumpkin Cheesecake Bars. Their perfect blend of creamy richness, comforting spices, and satisfying crunch makes them a standout dessert that embodies the warmth and spirit of the autumn season. Whether you’re making them for a special occasion or simply to brighten an ordinary day, these bars are sure to impress and satisfy.
Also, if you try this recipe and love it, please consider leaving some feedback and a star rating in the comment section below. Your thoughts and experiences are incredibly valuable and help others discover wonderful new recipes. We would be absolutely thrilled if you shared this recipe with your friends and family – spread the joy of homemade pumpkin deliciousness!
Pumpkin Cheesecake Bars
Rena
12 Servings
20 mins
55 mins
2 hrs
3 hrs 15 mins
Ingredients
- ¾ cup gluten-free rolled oats
- ¾ cup raw cashews
- ¼ teaspoon kosher salt
- 2 tablespoons caster sugar
- ¼ cup coconut oil, melted
- 24 ounces cream cheese, softened to room temperature
- 1 cup caster sugar
- 6 large eggs, at room temperature
- 1 tablespoon vanilla extract
- 1 teaspoon cinnamon powder
- 15 ounces pumpkin puree, one can (not pumpkin pie mix)
Instructions
-
Preheat your oven to 350°F (175°C) and line an 8 or 9-inch square pan with parchment paper, leaving an overhang on the sides. In a food processor, combine the ¾ cup gluten-free rolled oats, ¾ cup raw cashews, ¼ teaspoon kosher salt, and 2 tablespoons caster sugar. Blend until mostly fine. Then, add the melted ¼ cup coconut oil and pulse until the mixture starts to stick together. If it feels too dry, add another tablespoon of oil and pulse again.

-
Press the crust mixture evenly and firmly into your prepared pan. Bake for 12 to 14 minutes, or until lightly golden. Remove from the oven and immediately lower the oven temperature to 325°F (160°C).
-
In a large mixing bowl, beat the 24 ounces softened cream cheese, 1 cup caster sugar, 6 large room-temperature eggs, 1 tablespoon vanilla extract, and 1 teaspoon cinnamon powder until the mixture is smooth and creamy. Pour about one-third of this plain cheesecake mixture into a separate bowl or jug and set it aside.
-
Add the 15 ounces pumpkin puree to the remaining two-thirds of the cream cheese mixture in the large bowl and mix until just combined and smooth. Do not overmix.
-
Pour the pumpkin cheesecake layer evenly over the baked crust. Then, spoon the reserved plain cheesecake mixture on top of the pumpkin layer. Using a knife or skewer, gently swirl the two mixtures together to create a beautiful marbled effect.
-
Bake for 40 to 42 minutes, or until the edges are set and a slight jiggle remains in the center. Turn off the oven, crack the door open slightly, and let the bars cool inside the oven for about one hour to prevent cracking. Once cooled in the oven, remove the pan and let it come to room temperature on a wire rack. Refrigerate until completely chilled and firm, at least 4 hours or overnight, before slicing and serving.
Notes
- Let the cheesecake cool slowly in the oven to keep the top smooth and crack-free.
- Always chill completely before slicing for clean, neat bars.
- Swap cashews for almonds or pecans if you want a slightly different flavor. Walnuts also work well.
- For a stronger spice flavor, add a pinch of pumpkin pie spice with the cinnamon.
Storage:
- Store in an airtight container in the fridge for up to 5 days.
- To freeze, slice the bars first, then arrange in a single layer until firm. Transfer to a sealed container with parchment paper between layers. Thaw in the fridge overnight before serving for best results.
Nutrition Information (Approximate Per Serving)
Calories: 339 kcal | Carbohydrates: 32g | Protein: 10g | Fat: 20g | Saturated Fat: 10g | Polyunsaturated Fat: 2g | Monounsaturated Fat: 6g | Trans Fat: 0.01g | Cholesterol: 124mg | Sodium: 291mg | Potassium: 322mg | Fiber: 2g | Sugar: 24g | Vitamin A: 5964IU | Vitamin C: 2mg | Calcium: 115mg | Iron: 2mg
Nutrition information is automatically calculated and should only be used as an approximation. Actual values may vary based on specific ingredient brands and preparation methods.
Additional Info
Dessert
American