
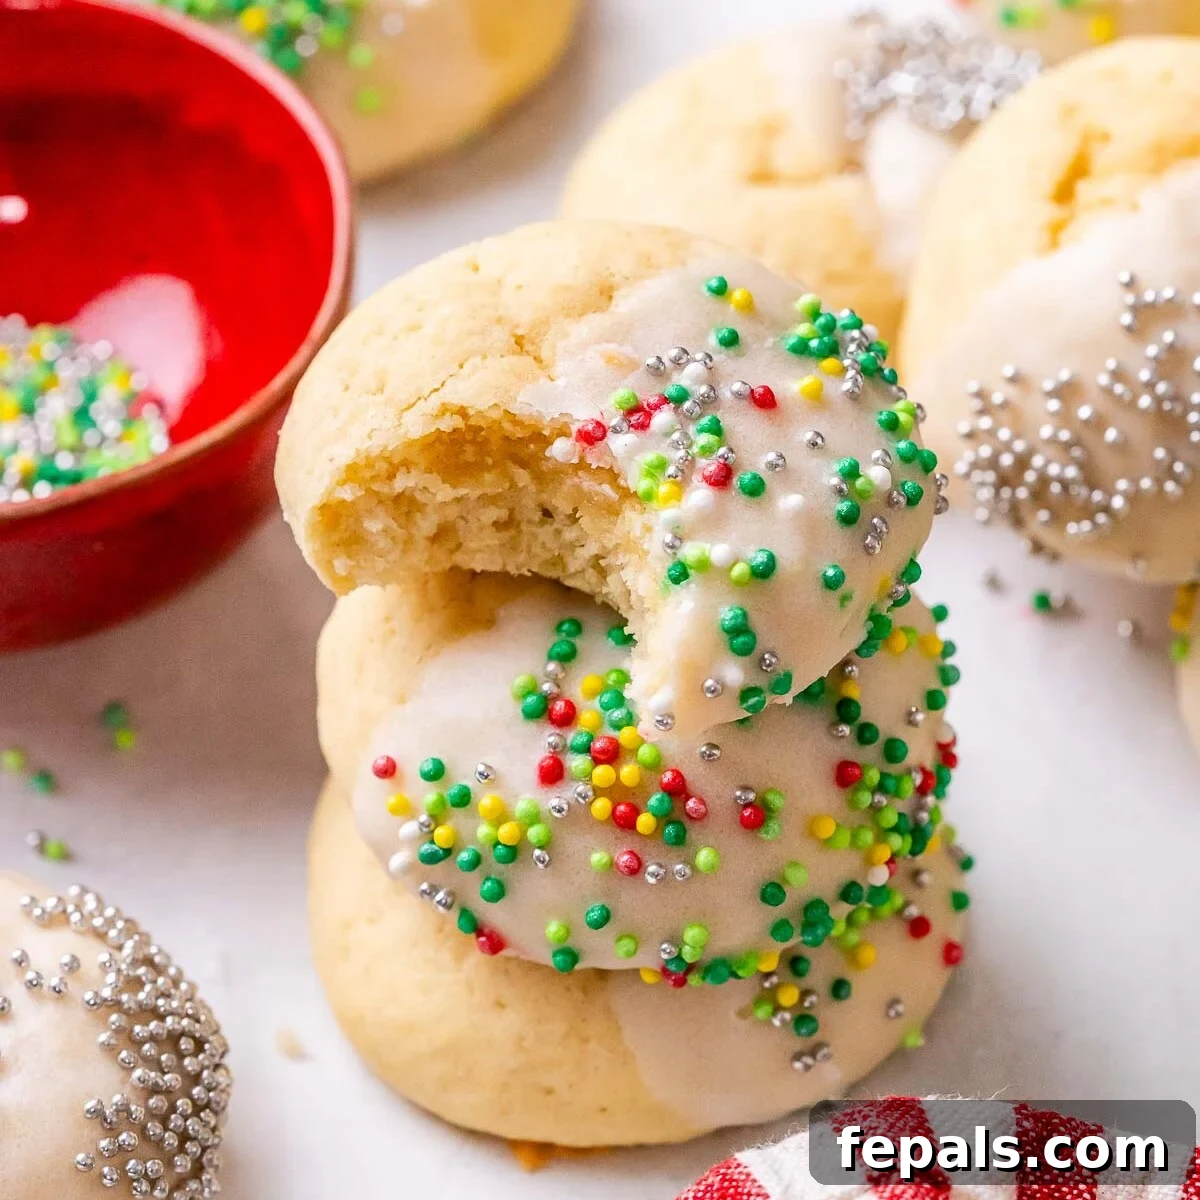
Welcome to the enchanting world of holiday baking, where tradition meets irresistible flavor! These soft, buttery Italian Christmas cookies are more than just a recipe; they are a cherished holiday favorite, embodying the spirit of the festive season with every bite. Effortlessly simple to prepare yet profoundly delicious, these delightful treats are infused with the warm, comforting essence of vanilla and finished with a delicate, sweet glaze, adorned with vibrant, colorful sprinkles for that quintessential festive charm. Whether you’re preparing them for thoughtful gifts, participating in a lively cookie exchange, or simply elevating your holiday dessert table, these classic Italian cookies are guaranteed to infuse a touch of magic and charm into your seasonal baking.

The true genius behind these tender cookies lies in a deceptively simple yet critical step: chilling the soft dough. This essential resting period serves a dual purpose. Firstly, it allows the butter within the dough to firm up, creating a more manageable texture. Secondly, and perhaps more importantly, it provides the flour ample time to fully absorb the liquid from the eggs. This crucial process not only makes the cookie dough significantly easier to handle and shape, but it also dramatically influences the final baked result. Chilled dough prevents excessive spreading in the oven, ensuring your cookies maintain their lovely, thick shape and emerge with an exquisitely soft, light, and almost cake-like texture that melts in your mouth. While simply flavored to let the pure taste of vanilla truly shine, these Italian Christmas cookies are incredibly versatile. They serve as a perfect canvas for your culinary creativity, easily customized with delightful mix-ins like finely chopped nuts, or by experimenting with different flavor extracts to create a personalized twist on this beloved classic.
These exquisite cookies are an ideal addition to any festive assortment, particularly when presented as part of a charming Christmas cookie box. Imagine them nestled alongside other holiday favorites such as our delightful Peppermint Cookies, bursting with cool, minty flavor, and our decadent Cranberry Bliss Bars, offering a perfect blend of sweet and tart. Together, they create a harmonious collection of homemade treats that will impress and delight everyone during the holiday season.
Recipe Overview
Essential Ingredients for Perfect Italian Christmas Cookies
Crafting these delectable Italian Christmas cookies requires a thoughtful selection of staple ingredients, each playing a vital role in achieving their signature taste and texture. Below, you’ll find a detailed breakdown of the components you’ll need. For precise measurements, please refer to the comprehensive recipe card located further down on this page.
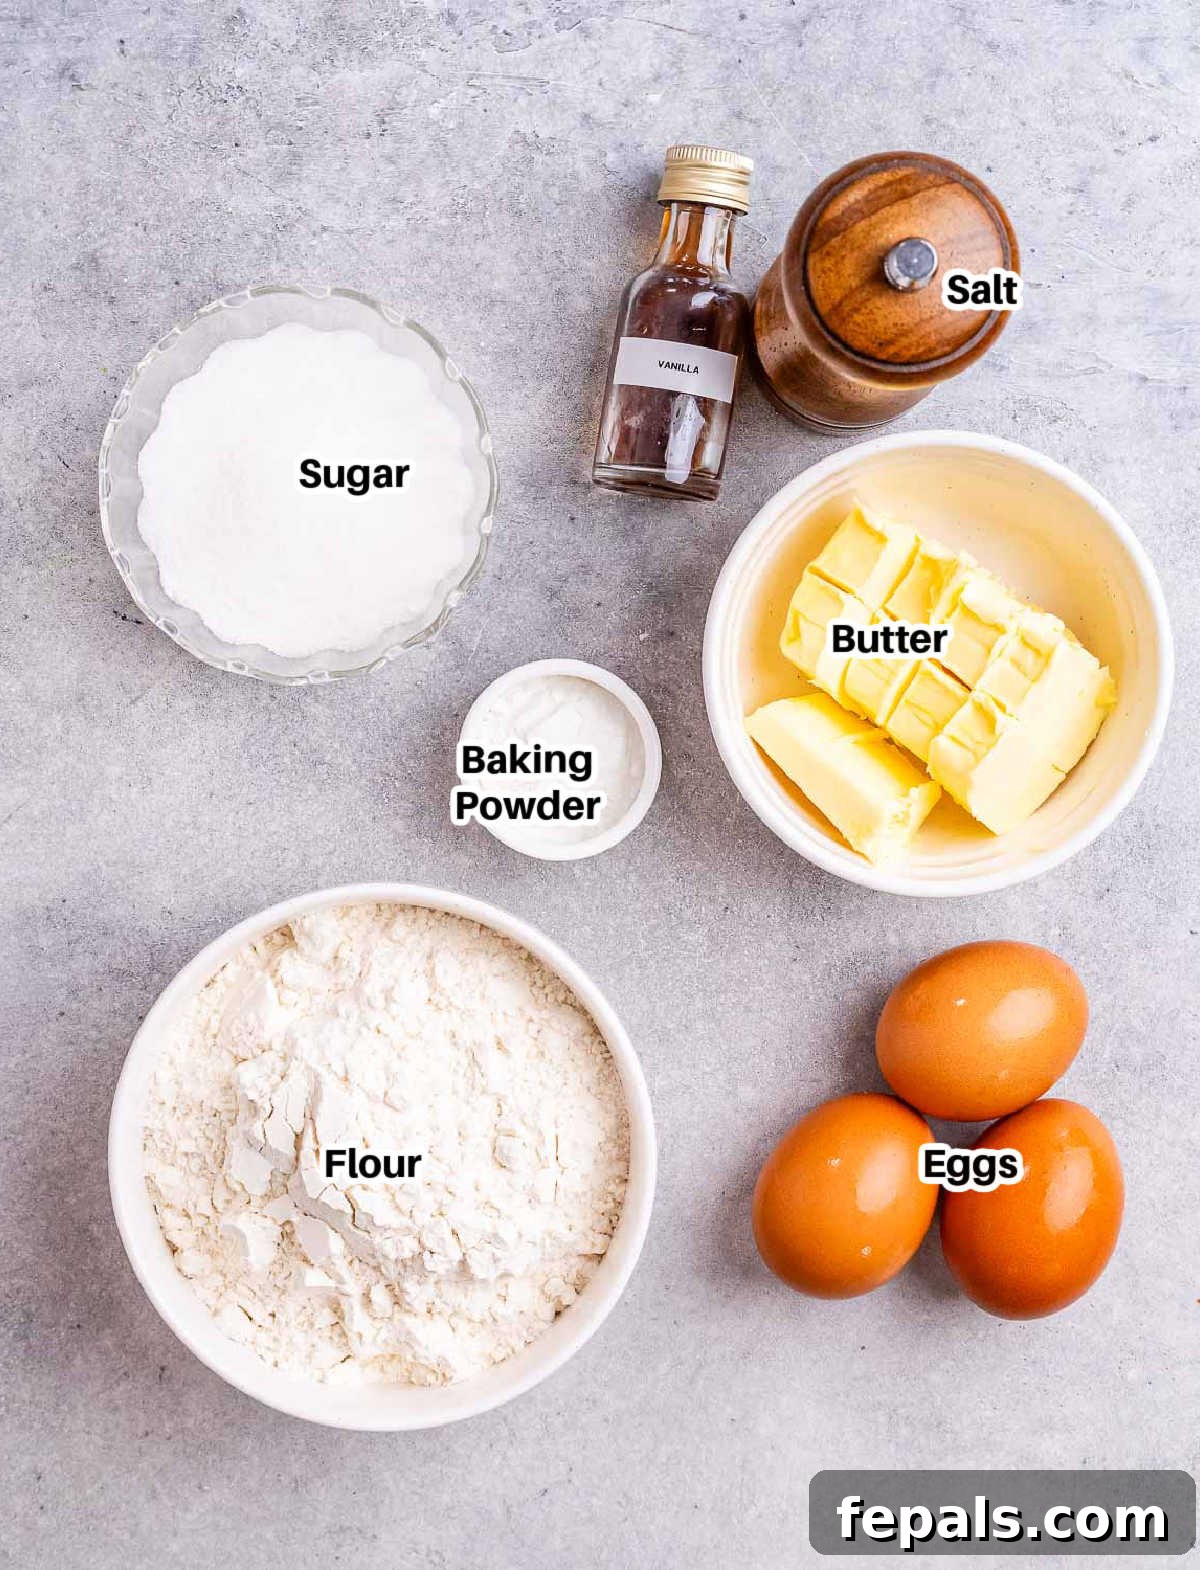
- Salted Butter: The foundation of our cookies’ rich, buttery flavor and tender crumb. Using salted butter offers a beautiful balance to the sweetness, preventing the cookies from tasting overly saccharine. If your pantry only holds unsalted butter, simply adjust by increasing the amount of fine kosher salt in the recipe to 1/2 teaspoon. Remember, ensure your butter is at proper room temperature for optimal creaming.
- Granulated Sugar: This essential sweetener contributes to the cookies’ delightful sweetness and aids in achieving that appealing golden-brown edge during baking. It also plays a role in the cookie’s final texture, contributing to a slightly crispy exterior and a soft interior. For an even finer texture, you may opt for superfine sugar (caster sugar) if available.
- Eggs: Acting as a crucial binding agent, eggs bring the cookie dough together, providing structure and moisture. They also contribute to the cookies’ slight rise and contribute to their overall richness, helping to create that desirable soft and light texture. Always use large eggs as specified for consistent results.
- Vanilla Extract: The primary flavor profile of these classic Italian cookies is elegantly simple, allowing the pure, aromatic notes of vanilla extract to truly shine. For an even more intense and visually appealing vanilla essence, consider substituting with 1/2 tablespoon of high-quality vanilla bean paste. Other extracts like almond, anise, lemon, or orange can also be used for delightful variations.
- All-Purpose Flour: The backbone of our cookie structure, all-purpose flour is chosen for its ability to create cookies with the perfect level of chewiness. For those who prefer a more delicate, crumbly cookie, pastry flour can be a suitable alternative. If you’re looking to boost the fiber content, a portion of the all-purpose flour can be replaced with whole wheat flour, though this will slightly alter the texture.
- Fine Kosher Salt: A small but mighty ingredient, fine kosher salt is indispensable for enhancing all the other flavors in the cookies and perfectly balancing their sweetness, ensuring a well-rounded and harmonious taste.
- Baking Powder: This leavening agent is key to achieving the cookies’ desired light and airy texture. It helps the cookies rise beautifully in the oven, contributing to their soft, thick, and irresistible crumb. Be sure your baking powder is fresh for best results.
- Powdered Sugar (for Glaze): The secret to our simple yet elegant glaze. When combined with liquid, powdered sugar creates a smooth, opaque icing that not only adds an extra layer of sweetness but also acts as the perfect adhesive for those festive sprinkles.
- Milk: Any variety of milk can be used to create the glaze, allowing you to control its consistency from thin and drippy to thick and opaque. If opting for a non-dairy alternative, select an unsweetened and unflavored version to avoid altering the glaze’s taste.
- Sprinkles: The vibrant finishing touch that instantly transforms these simple cookies into a festive masterpiece. We particularly love nonpareils, those tiny, multicolored balls that add a classic, joyful look. However, feel free to unleash your creativity and choose any sprinkles that capture your holiday spirit – from classic red and green jimmies to sparkling edible glitter.
- Birthday Cake Cookies
- Gluten Free Snickerdoodles
- Sweet Potato Cookies
- Blueberry Oatmeal Cookies
- Vegan Chocolate Chip Cookies
- Flourless Peanut Butter Cookies
- Brownie Cookies
- Chocolate Oatmeal Cookies
- 1/2 cup salted butter, room temperature
- 2/3 cup granulated sugar
- 3 large eggs
- 1 tablespoon vanilla extract, (anise extract or lemon zest works too)
- 2 cups all-purpose flour
- ¼ teaspoon fine kosher salt
- 2 teaspoons baking powder
- 1 1/2 cups powdered sugar
- 3-4 tablespoons milk of choice
- 1/4 cup sprinkles of choice, (I use nonpareils)
-
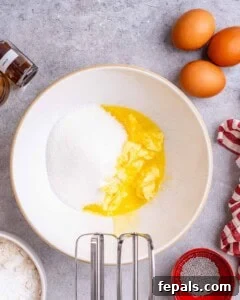
In a mixing bowl, use an electric mixer to beat the 1/2 cup salted butter and 2/3 cup granulated sugar until combined and fluffy. Add in the 3 large eggs and 1 tablespoon vanilla extract, and mix until creamy.

-
In a small bowl, combine the 2 cups all-purpose flour, ¼ teaspoon fine kosher salt and 2 teaspoons baking powder. Whisk thoroughly to ensure even distribution.
-
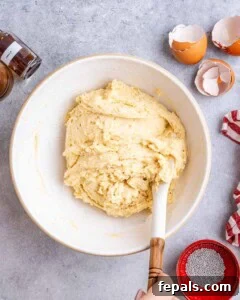
Add the flour mixture gradually over the egg mixture and mix with a spatula or on low speed until just incorporated and no floury streaks remain. Scrape the sides of the bowl and gently bring the dough together. Cover the bowl tightly and refrigerate for 2 hours to allow the dough to firm up and flavors to meld.
-
Preheat your oven to 350°F (175°C) and line a sheet pan with parchment paper or a silicone baking mat.
-
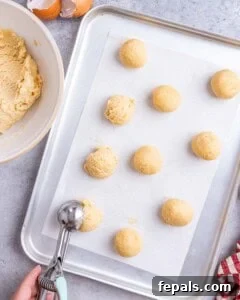
Using a small ice cream scoop (approximately 1.5 tablespoons) or a tablespoon, scoop the chilled cookie dough. Gently roll and shape each portion into smooth balls. Place them on the prepared sheet pan, leaving about 1.5 to 2 inches of space between each cookie.
-
Bake the cookies for 8-10 minutes, or until the edges are lightly golden and the centers are set but still look soft.
-
Remove the cookies from the oven and let them cool on the sheet pan for 5 minutes before transferring them to a wire rack to cool completely.
-
Once the cookies are completely cool, prepare the optional icing. In a mixing bowl, add the 1 1/2 cups powdered sugar and 3-4 tablespoons milk of choice. Whisk by hand until a thick, smooth glaze is formed. Adjust milk or powdered sugar for desired consistency.
-
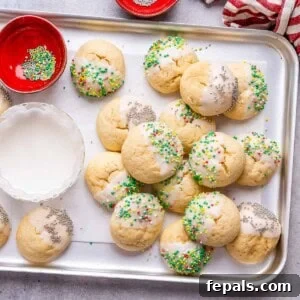
Drizzle or gently dip the glaze over the cooled cookies and immediately top with your chosen 1/4 cup sprinkles. Allow the glaze to set fully before storing or serving.
- Once the glaze has completely set, store the cookies in an airtight container at room temperature for up to 5 days, layering with parchment paper if stacking.
- To freeze baked cookies: Allow cookies to cool completely before decorating. Transfer the unglazed cookies to an airtight, freezer-safe container, separating layers with parchment paper. Freeze for up to 3 months. Defrost at room temperature before decorating with glaze and sprinkles.
- To freeze the dough: After chilling and forming into balls, freeze the unbaked dough balls on a parchment-lined sheet pan until firm (1-2 hours). Once solid, transfer to an airtight container or freezer bag and freeze for up to 3 months. Bake from frozen as usual, adding 1-2 minutes to the bake time.
Step-by-Step Guide: Crafting Irresistible Italian Christmas Cookies
Baking these traditional Italian Christmas cookies is a joyous and straightforward process. Follow these detailed steps to ensure your batch turns out perfectly soft, flavorful, and beautifully decorated, ready to delight everyone on your holiday list.
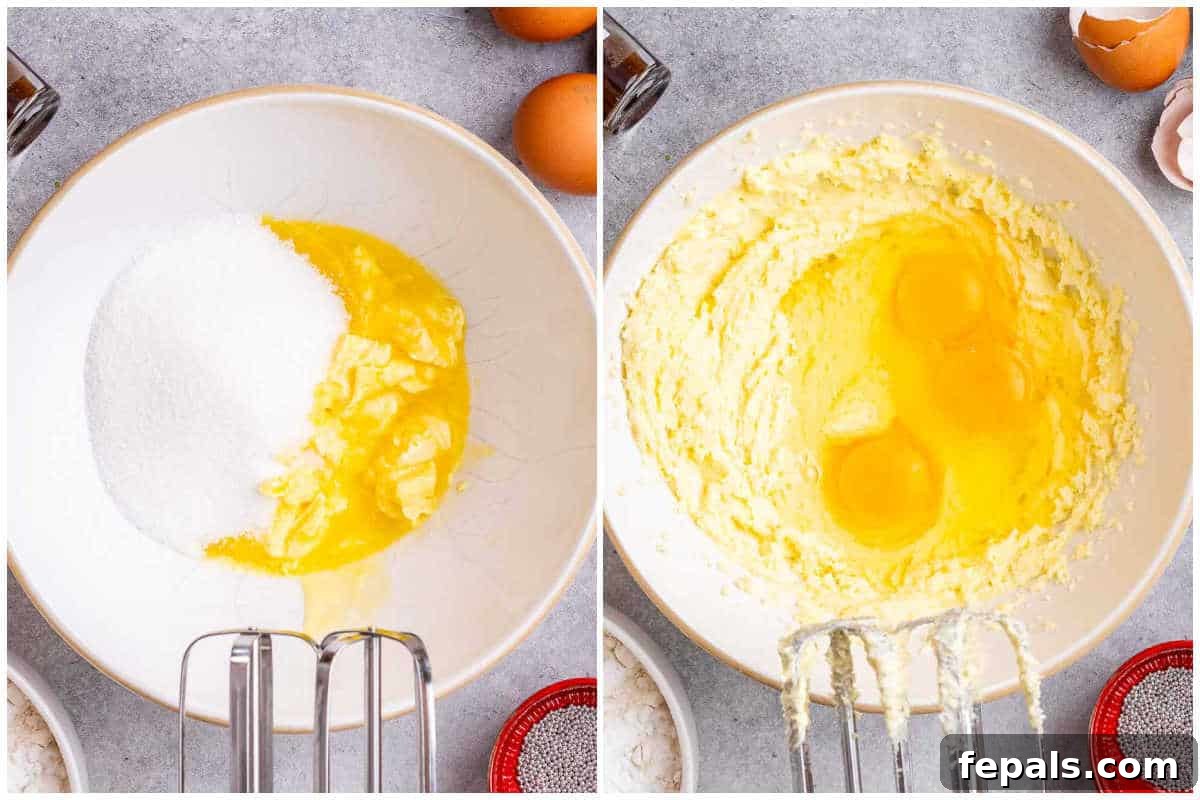
Step 1: Cream Butter, Sugar, Eggs, and Vanilla. In a generously sized mixing bowl, begin by creaming together the room temperature salted butter and granulated sugar using an electric mixer. Beat them on medium speed until the mixture becomes wonderfully light, fluffy, and pale in color – this usually takes about 2-3 minutes. Next, incorporate the large eggs one at a time, mixing well after each addition to ensure they are fully combined. Finally, stir in the vanilla extract until the mixture is smooth and creamy, scraping down the sides of the bowl as needed to ensure everything is thoroughly blended.
Step 2: Combine Dry Ingredients. In a separate, smaller bowl, whisk together the all-purpose flour, fine kosher salt, and baking powder. This ensures that the leavening agent and salt are evenly distributed throughout the flour, which is crucial for a consistent cookie texture and flavor.
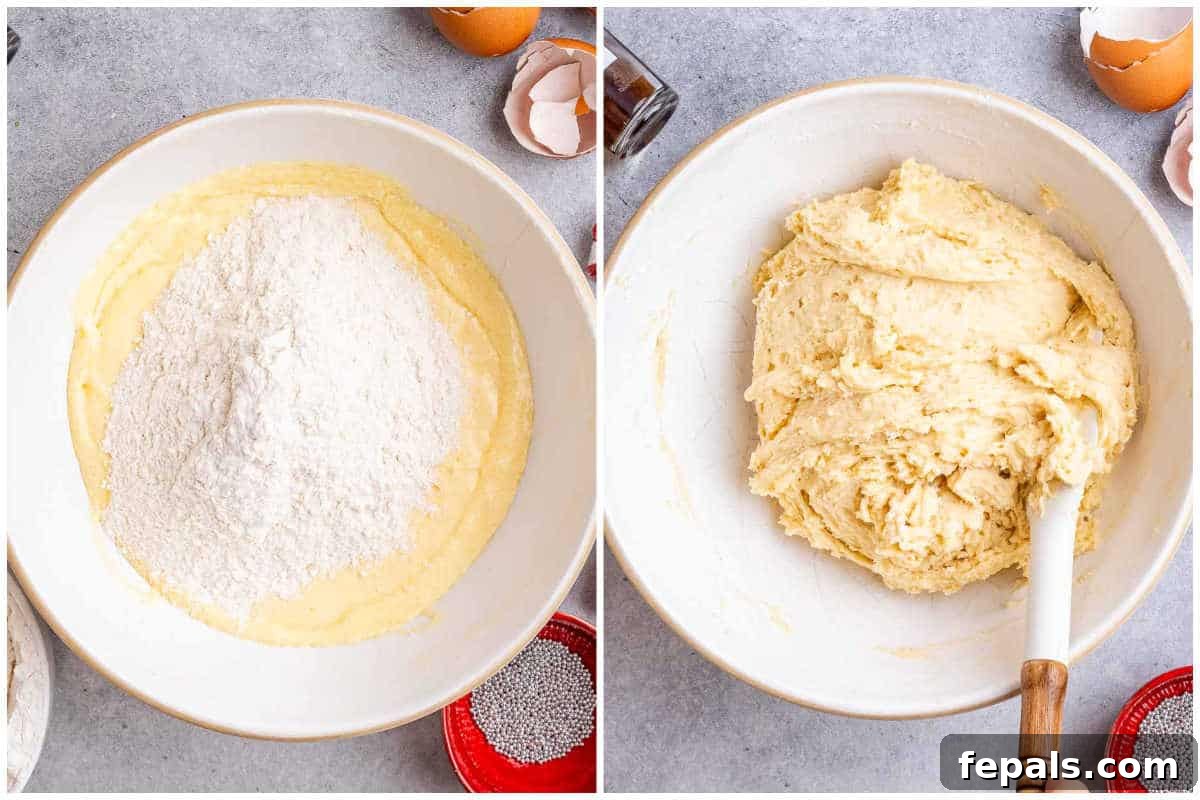
Step 3: Form Dough and Chill. Gradually add the dry flour mixture to the wet butter mixture. Mix on low speed, or gently fold with a spatula, just until no streaks of flour remain and a soft, cohesive dough forms. Be careful not to overmix, as this can lead to tough cookies. Once combined, cover the bowl tightly with plastic wrap and refrigerate the dough for a minimum of 2 hours. This chilling period is absolutely vital; it allows the butter to firm up and the flour to fully hydrate, preventing the cookies from spreading too much during baking and ensuring a wonderfully soft, thick texture.
Step 4: Prepare for Baking. Once your dough is sufficiently chilled, preheat your oven to 350°F (175°C). Line a large baking sheet with parchment paper or a silicone baking mat. This prevents sticking and ensures even baking, making cleanup a breeze.
Step 5: Scoop and Shape Cookies. Using a small ice cream scoop (about 1.5 tablespoons capacity) or a tablespoon, scoop even portions of the chilled cookie dough. Gently roll each portion between your palms to form smooth, round balls. Place these dough balls onto the prepared baking sheet, ensuring there’s about 1.5 to 2 inches of space between each cookie to allow for slight expansion during baking. Avoid overcrowding the pan.
Step 6: Bake Until Golden. Transfer the baking sheet to your preheated oven and bake for 8-10 minutes. The cookies are ready when their edges are lightly golden and the centers appear set but still look soft. They should not be deeply browned. Immediately after removing from the oven, leave the baked cookies on the hot sheet pan for about 5 minutes to firm up before carefully transferring them to a wire rack to cool completely. This prevents them from breaking and ensures they cool evenly.
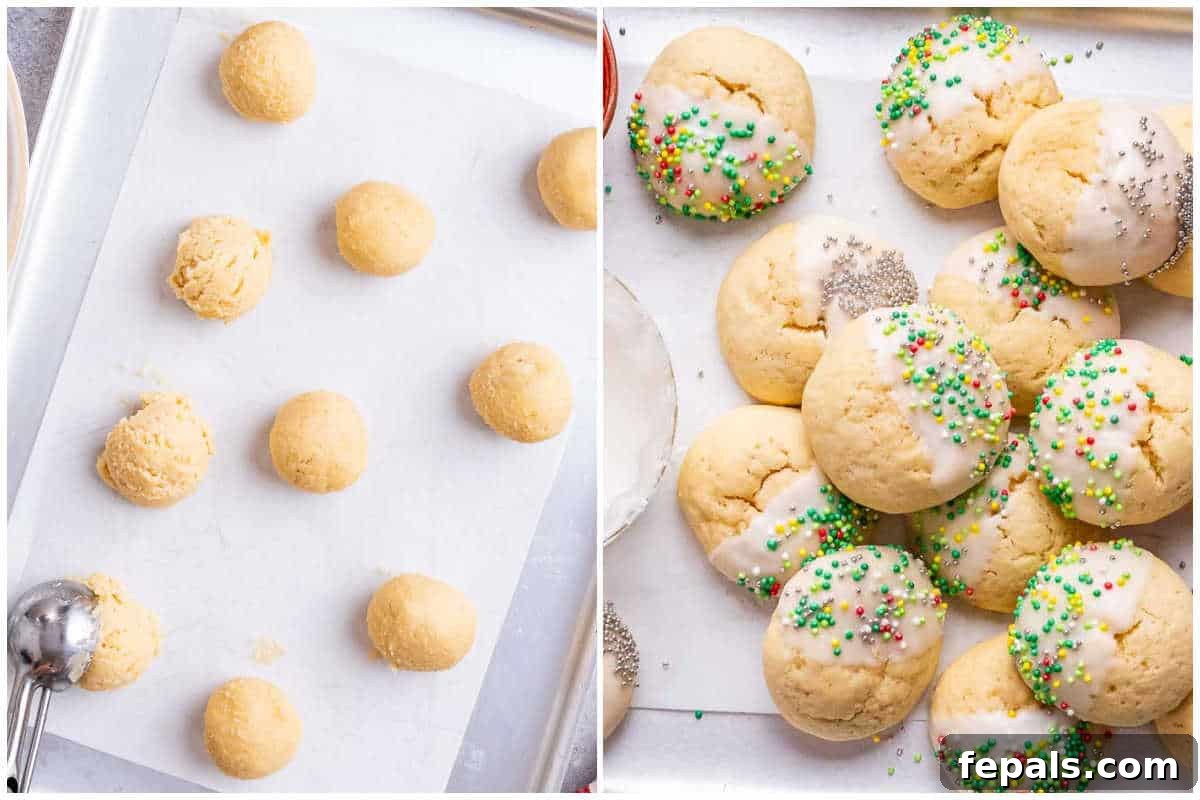
Step 7: Prepare the Optional Glaze. While the cookies are cooling, prepare the sweet, optional glaze. In a small bowl, combine the powdered sugar with 3 tablespoons of milk. Whisk thoroughly until the mixture is smooth, free of lumps, and reaches a thick yet pourable consistency. If the glaze is too thick, add more milk a teaspoon at a time until desired consistency is achieved. If it’s too thin, add a little more powdered sugar.
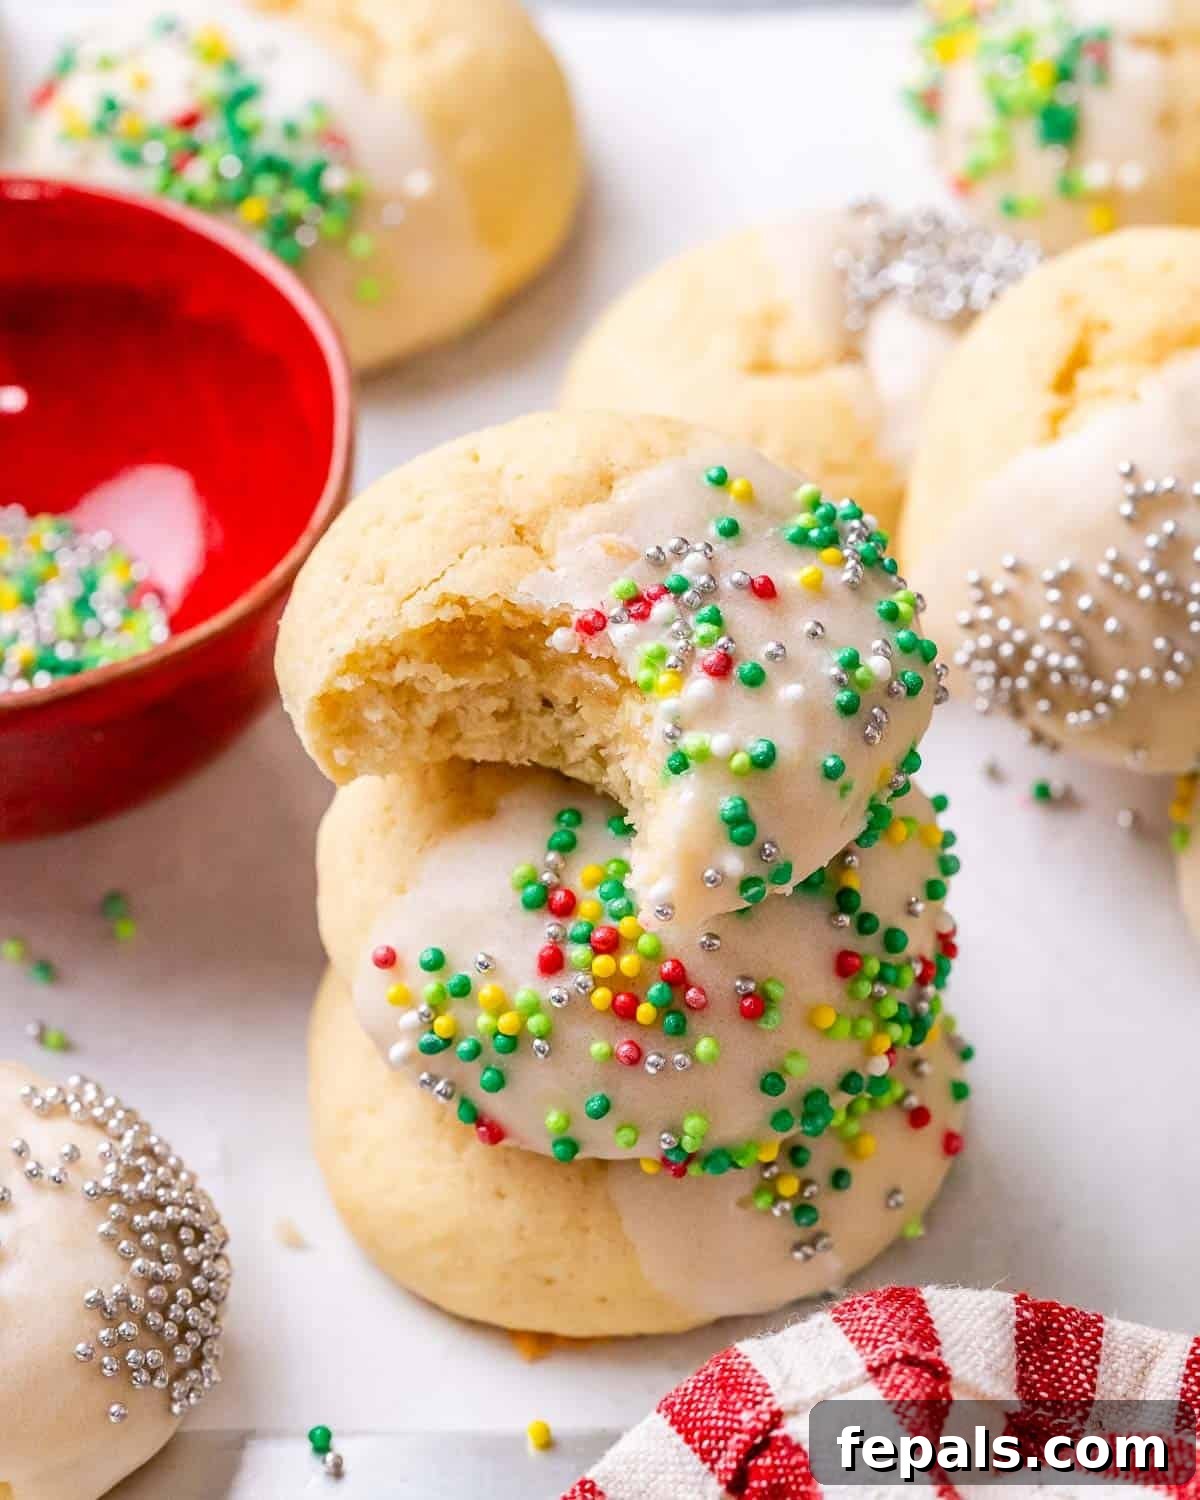
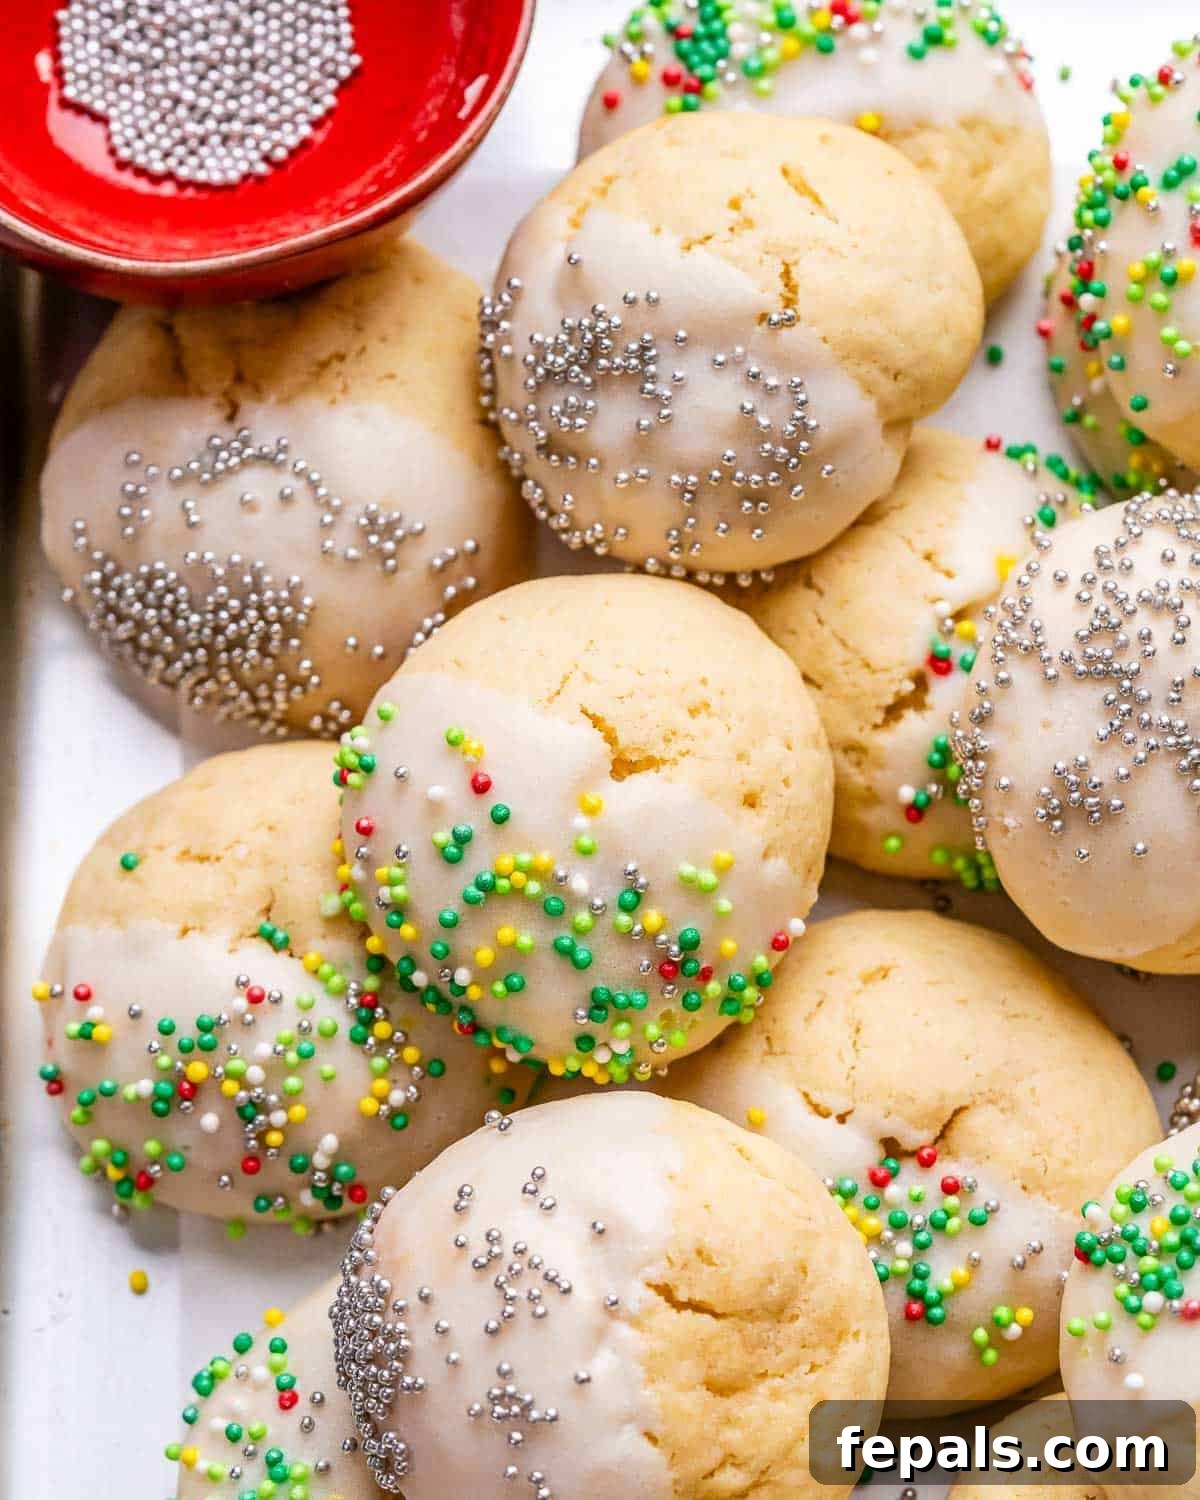
Step 8: Glaze and Decorate. Once the cookies are completely cool to the touch, drizzle or gently dip the tops of each cookie into the prepared glaze. Immediately after glazing, adorn them with your favorite colorful sprinkles. The wet glaze will ensure the sprinkles adhere beautifully. Place the glazed and sprinkled cookies back onto the parchment-lined sheet pan or a fresh piece of parchment paper to allow the glaze to set fully before handling or storing. This typically takes about 30-60 minutes, depending on the thickness of your glaze and humidity. Once set, they are ready to be enjoyed!
Creative Variations & Expert Baking Tips for Success
Elevate your Italian Christmas cookies with these helpful tips and exciting variations. Mastering these techniques will ensure your cookies are consistently perfect and inspire new traditions in your holiday baking repertoire.
The Magic of Chilling the Dough: Never skip this crucial step! Chilling the dough for at least 2 hours, and ideally up to 24 hours, is truly the secret to these cookies. This time allows the butter to solidify, preventing the cookies from spreading too much in the oven and instead encouraging them to rise and bake into thick, soft, and beautifully textured rounds. It also gives the flour sufficient time to fully absorb the liquid from the eggs, resulting in a more tender and cohesive dough that is much easier to handle and shape.
Smart Glaze Setting for Easy Cleanup: After you’ve applied the glaze and sprinkles to your cooled cookies, gently place them back onto a parchment-lined sheet pan. This simple tip allows the glaze to set without sticking to your countertop and makes for effortless cleanup, as any stray drips of glaze will simply dry on the parchment.
Patience is a Virtue: Ensure the glaze has completely set and hardened before you attempt to stack or transfer your cookies to an airtight container. If the glaze is even slightly tacky, the cookies will stick together, marring their beautiful decoration and making them difficult to separate. A fully set glaze creates a protective layer, preserving their pristine appearance.
Personalize with Flavor Extracts: The simple vanilla base of these cookies is wonderfully adaptable. Unleash your creativity by experimenting with different flavor extracts to customize the taste profile. Consider replacing the vanilla extract with 1/2 teaspoon of almond extract for a classic, nutty twist, anise extract for a traditional Italian flair, or lemon or orange extract for a bright, citrusy note. For an extra layer of freshness, you can also add a teaspoon of fresh citrus zest (lemon or orange) along with your chosen extract. Other exciting options include peppermint extract for a minty holiday feel, or a hint of rum extract for a sophisticated flavor.
Indulgent Chocolate Variation: For chocolate lovers, transform these vanilla beauties into a rich cocoa treat. Replace 1/4 cup of the all-purpose flour with unsweetened cocoa powder when combining your dry ingredients. Once baked and cooled, instead of the traditional glaze, dip the cookies in melted dark, milk, or white chocolate for an extra layer of decadence. A sprinkle of sea salt on the melted chocolate can further enhance the flavor.
Add Nutty Crunch: Introduce a delightful textural contrast by stirring 1/2 cup of finely toasted and chopped almonds into the cookie dough just before the chilling stage. Other nuts like pistachios or walnuts can also be used. Toasting the nuts beforehand enhances their flavor significantly.
Don’t Overmix the Dough: When combining wet and dry ingredients, mix only until just combined and no streaks of flour are visible. Overmixing develops the gluten in the flour, which can result in tough, dense cookies rather than the desired soft and tender texture.
Evenly Sized Cookies: For consistent baking and a professional appearance, use a cookie scoop to portion out your dough. This ensures all cookies are roughly the same size and will bake uniformly.
Oven Temperature Matters: An oven thermometer can be a baker’s best friend. Ovens can vary widely in actual temperature compared to their display. Using an oven thermometer helps you ensure your oven is truly at 350°F (175°C), which is crucial for proper cookie baking and preventing uneven results.
Frequently Asked Questions for Cookie Success
Here are answers to some common questions that arise when baking and storing these delightful Italian Christmas cookies, ensuring your baking journey is smooth and successful.
Once the beautiful glaze has completely set and is firm to the touch, store your Italian Christmas cookies in an airtight container at room temperature. Layer them with parchment paper to prevent sticking. Stored correctly, they will maintain their freshness, soft texture, and delightful flavor for up to 5 days. For longer storage, consider freezing unglazed cookies.
Absolutely! Freezing the cookie dough is a fantastic way to prepare ahead for spontaneous baking or holiday gatherings. After chilling and scooping the dough into individual balls, arrange them on a sheet pan lined with parchment paper. Freeze them until they are completely firm, which typically takes around 1-2 hours. Once solid, transfer the frozen dough balls to a freezer-safe airtight container or a heavy-duty freezer bag, making sure to remove as much air as possible. You can freeze the dough for up to 3 months. When you’re ready to bake, you can bake the dough directly from frozen, although you might need to increase the bake time by an additional 1-2 minutes to ensure they cook through evenly.
Yes, you can certainly freeze the baked cookies, but for the best results, we strongly advise freezing them *before* decorating with icing and sprinkles. If you freeze cookies that have already been glazed, the icing tends to become sticky and can often weep or smudge when you defrost them, ruining their festive appearance. To freeze baked cookies, allow them to cool completely after baking, then place the unglazed cookies into an airtight freezer-safe container, separating layers with parchment paper. They can be frozen for up to 3 months. When you’re ready to enjoy them, simply defrost the cookies at room temperature for a few hours, then proceed with decorating them with glaze and sprinkles as usual.
Several factors can contribute to cookies flattening. The most common reason is not chilling the dough sufficiently before baking. The chilling time is absolutely vital as it allows the butter to firm up and prevents the dough from spreading excessively as it bakes, thus maintaining their thick, soft shape. Other potential culprits include using too much butter, using ingredients that were too warm (especially butter), or accidentally using baking soda instead of baking powder (or using too much leavening). Additionally, using larger eggs than specified can add excess liquid, leading to a thinner dough that spreads more. Always ensure your ingredients are measured accurately and your dough is properly chilled.
While you can technically substitute oil for butter in baking, it’s important to understand that the texture, shape, and taste of your Italian Christmas cookies will be noticeably different. Butter contributes to the rich flavor, tender crumb, and structure of these cookies. Using oil will likely result in cookies that spread significantly more, leading to a much flatter profile. Furthermore, they will not achieve the same soft, cake-like texture that butter provides and may lack the depth of flavor. For the authentic experience of soft, buttery Italian Christmas cookies, sticking to butter is highly recommended.
Explore More Delicious Cookie Creations
If you loved baking these Italian Christmas Cookies, you’ll surely enjoy exploring other delightful cookie recipes from our collection. Expand your baking repertoire with these irresistible treats:

Download Free Ebook
Thank you for visiting! We hope you enjoy making these wonderful Italian Christmas Cookies. If you try this recipe and find it delightful, we’d love to hear from you. Please leave us some feedback in the comment section below, and don’t forget to rate it – your feedback helps other bakers!
FOLLOW me on FACEBOOK | INSTAGRAM | PINTEREST | TWITTER for all of my latest blog posts, healthy recipes, and culinary inspiration.
Italian Christmas Cookies
Ingredients
Optional Icing & Decoration:
Instructions
Notes
Storage:
Nutrition
Nutrition information is automatically calculated, so should only be used as an approximation.